|
|
Post by triffid on Nov 2, 2017 12:36:13 GMT
Could be, think I have 2 different sizes, do you want me to send em down?
|
|
|
|
Post by snails on Nov 6, 2017 10:38:32 GMT
Hi Triffid. Only just seen your offer - much appreciated but I've bought one now.
Strangely speaking to Beedspeed I mentioned that I had been removing the old flywheel with my lambretta flywheel puller which they said shouldn't have fitted - all very odd.
|
|
|
|
Post by triffid on Nov 7, 2017 9:50:41 GMT
If thread is the same then should be Ok. Useful tool to have tbh.
|
|
|
|
Post by snails on Dec 14, 2017 22:02:52 GMT
So I've finally got a spark! I had to return the stator to beedspeed and get a replacement. Not quick but at least they replaced it so all good.The old faulty flywheel must have been touching the pick up and knocked it slightly out. So back to trying to get it running. Fitted the exhaust - I have this second hand Leo Vince item. Is it normal for the fit to be so bad? Its grounding out where the bracket meets the engine casing.and I've already had to persuade the bracket to move in quite a bit to get the fit this good. Also there is not a great amount of clearance between the rear wheel nut and the pipe where its cut out. I bet its fun if you get a rear wheel puncture changing the wheel. Glad I went for the tubeless rims! 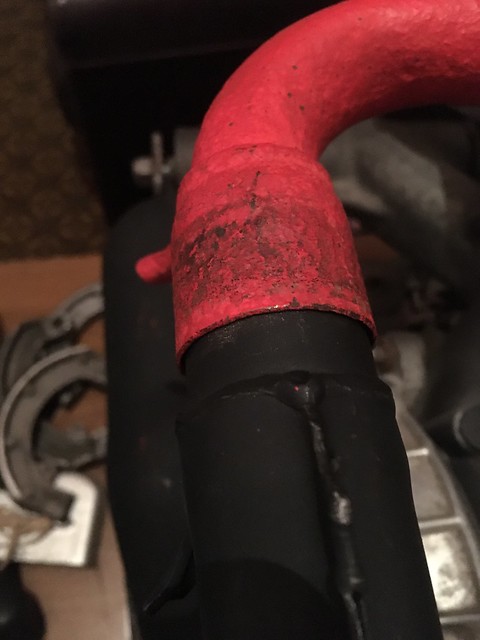 |
|
|
|
Post by triffid on Dec 15, 2017 9:51:54 GMT
Unfortunately yes to the above Snails. Brackets can be gently persuaded a bit but be careful of overdoing it as it will weaken it and could the fail at a later date when it is pissin down and you are in the middle of nowhere on a dark night with no torch or tools and locals telling you to stick to the road! Is the joint held by springs?
|
|
|
|
Post by bikegrim on Dec 15, 2017 9:54:31 GMT
Should go straight on check its the correct downpipe
Be aware that tubeless does not mean punctureless
|
|
|
|
Post by snails on Dec 16, 2017 7:32:49 GMT
Yeah that is true about no guarantee with punctures but better than nothing. It will fit OK (and has a spring) when not attached to scooter so it's definitely the bracket stopping it. Any way I can check down pipe is correct?
|
|
|
|
Post by snails on Dec 16, 2017 7:34:58 GMT
Oh and the big question - is it liveable like this? I'd fit some exhaust putty you improve the seal when I do final fit
|
|
|
|
Post by tzsteve on Dec 16, 2017 20:03:34 GMT
use hi temp silicon something like this other brands are available including a loctite version |
|
|
|
Post by snails on Jan 17, 2018 14:51:41 GMT
Ok so with good news that the engine in and seems to work in so far as it will start and run: Next steps are to: 1. Check timing, which should be simple enough 2. Mark where my glovebox will go. I've had a look at it today. No instructions but I guess that the lower bracket goes here? 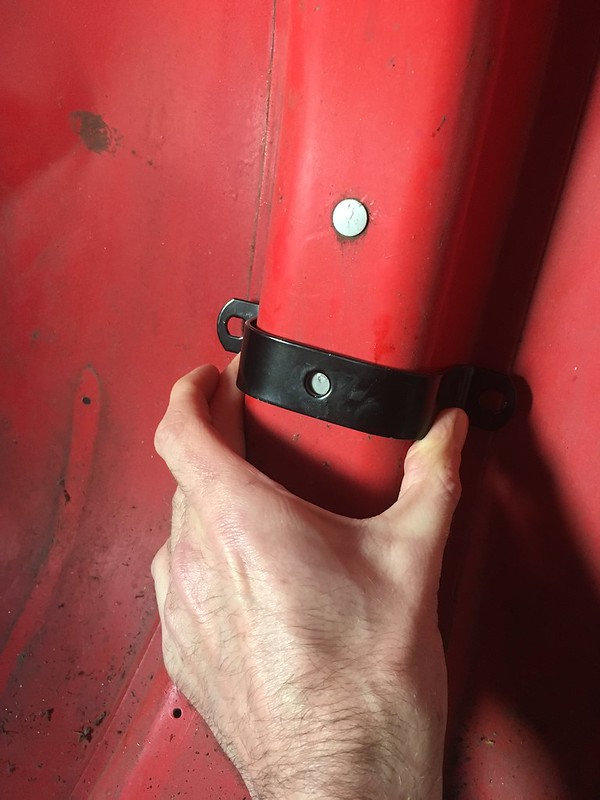 So the process to mount the brackets would be to weld this lower bracket on first using the spare wheel holder mounting hole to ensure its in the right place. Fit glovebox to lower bracket and this will enable you to mark the location for the upper bracket? I was hoping to buy a mig welder and learn how to weld and mount the bracket myself but finding the right MIG at the price I want has proved a frustrating process and so I will probably end up sub contracting that part. I've gone off the glue idea. 3. I'm wondering if I need more clearance between my cdi and rear shocker. Its pretty close to the frame already but I guess I have a few more mm spare that I could use to shift it right. 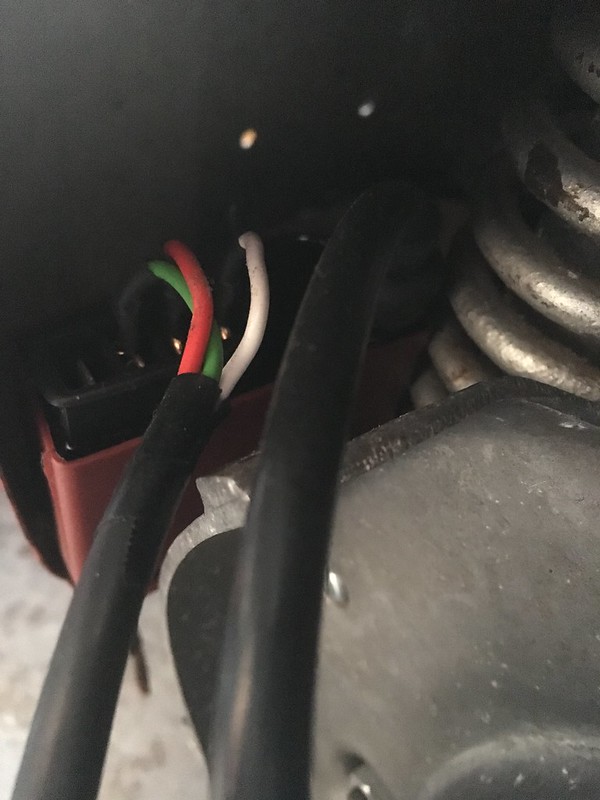 4. Start stripping the paint off. I'm wondering whether its best to start this with the engine and forks in the frame? |
|
|
|
Post by triffid on Jan 17, 2018 15:12:50 GMT
You could rivet it in place, if you use countersunk ones you could cover with a bit of filler before painting and it shouldn't show.
Strip frame before stipping paint it will be much easier as you can move it around as you need to get better access. Also means you can seal the underside.
|
|
|
|
Post by tzsteve on Jan 18, 2018 16:03:10 GMT
glad you got the engine going
with what you have done it should be a little quicker than standard and still be quite good on the go-go juice
|
|
|
|
Post by snails on Jan 20, 2018 10:29:02 GMT
So a couple of bits of bad news today
1. My kickstart lever snapped at the bolt pinch point. Is that common. Could it be something I've done in fitting it? It was second hand so no idea how old
2. I have an oil leak. It's very slow so I can't tell exactly from where. It looks like it could the clutch lever shaft as the spring has oil on it. Is that possible? Is it an o ring that needs replacement? My other prime suspect is the rear wheel mounting plate. That has a oil seal which I replaced so should be good but I will post some pics when the engine is out again.
|
|
|
|
Post by henri on Jan 20, 2018 13:32:12 GMT
the clutch arm has a o-ring , first suspect in that area ,along with a weep past gasket ,theres been a spate of badly made/misshapen gaskets recently .
an old kickstarts do snap ,especially if a loose fit on splines an not tightened up good enough .3 steps forward ,2 steps back , still leaves ya 1 ahead , bump the bitch n keep an eye on oil level . H
|
|
|
|
Post by snails on Jan 27, 2018 10:39:53 GMT
So going back to the glovebox, and thinking about it a little, it seems that the correct/best/intended way of fitting it would be to use the spare wheel holder hole for the bottom bracket and then drill and tap another in the correct place for the top bracket. Anyone done this? Any reason why not to? Otherwise I've made some good progress on stripping the frame. Finally got the wiring loom out after making a few school boy mistakes with disconnecting the horn and rear brake light switch. Still was not easy after that. I'm not looking forward to fitting a new loom that's for sure. I dint manage to pull the string through the entire frame loop either (just the lower half) which is a shame. After removing the rear brake pedal I seem to have more bolts than I can remember go where. That's what happens when you do jobs over several days I guess. Can anyone tell what the central bolt might be in the image below. I have the one for the brake light switch on the left and the bolt to fit to the frame on the right of the three. No idea what its off! Any tips on how to clean up the pedal in general? 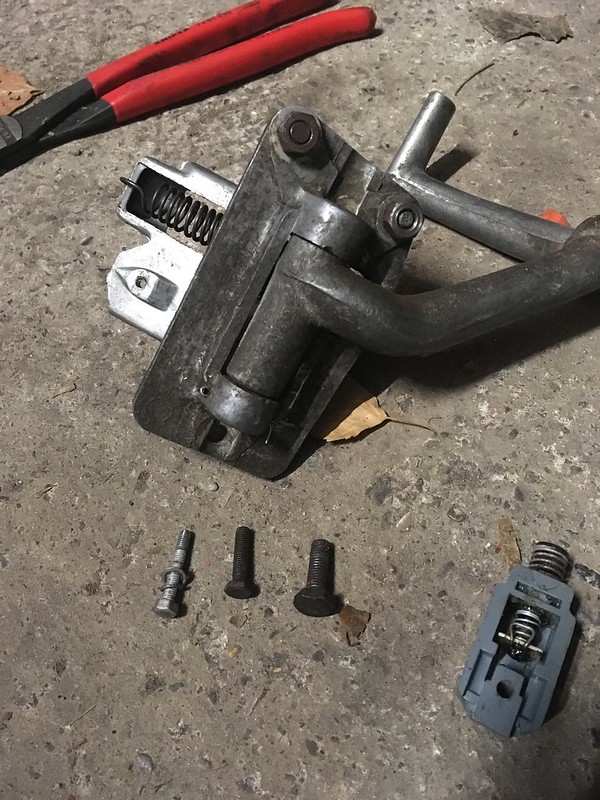 Not sure what is going on with my stand. Can't tell whether someone has tried to extend the stand or whether its just falling apart? 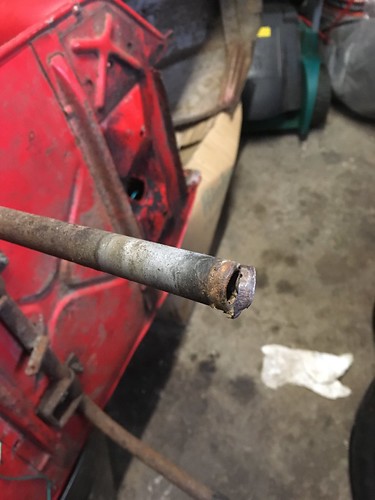 Also not sure what to do regarding the petrol tank when it goes to get blasted / powder coated. They are pretty good and know to block up the tank but should I remove the tank cap by knocking the pin out? I also realised Im going to need the tool for removing the tap and filter  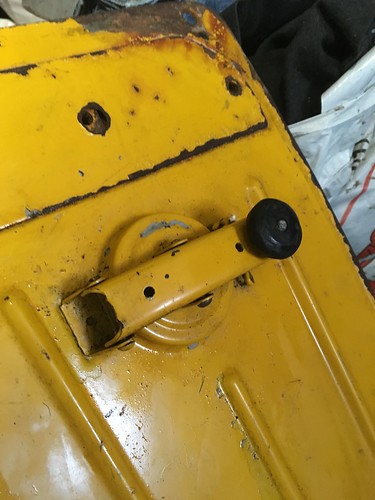 There are a few pings in the frame. I hoping to find a body shop that will sort the majority of them out before I get it powder coated. The only one I don't think will be able to be sorted in the one on the RHS engine bubble near the kickstart as the the strengthening beam gets in the way. That will have to be filler I guess 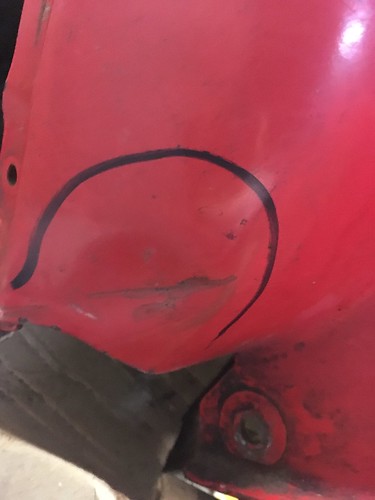 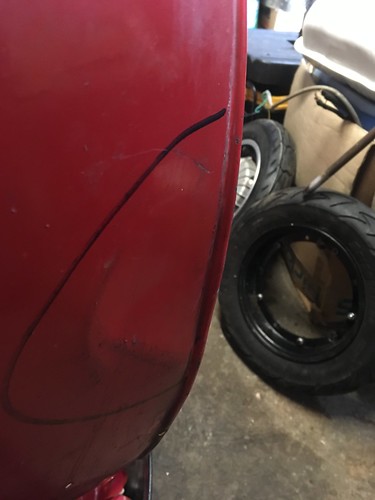 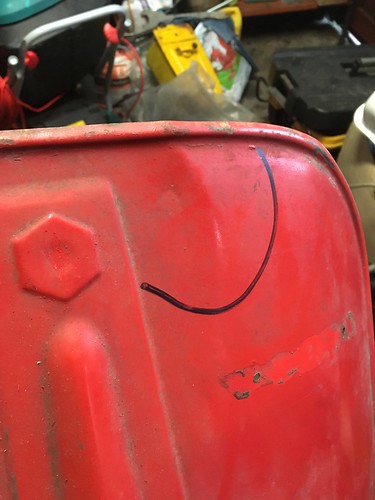 not sure if this is one or not 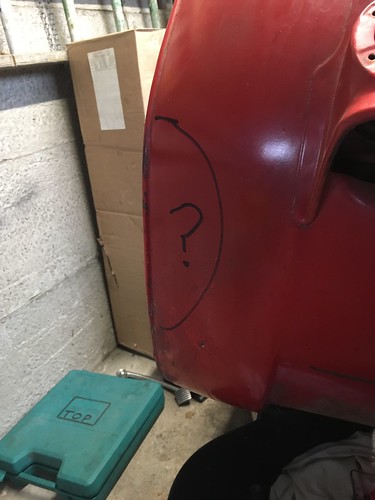 Luckily there is a guy who does scooter painting and body work not a mile from me. Pretty expensive he is but I guess he will know what doing more than just trying random car body shops Also have this damage to my mudguard. Looks easy enough to knock out - what causes it and can I stop it happening again 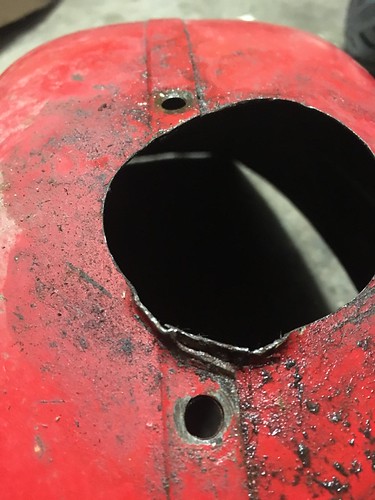 And lastly for now. ANy suggestions on how to remove the front shock? How do I stop the shock itself turning when I try to remove the nut. All I could think of was to cut the spring cover off so that I could clamp it 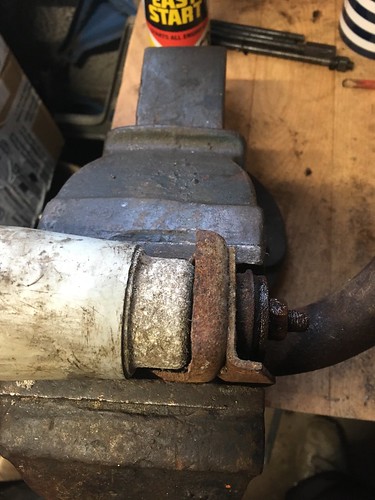 |
|
|
|
Post by snails on Jan 27, 2018 10:42:13 GMT
the clutch arm has a o-ring , first suspect in that area ,along with a weep past gasket ,theres been a spate of badly made/misshapen gaskets recently . an old kickstarts do snap ,especially if a loose fit on splines an not tightened up good enough .3 steps forward ,2 steps back , still leaves ya 1 ahead , bump the bitch n keep an eye on oil level . H I've taken engine out again now, will get it back in its stand and look at oil issue, Think this might be my second kick start to die (its all a bit hazy!) so that is a concern. WIll triple check I have it on tight but it was hard to get it to tighten up last time |
|
|
|
Post by vinrouge on Jan 27, 2018 12:25:06 GMT
"Can anyone tell what the central bolt might be in the image"
looks about the right size for the speedo fitting to the hub, but if its come from the brake pedal is it a temporary fix to hold the brake cable eye to the pedal. Otherwise i'm stumped.
|
|
|
|
Post by tzsteve on Jan 27, 2018 15:20:26 GMT
the dings in the frame will be easily removed.
|
|
|
|
Post by snails on Jan 27, 2018 20:08:09 GMT
the dings in the frame will be easily removed. Spoke to the body shop and they wouldn't give a figure from photos so I asked for ball park figure and got given £100 - £150. Quite a bit more than I'd hoped for |
|
|
|
Post by tzsteve on Jan 27, 2018 20:42:00 GMT
iv`e sorted worse than that and i am not a ding man.
dont forget that your filler primer will hide most of your hammer marks.
a smooth block of wood, a sand bag and the gentle use of a hammer will give very good results faster than you would expect
|
|