|
|
Post by triffid on Jan 28, 2018 13:41:44 GMT
Stand looks fooked Snails. For tank, let me know if you have the tap tool, if not I can post down for you to borrow. Make sure you clean it all out when it comes back else it will probably block your filter. Have a go at the dents yourself, at least you might be able to d=reduce the work needed by the pro. The muddy I probably from trying to get it on and off the fork. Easy straightened and care and patience when re-fitting. Mole grips of the shock to hold it steady I think or if you are replacing it then just cut the bolt off.
|
|
|
|
Post by snails on Jan 29, 2018 9:03:07 GMT
Thanks Triffid. A borrow of the tool would be appreciated, if you dont mind waiting a while for return. Neither myself or the sand blasters are the quickest at doing stuff but I would return it asap?
I'm still in two minds about the dents. Half tempted to try myself but as I'm going powder coat route and wont be using filler if at all possible its making me sway towards the pro approach.
|
|
|
|
Post by snails on Jan 29, 2018 18:28:07 GMT
Another question - how to loosen the bearing retaining ring in the Forks?
|
|
|
|
Post by snails on Jan 29, 2018 18:32:34 GMT
And what is the correct torque for the rear brake plate? I think I found the cause of my oil leak!
|
|
|
|
Post by triffid on Jan 30, 2018 8:20:32 GMT
fork ring, heat it a bit and then you need a big pole to slide down from the top and a big hammer to knock it out. I think.
No idea on the brake.
Let me know when you want the tool and I'll post it down. PM me your address.
|
|
|
|
Post by snails on Jan 30, 2018 8:34:30 GMT
fork ring, heat it a bit and then you need a big pole to slide down from the top and a big hammer to knock it out. I think. No idea on the brake. Let me know when you want the tool and I'll post it down. PM me your address. Thanks I will drop you a pm. I dont think the fork ring is knocked out, more screwed out - like the nut you have on top of the fork stem but this side inside a tube so that you cant tap it with a screw driver very easily. To me you'd need a tube with a bar across the top to form a t shape to get it out loosen or tighten up properly |
|
|
|
Post by vinrouge on Jan 30, 2018 20:01:59 GMT
Upper fork bearing is a screw fitment, fairly straight forward with either a "C" spanner or tap the ring with a screwdriver. Lower is a pressure/friction fit, I found it a right pain in the proverbial. Its a bit of a bogger to knock out the lower bearing race out, Then the fun begins trying to get the new one seated correctly.
If anyone can translate from German there's a full list of torque figures on GSF,
|
|
|
|
Post by snails on Jan 31, 2018 15:31:36 GMT
Just to clarify its this that I dont know how to loosen off to remove. The bearing I hope to drift out 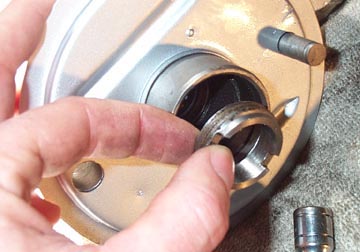 |
|
|
|
Post by henri on Jan 31, 2018 15:45:56 GMT
1st off its a left hand thread , so right =loosey , i made up a tool but most find a bit of flat bar that fits in the slots an turn it with moleys or adjustable spanner .unless seized they aint that tight ,well unless somebody else has been in there not knowing its a lefty n given up .H.
|
|
|
|
Post by snails on Feb 25, 2018 9:45:55 GMT
the clutch arm has a o-ring , first suspect in that area ,along with a weep past gasket ,theres been a spate of badly made/misshapen gaskets recently . an old kickstarts do snap ,especially if a loose fit on splines an not tightened up good enough .3 steps forward ,2 steps back , still leaves ya 1 ahead , bump the bitch n keep an eye on oil level . H So any tips on removing the pin that holds the clutch arm in place? I think just tapping it with a hammer (which Ive been trying) will just flatten the head of the pin I'm nearly ready to go to the sandblasters - just waiting for a couple of bits to turn up first Glove box bracket welded on and to my great relief it seems to fit ok   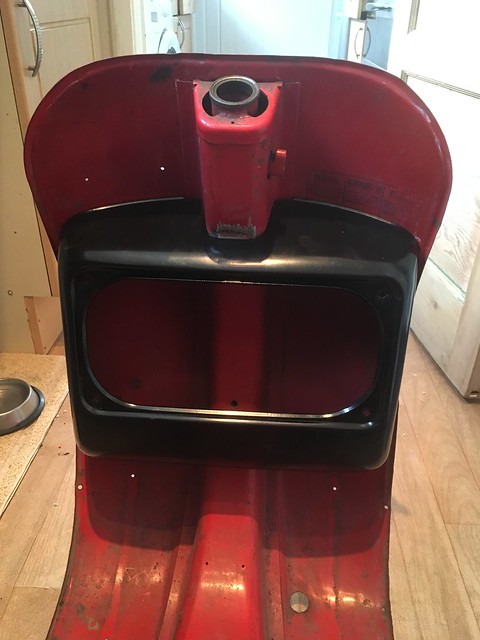 |
|
|
|
Post by terjee on Feb 26, 2018 20:40:56 GMT
Remove the pin on the gear shifter is hard, i try heat new tools and everything, in the end i saw it of and bye a new one, the new one had the same problem omg me and a fiend uset all day to make a rig to hold it firm.
and did not hit the side ho stand longest out, it is wrong.
|
|
|
|
Post by nickj on Feb 27, 2018 7:18:57 GMT
Measure the pin accurately with calipers so you know which direction it is tapered then use a proper engineering punch made of hardened steel and large club hammer or mallet and give it a sharp whack
|
|
|
|
Post by snails on Feb 27, 2018 9:29:35 GMT
Measure the pin accurately with calipers so you know which direction it is tapered then use a proper engineering punch made of hardened steel and large club hammer or mallet and give it a sharp whack Ah ok, its tapered, I would never have guessed. I will give that a try. I am right in thinking that its necessary to remove the pin to unlock the lever from the cover and replace the o ring seal? |
|
|
|
Post by nickj on Feb 27, 2018 19:16:52 GMT
It’s a small taper so you need calipers to check it. Yes you are right about removing it. The shaft and assembly come out from the inside. You don’t really want to mess around with all the joints on the linkage assembly. A bit of heat may help but I’ve always found they budge with a proper hardened punch and a well placed tap. It’s worth trying to support the shaft on something firm if you can so the force goes into the pin
|
|
|
|
Post by snails on Mar 21, 2018 18:07:19 GMT
It’s a small taper so you need calipers to check it. Yes you are right about removing it. The shaft and assembly come out from the inside. You don’t really want to mess around with all the joints on the linkage assembly. A bit of heat may help but I’ve always found they budge with a proper hardened punch and a well placed tap. It’s worth trying to support the shaft on something firm if you can so the force goes into the pin So I've followed you've advice and managed to knock out so far that the top of the pin is now flush to the shaft. It won't pull out any more by using pliers - any suggestion on what to use to keep knocking it out? I can't knock it back in to loosen it further as the pin is splayed on the other side. |
|
|
|
Post by tzsteve on Mar 21, 2018 18:25:46 GMT
file the narrow end flush with the shaft and mark the center of the pin with a very small drill or dot punch (a gentle tap is all you need)
then use a very short narrow pin punch
after this you get into the nasty world of drilling it out and re-cutting the hole with a taper reamer
problem is
once you start hitting it, if it is a little tight it starts to bulge and becomes even more difficult to shift
|
|
|
|
Post by snails on Mar 21, 2018 19:09:38 GMT
Ah right a pin punch sounds like just the job!
|
|
|
|
Post by snails on Mar 28, 2018 8:48:40 GMT
So, the pin is out! Its made no difference though in my ability to remove the clutch shaft from the cover.. I dont see what is holding it in place 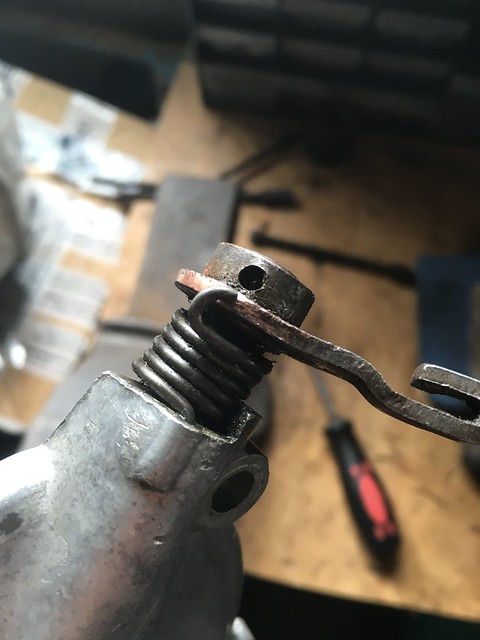 Parts are back from the powder coaters. Only after which I realised 1. I'd taken the wrong headstock, so the correct one will have to go back 2. I'd not purchased a rear light unit and if I want the metal version that will have to go too 3. The set of shocks I was thinking of buying would need the forks adjusting, so potentially they would go back - I'm going to use a different set of shocks instead 4. I'd forgotten all about the fact that the beading tools are for sorting out your frame rather than fitting the beading so its too late for that. I did improve the state of the beading with pliers before it went but probably not good enough for fitting the original beeding if thats what I wanted to. Still not sure what option to go for in that respect but I think I will be kicking myself for a long time 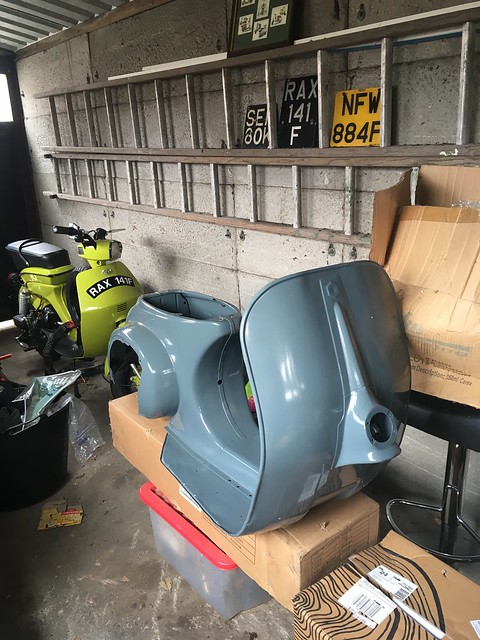 So as a bit stuck for things to do until some parts turn up I contented myself constructing a tool to help with fitting the rivets in the runners. lucky I had a tired punch knocking around having replaced mine recently  |
|
|
|
Post by nickj on Mar 28, 2018 16:04:15 GMT
Oh shit....somewhere in that thread clutch arm got changed to gear arm. I thought you were working on the gear arm....
To take the clutch arm off of it usually removes with the shaft from the clutch cover. It is only held in by the spring hooking round it....
|
|
|
|
Post by snails on Mar 28, 2018 18:59:20 GMT
Oh shit....somewhere in that thread clutch arm got changed to gear arm. I thought you were working on the gear arm.... To take the clutch arm off of it usually removes with the shaft from the clutch cover. It is only held in by the spring hooking round it.... Hmm. Not to worry - it still won't come out even with the spring unhooked. I tried that before removing the pin and as you can see in the picture it's unhooked now |
|