|
|
64 V90
Oct 15, 2016 17:11:45 GMT
Post by robd on Oct 15, 2016 17:11:45 GMT
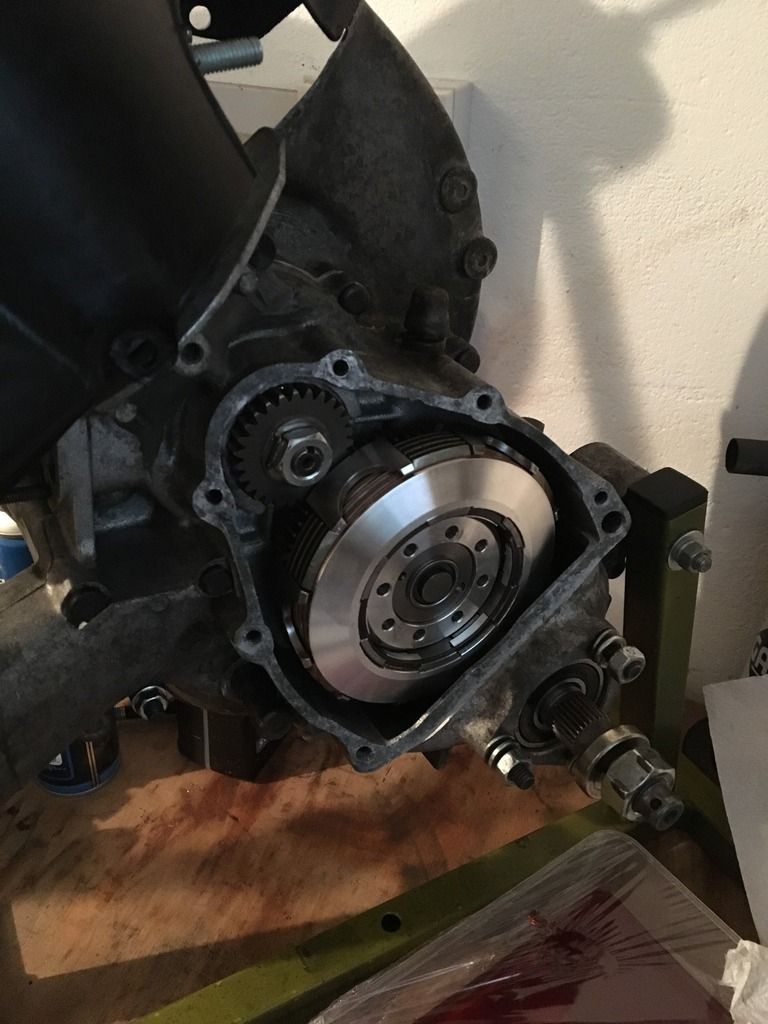
Not made a lot of progress until this week, have been saving for and buying the remaining bits for the build. Got more or less everything now, BSG gear selector, pinasco gear cluster and a big bertha pipe. Now have at last started the build though have realised that still need a few annoying little bits, lock washers and o rings etc. Also I hadn't ordered the flywheel side layshaft bearing. Can anyone confirm what bearing this should be? All old bearings are now out of the cases, fairly uneventful with exception of the blind layshaft bearing I haven't bought. Tried heating the case an tapping it on the bench. Didn't budge. Turned up a piece of bar in the lathe to a tight fit and tried the hydraulic grease method. If you feel the need to cover yourself and everything around you in hot grease and I can thoroughly recommend it. Not for removing the bearing though. Ended up getting medieval with it and with the amount of work done on the cases in the back of my mind a very carefully destroyed it to get it out... 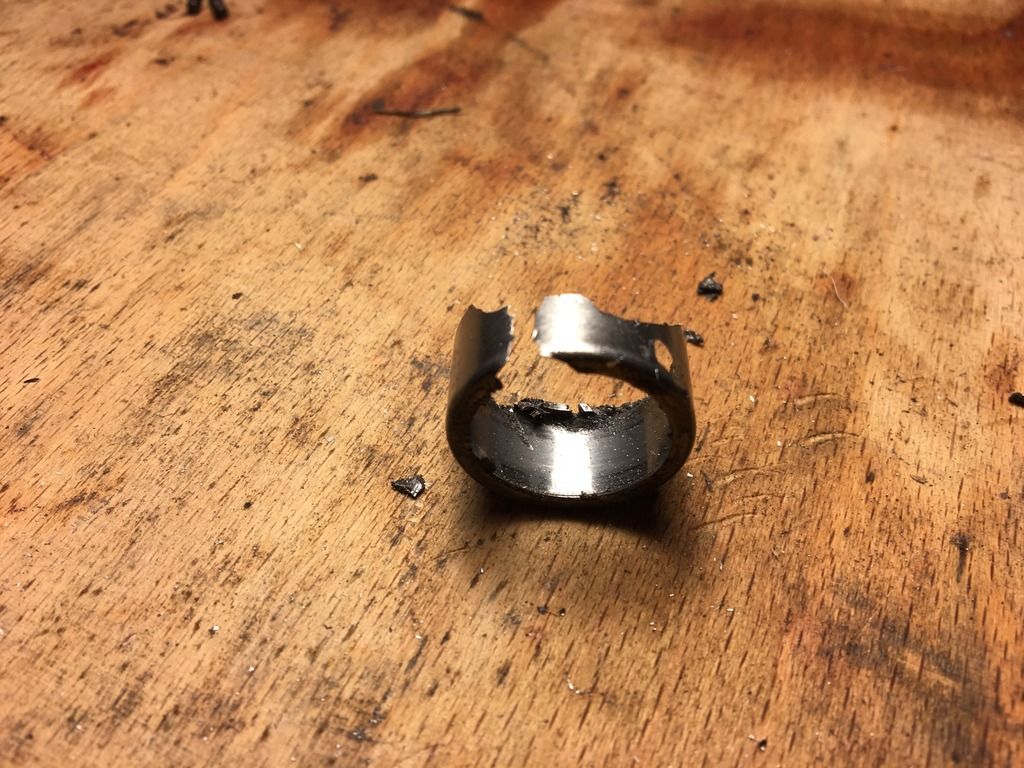 SIP performance PX type flywheel bearing is on the crank and in the casing, was a scarily tight fit in the casing adaptor though, so much so it would give me second thoughts about going down that route again. 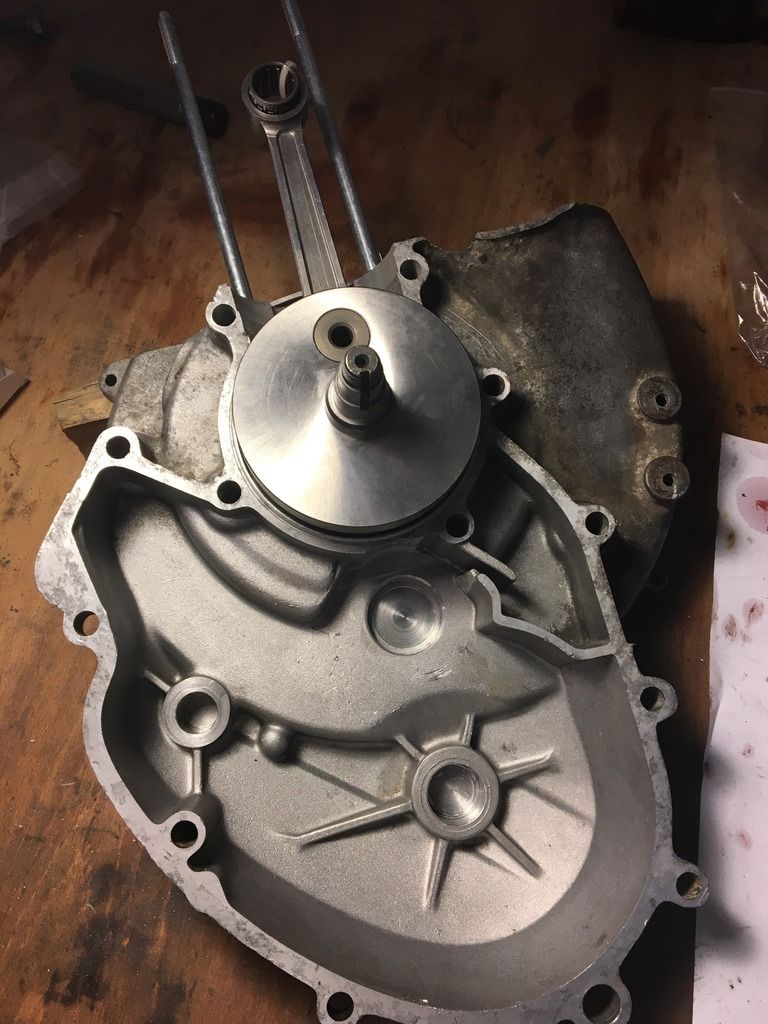 Drive side casing bearings have just gone in the freezer for round 2 of me vs. bearings |
|
|
|
64 V90
Oct 15, 2016 18:52:53 GMT
Post by henri on Oct 15, 2016 18:52:53 GMT
|
|
|
|
64 V90
Oct 15, 2016 19:50:23 GMT
via mobile
Post by robd on Oct 15, 2016 19:50:23 GMT
Cheers Henri, just going to assemble the gears on the layshaft and check I don't need a new shim and then I'll put in hopefully my last order. Unfortunately I didn't note down the dimensions of the adaptor sleeve
|
|
|
|
64 V90
Oct 18, 2016 10:18:58 GMT
Post by robd on Oct 18, 2016 10:18:58 GMT
(Hopefully) last order gone in for engine bits, mostly fiddly stuff. Rest of bearings are now in the cases. With the bearings in I could fit the crank and check clearances as I had to have the cases machined because of the bigger webs. Had measured everything up but foolishly hadn't included the sealing pad in my measurements so it was out with the dremel and the masking tape as it was catching on the webs. 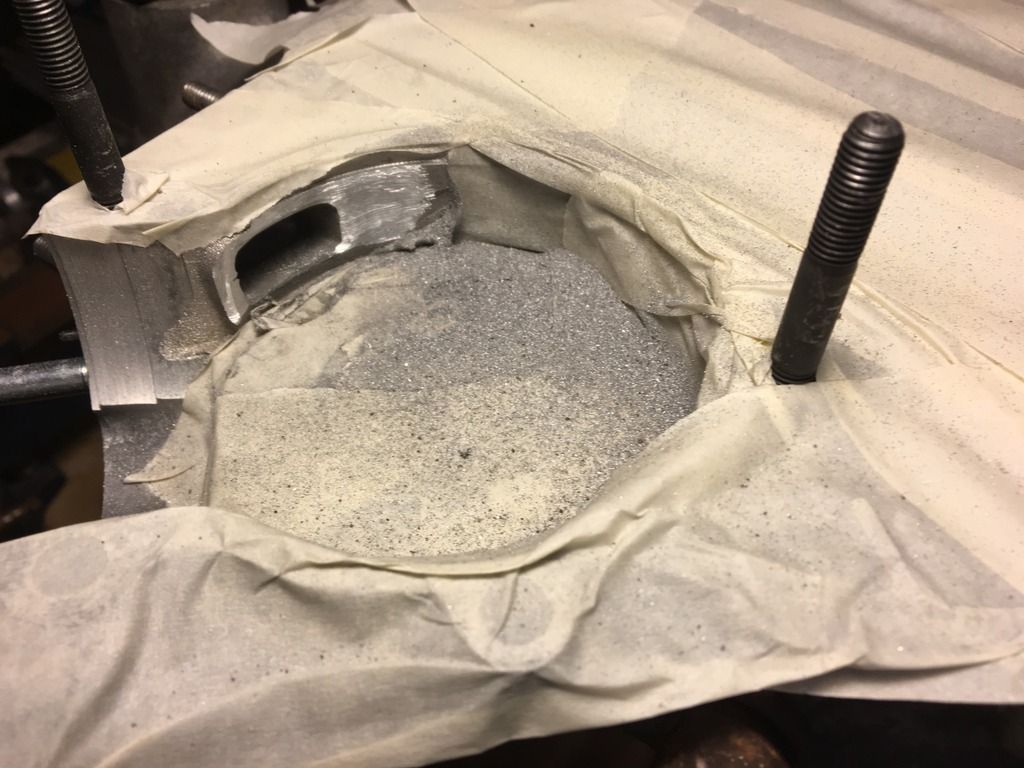 That done and the crank drawn into the bearing, cases together and the crank turns without catching anywhere. 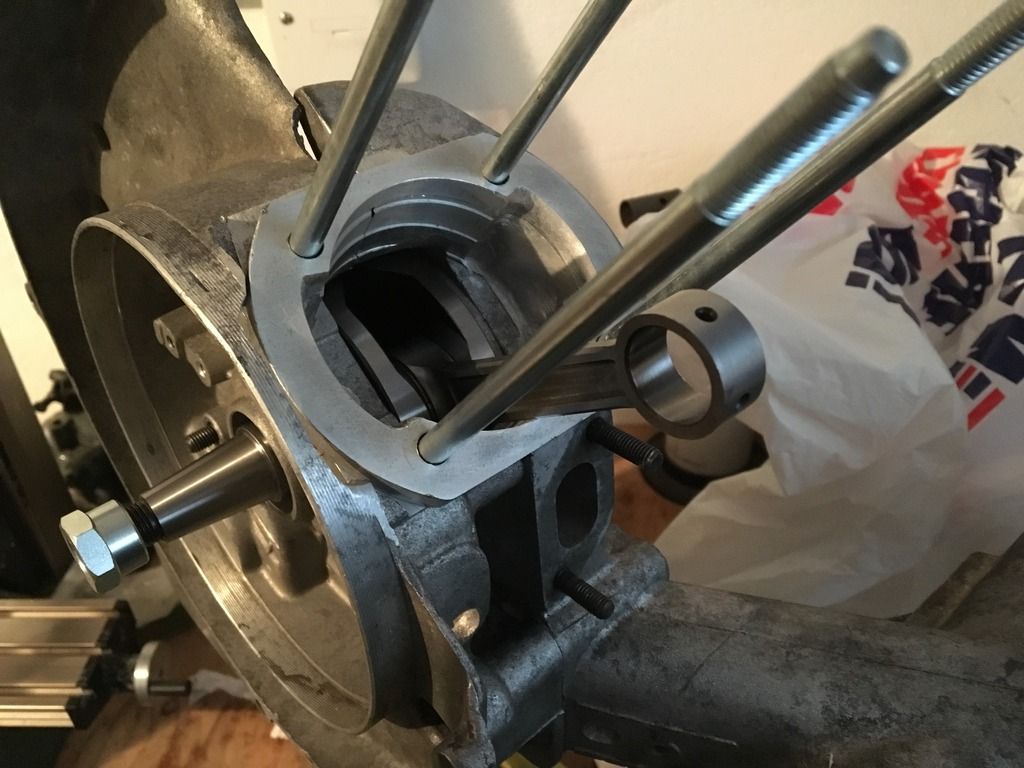 Next up was to fit the new selector to a PK shaft with the aid of the missus and a pair of chopsticks. It measured up at 0.55mm clearance and so have ordered up new shims. Hurry up scooter centre I'm on a roll... 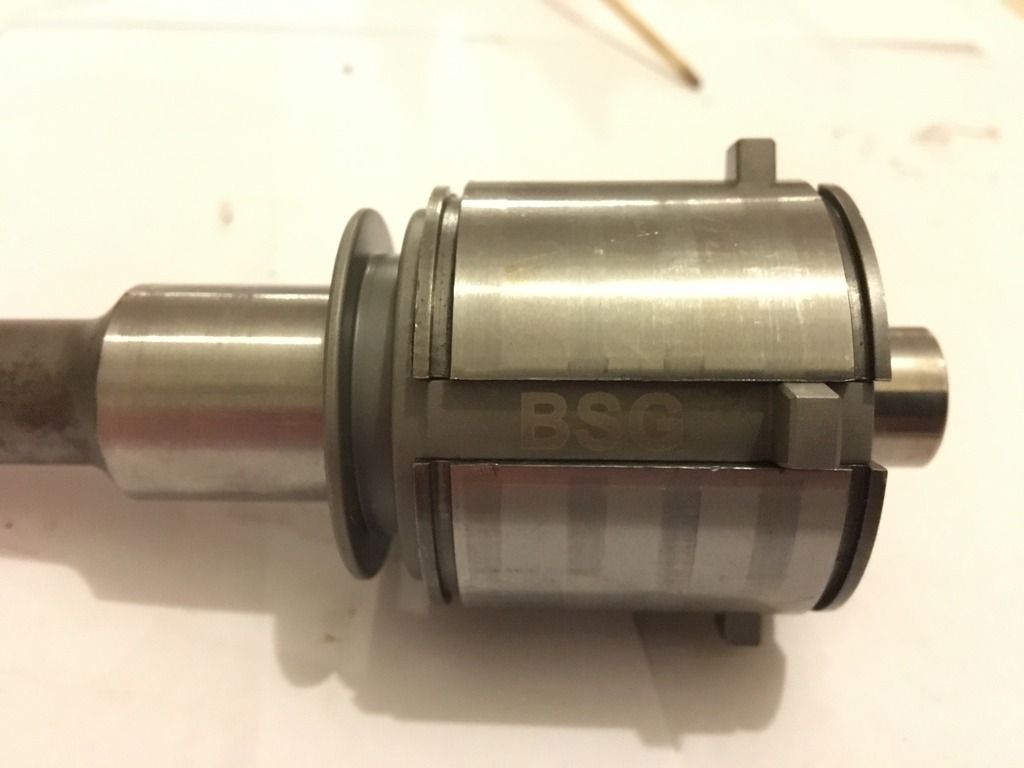 |
|
|
|
64 V90
Oct 20, 2016 13:59:59 GMT
Post by robd on Oct 20, 2016 13:59:59 GMT
After a fair bit of wiggling and swearing got the BSG clutch basket in and primary on last night. Realised then that I hadn't ordered woodruff keys though, what a tit. Hopefully they'll be here before the weekend. 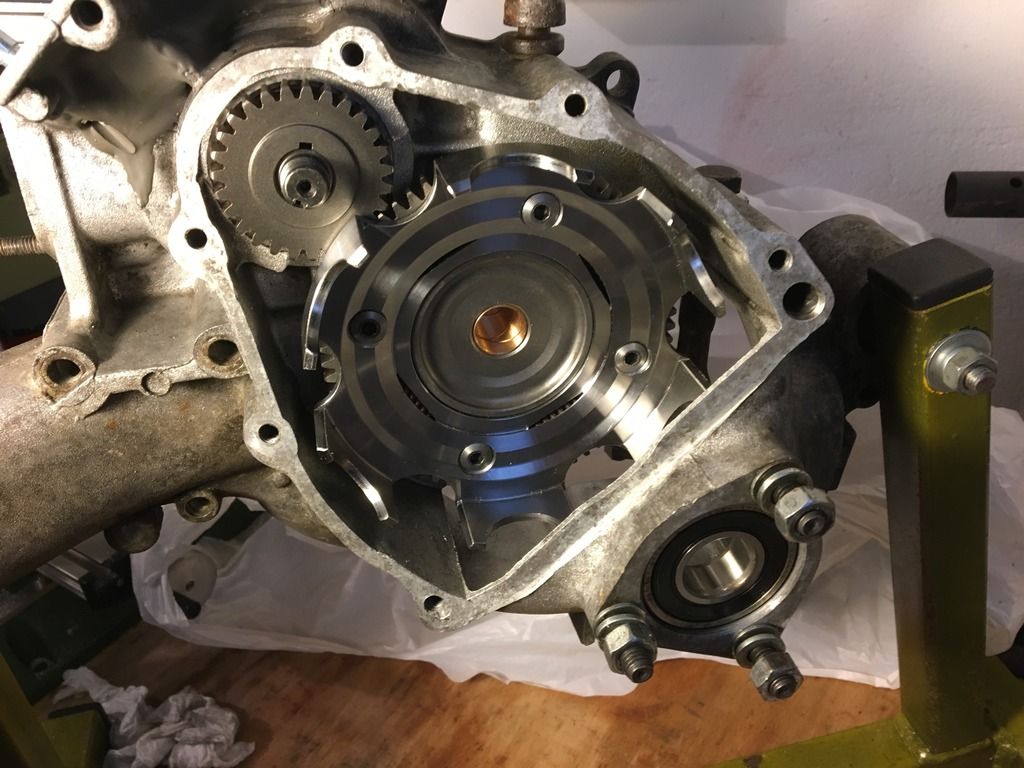 Usual excellent service from scooter centre, other bits arrived this morning and so spent my lunch hour shimming the gears, fitting kickstart mech, buffers and o ring and the layshaft. The two flywheel side blind bearings came and have gone straight in freezer. Hopefully I can get them in and close the casings tonight. 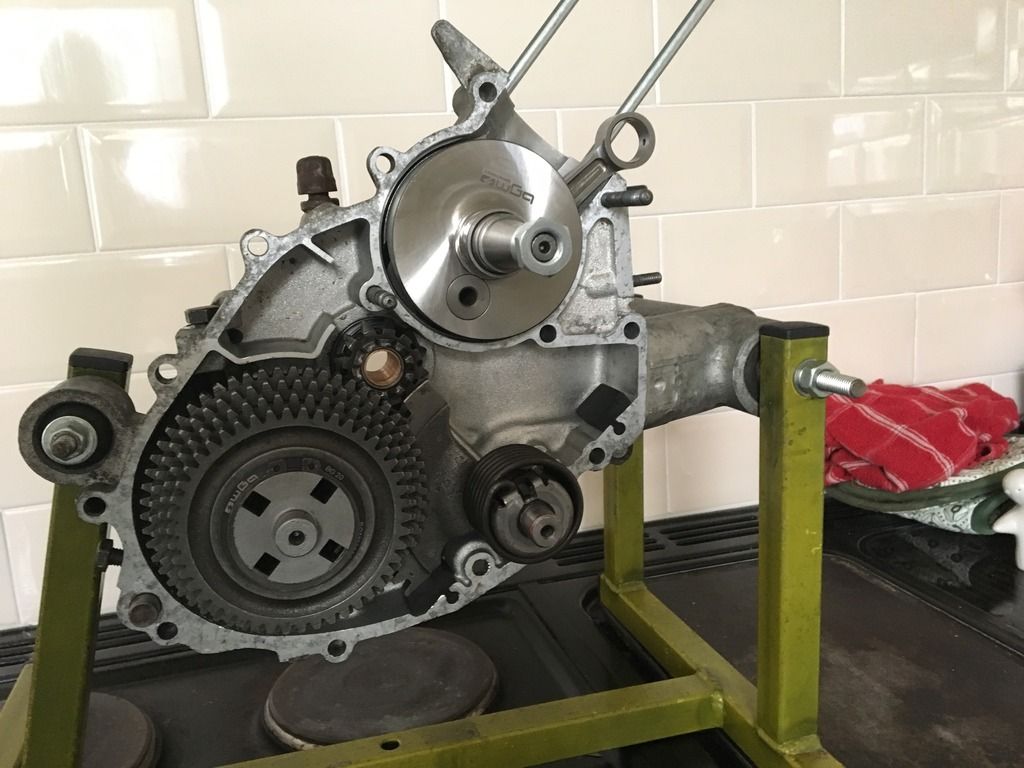 |
|
|
|
64 V90
Oct 20, 2016 18:26:17 GMT
Post by robd on Oct 20, 2016 18:26:17 GMT
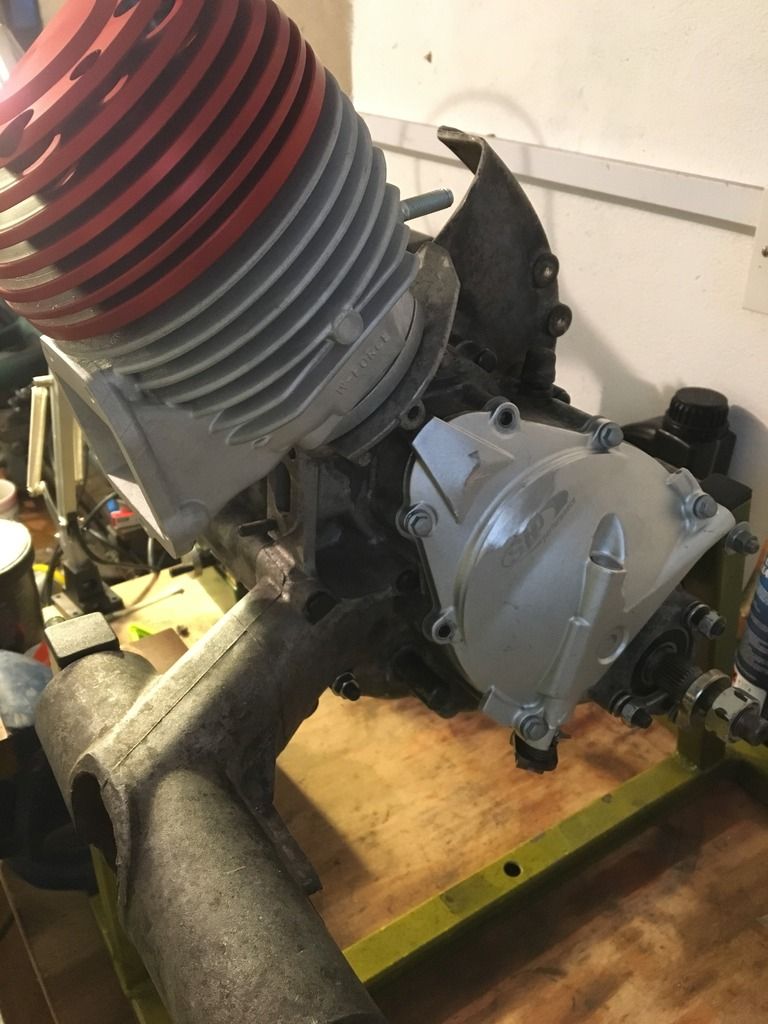
Managed to get another couple of hours in the garage tonight, have got more scooter stuff dome this week than in the last six months. Last of the bearings in an the pinasco short 4th cluster 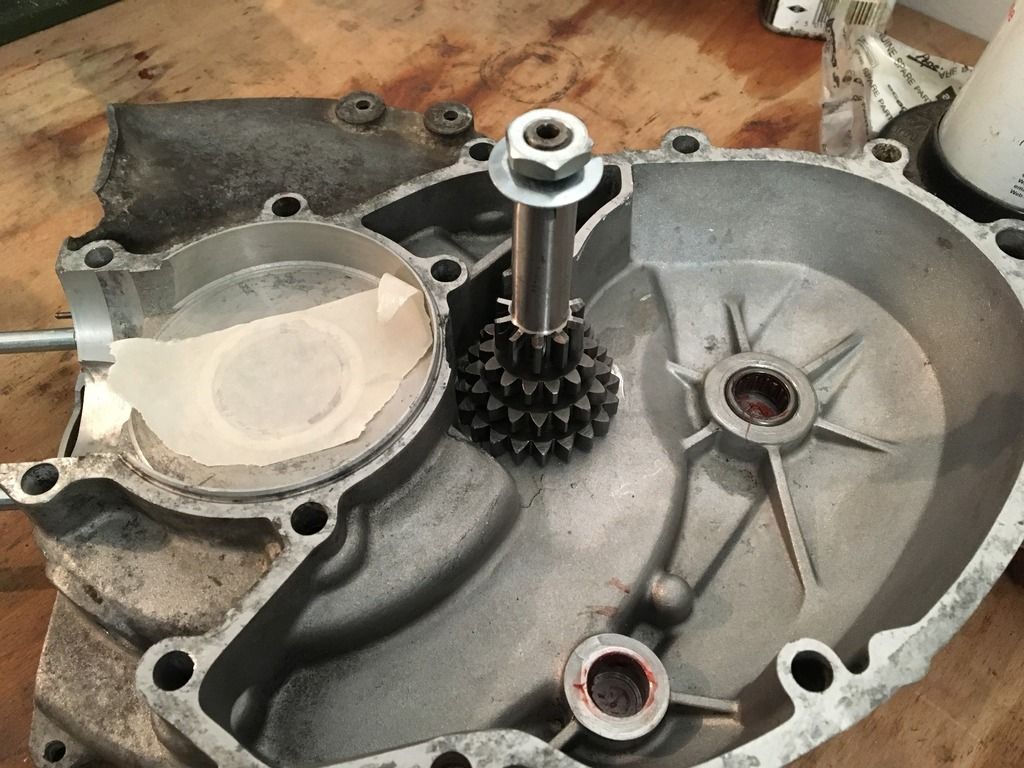 Decided to get the casings closed as short on workspace. Got on a bit of a roll and decided to fit top end too. When the woodruff keys turn up I'll get the clutch in and check the squish etc. 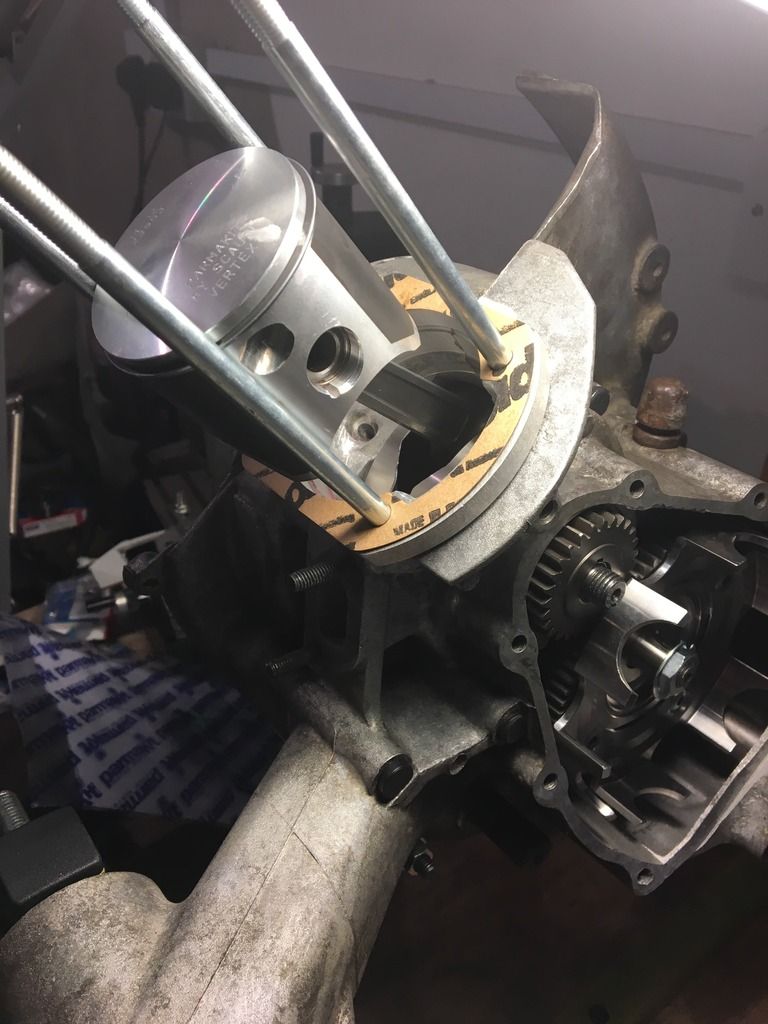 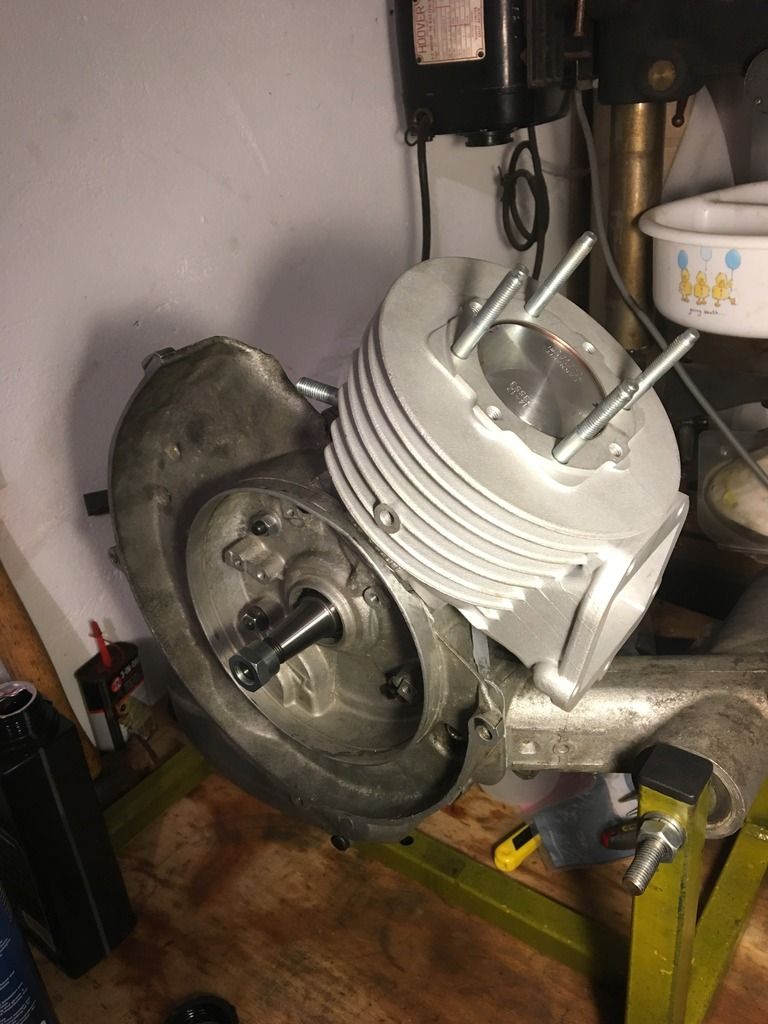 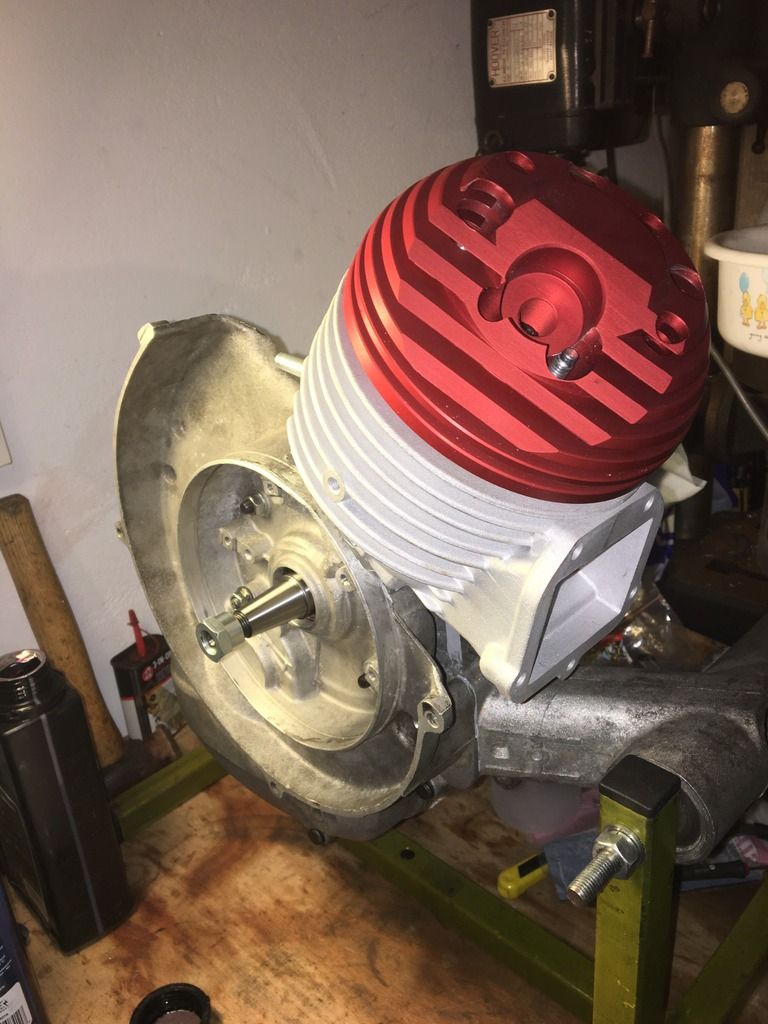 |
|
|
|
64 V90
Oct 20, 2016 18:31:13 GMT
Post by robd on Oct 20, 2016 18:31:13 GMT
Does anyone know if the BSG plates (think they are carbon?) need soaking and also what oil should I go for?
Hoping the primary woodruff key is made of stern stuff, to get the primary cog off is a clutch out job...
|
|
|
|
64 V90
Oct 20, 2016 19:16:14 GMT
Post by Juan on Oct 20, 2016 19:16:14 GMT
Don't think carbon plates require a soak. Not sure on oil but I think they might use automatic transmission fluid but maybe better checking with BSG to see what they recommend.
|
|
|
|
64 V90
Oct 20, 2016 19:40:29 GMT
Post by tzsteve on Oct 20, 2016 19:40:29 GMT
looks like all the hard work is coming near to an end
|
|
|
|
64 V90
Oct 22, 2016 7:50:31 GMT
via mobile
Post by bikegrim on Oct 22, 2016 7:50:31 GMT
Use a medium grade oil. I use Putoline medium on carbon plates as advised by Tony OB years ago and haven't deviated from that. You don't need to soak them but give them a good rub with the oil on your finger, both sides whilst assembling the clutch.
|
|
|
|
64 V90
Oct 22, 2016 12:10:09 GMT
via mobile
Post by robd on Oct 22, 2016 12:10:09 GMT
The guys from BSG came back to me this morning after I asked if the plates should be soaked and what oil
"Yes they should. In racing we use oil for "powershift" gearboxes from auto. For street we use standard 10w40 engine 4stroke oil"
I'm beginning to think there's prob not a lot in in, people seems to have used sae 30w, medium gear oil and ATF all with no apparent issues. Will look what I've got hanging around in the garage I think
|
|
|
|
64 V90
Oct 22, 2016 16:43:14 GMT
Post by henri on Oct 22, 2016 16:43:14 GMT
ive a friend who swears by ATF for boxes ,uses it in his enfield an vespas , an have others reckon it for use with carbon plates . either way ive not seen much difference in the life of carbon plates , as the oils there primarily for gears i think i'd stick with sae30 or if going to buy ATF .if going for 10w40 dont get car oil but bike ,as its detergent free ,oh an also bout 10-15 quid dearer than car types . H
|
|
|
|
64 V90
Oct 22, 2016 20:28:50 GMT
Post by tzsteve on Oct 22, 2016 20:28:50 GMT
i can see 10/40 having a lot going for it.
i was going to get some 10/40 then i saw a gallon of rock oil sea30 for £4 so i`m using that untill i kick the bucket
|
|
|
|
64 V90
Oct 22, 2016 22:05:24 GMT
via mobile
Post by robd on Oct 22, 2016 22:05:24 GMT
Am going with some Castrol power 1 10/40. Had an unopened bottle, think it was probably from an fzr400rr I used to have. It's suitable for wet clutches it says. Plates are in and soaking, there's quite a few burrs on the (ally) steels so will dress them too
|
|
|
|
64 V90
Oct 24, 2016 12:59:20 GMT
Post by robd on Oct 24, 2016 12:59:20 GMT
|
|
|
|
64 V90
Oct 24, 2016 13:36:38 GMT
Post by robd on Oct 24, 2016 13:36:38 GMT
Painted the pipe with VHT clear lacquer. Bought 2 cans on ebay and it only took a 3rd of a can. It air dried and looks really nice but the instructions say it needs to be baked at 160 degrees for 30 minutes to harden and it might smoke whilst hardening so the oven is out of the question. Thinking at the moment of running the hot air gun through it on medium (400 degrees) on and off for half an hour. 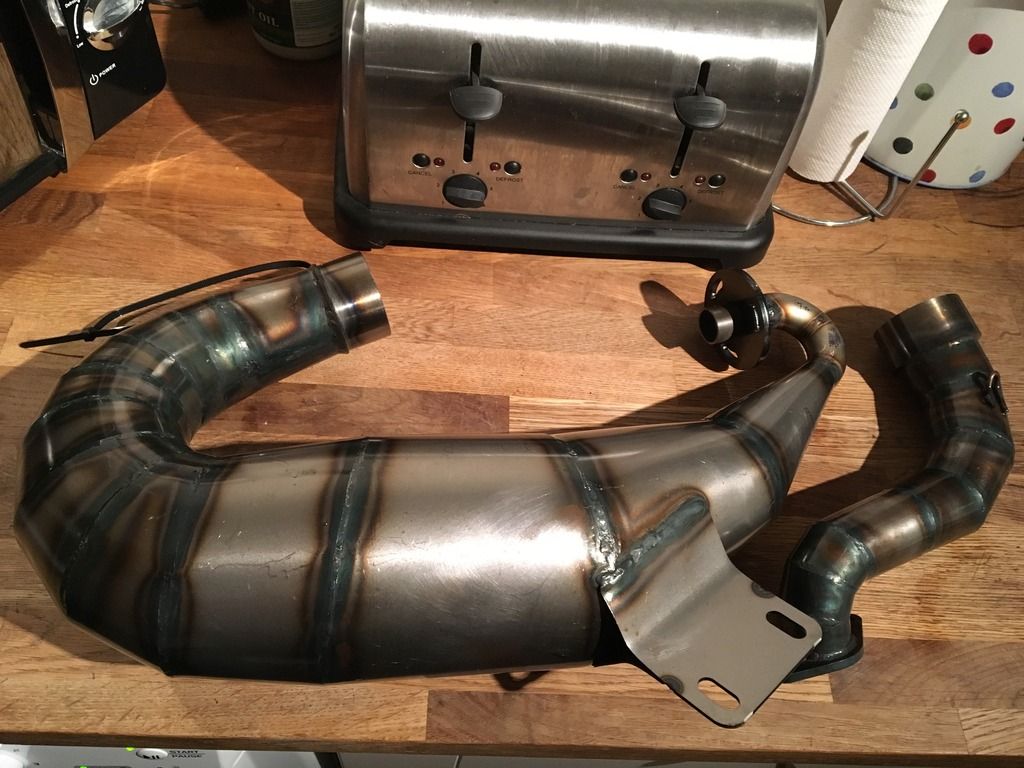 Checked the squish and it came out at 1.3mm first time round with the medium base gasket 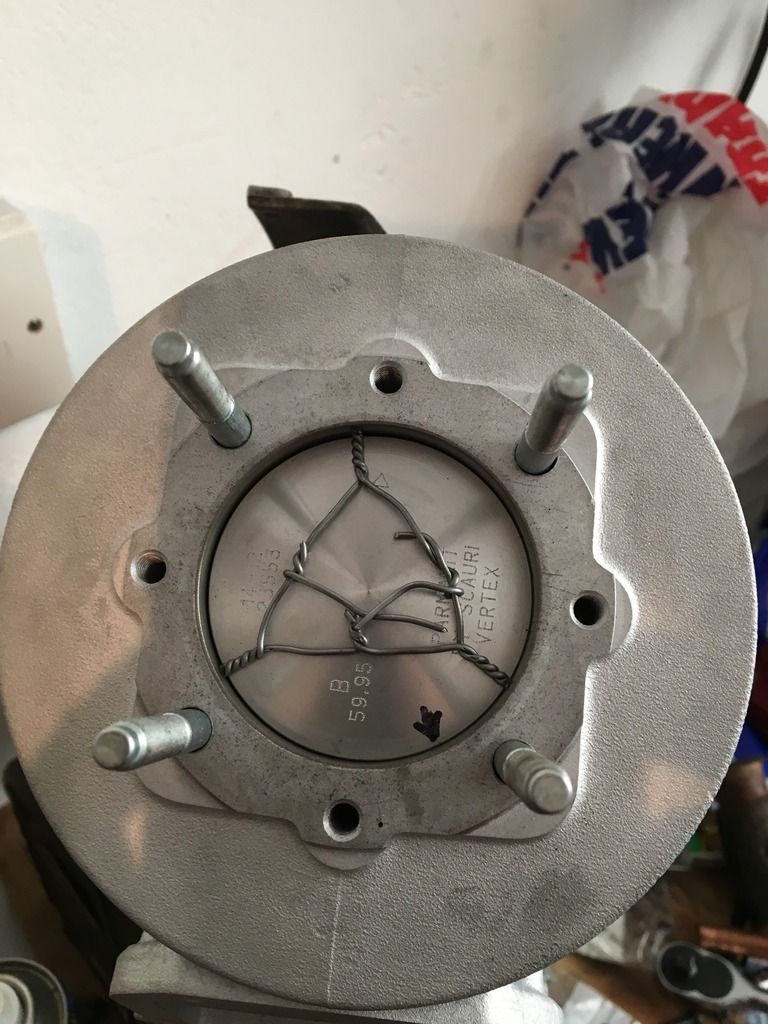 Feeling pleased with myself I decided to crack on and assemble and torque up the top end with sticky as shit yamabond on all mating surfaces which is quite a few with the packer plate and a gasket between it and the barrel. 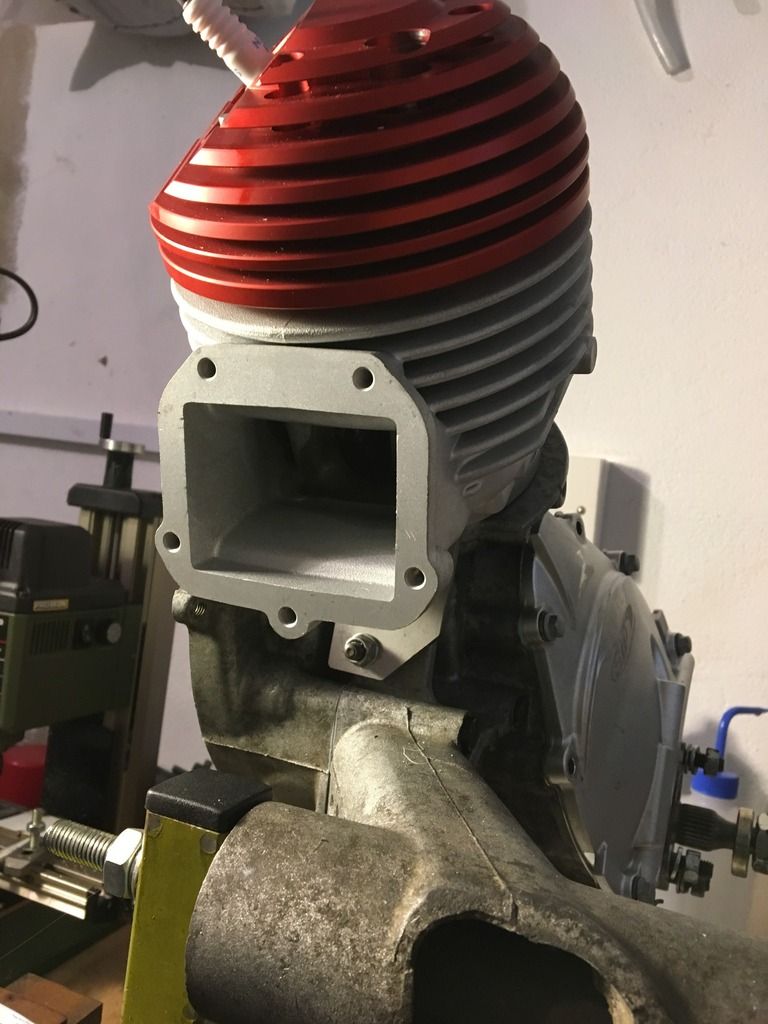 This is where it all started unravelling a bit. As I was sitting back admiring my handiwork I started to question myself whether I'd checked the ring gap. The ring was on the piston and I can't remember if I fitted it, I don't think I did. It went into the bore on the piston without any bother and so shouldn't be tight. Also realised that I should've fitted the flywheel and marked up TDC on the cases before I fitted the head. I could use the positive stop method now but I don't want to wreck the kit for the sake of pulling apart again so have decided to come out of the garage and sulk for while instead...definitely a case of more haste = less speed |
|
|
|
64 V90
Oct 24, 2016 15:16:09 GMT
Post by robd on Oct 24, 2016 15:16:09 GMT
Got over my sulk and decided to give the yamabond 48 hours to go off before I strip the top end back off. Went back out to the garage, loosely bolted on the inlet and modded the new head cowl to fit with cutting discs and sanding drums on the dremel. Fits really nicely though I'll be picking bits of plastic out of my beard and hair for the next couple of days lol 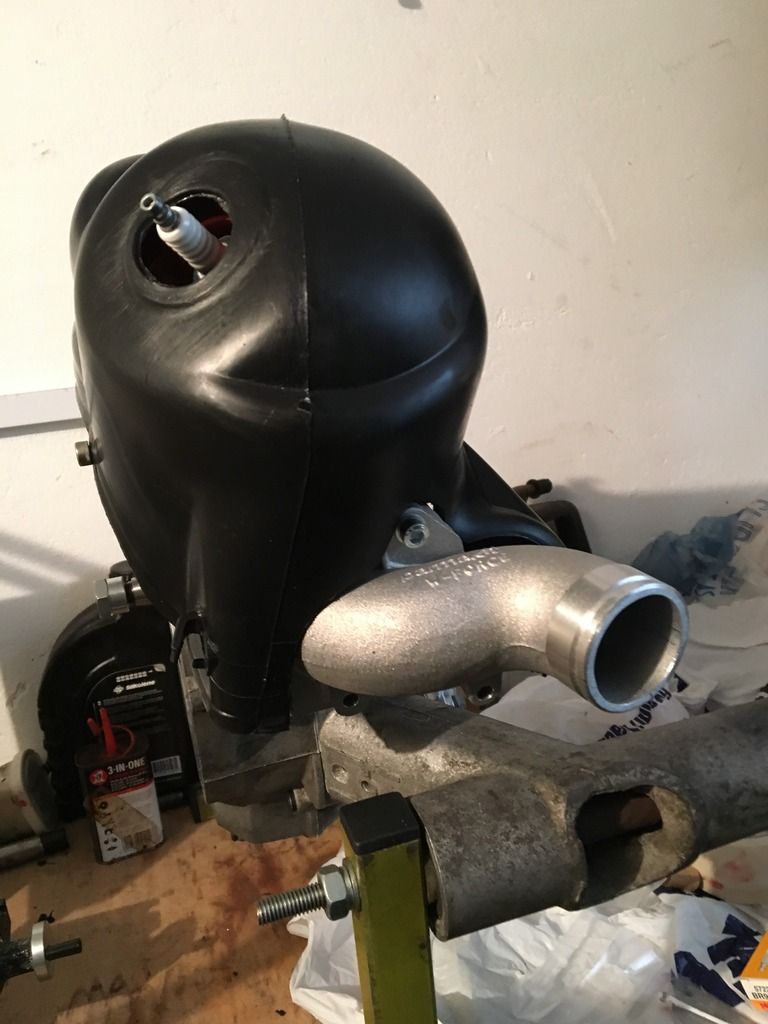 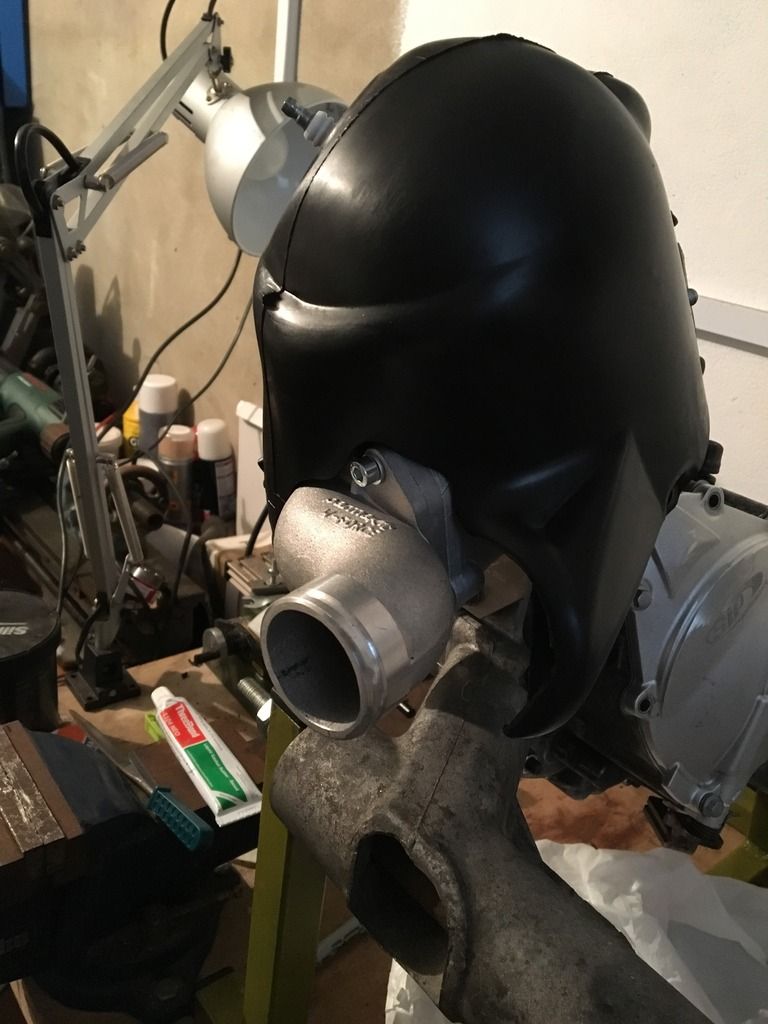 Ordered up some 14mm brass bar to make up some long exhaust nuts, 13mm seems like hens teeth |
|
|
|
Post by GeorgeS on Oct 24, 2016 15:46:50 GMT
Yamabond cleans off quite nicely with some thinners.
That motor looks great, hope you can take a video of the first start.
|
|
|
|
64 V90
Nov 1, 2016 11:38:54 GMT
Post by robd on Nov 1, 2016 11:38:54 GMT
Progress has ground to a halt this last few days as have spent hours trying to make the backplate fit with the XL2 clutch cover. Now thinking I may have the wrong backplate. Stripped the top end back off to check he ring gap and you guessed it, it was bang on already... Assembled and fitted the polini stator, had to take a bit off the rear of the stator backplate to make it sit properly in the casings. Fitted the flywheel and now it sounds like something is catching slightly. That was when I realised my flywheel puller didn't fit the polini flywheel so all on hold again while I wait for another delivery. 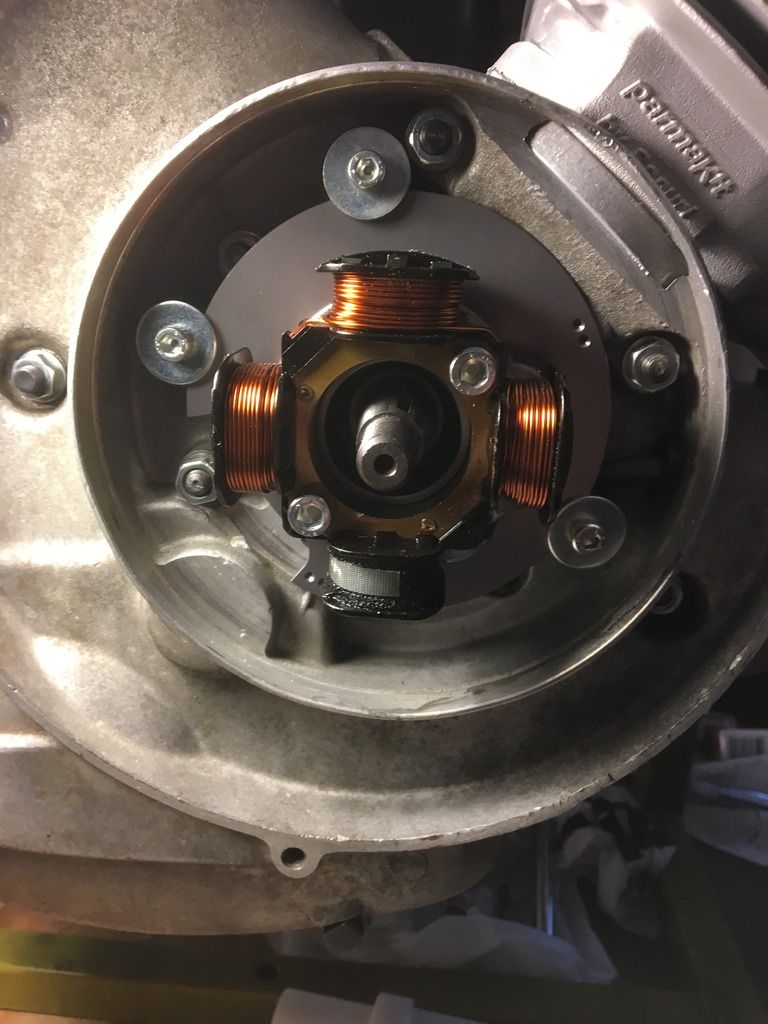 |
|
|
|
64 V90
Nov 14, 2016 17:28:18 GMT
Post by robd on Nov 14, 2016 17:28:18 GMT
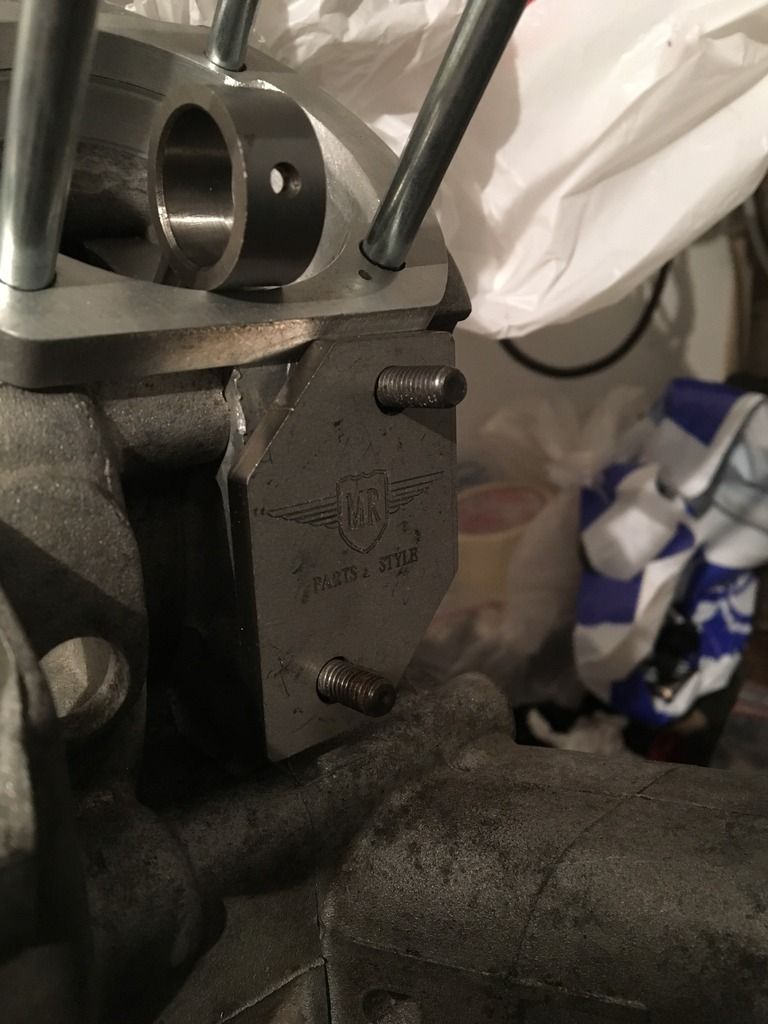
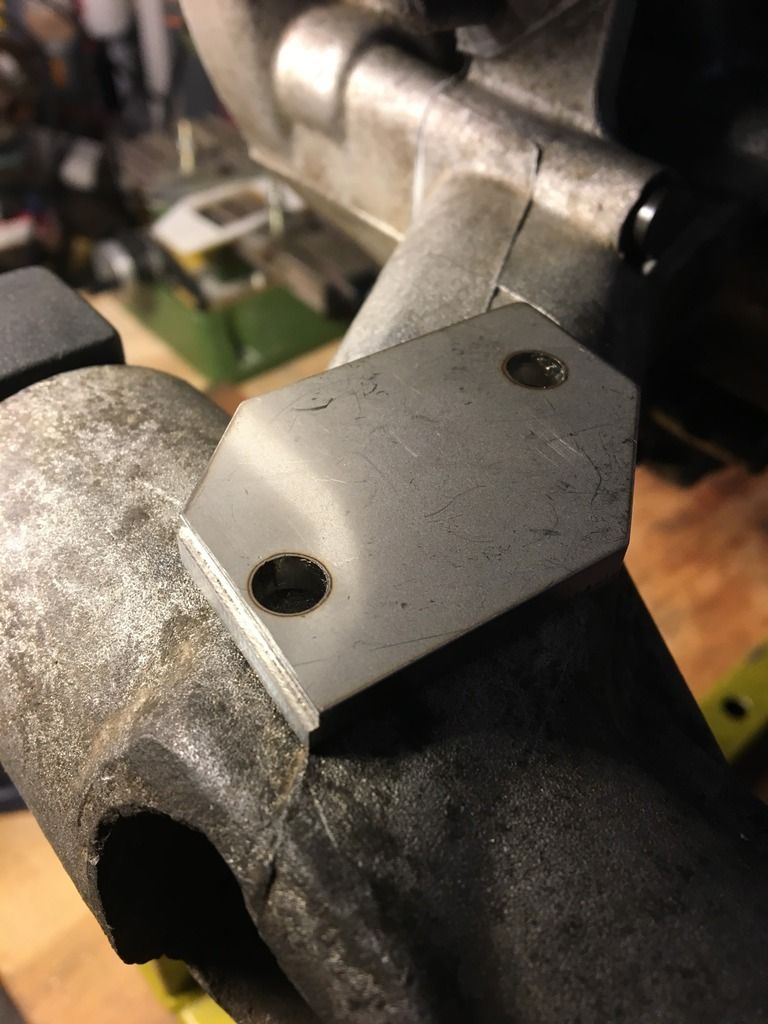
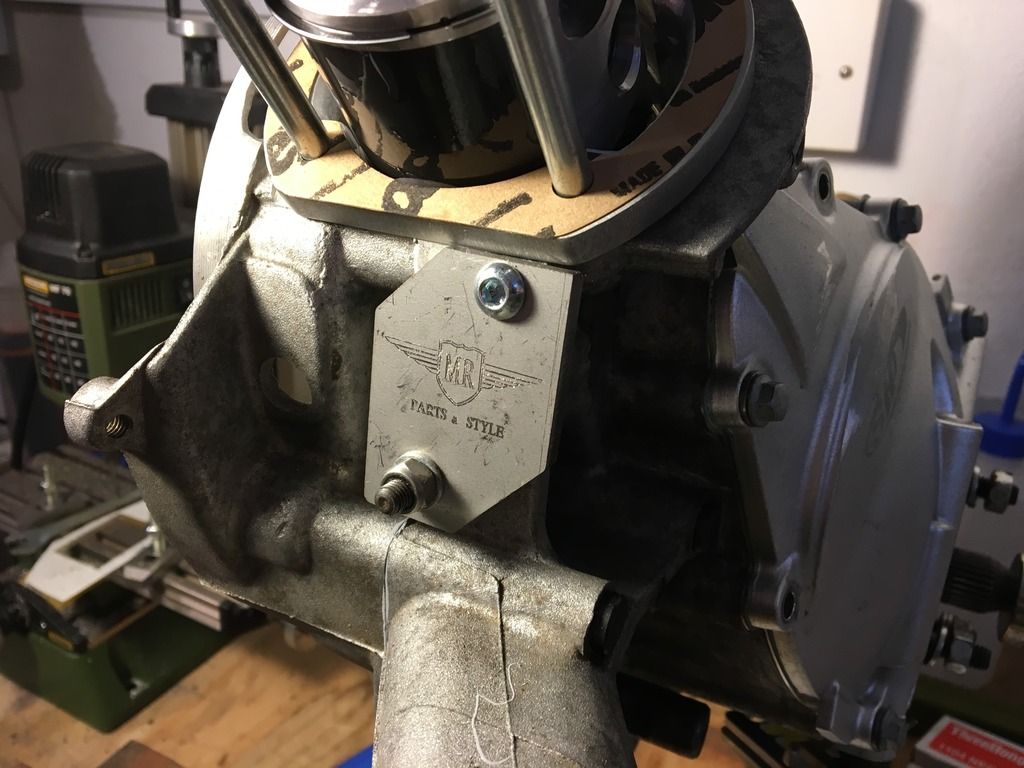
Not made a lot of progress of late. Stripped the top end off and something is catching slightly. It's difficult to tell if it is the crank webs on the casing or the flywheel on the stator coils, I didn't notice it until I fitted the flywheel though and am really hoping it's that so I don't have to split the casings. Until I've got a flywheel puller that fits though I'm at a dead end and so I turned my attention to the headset. A few months ago I bought a Mr Parts & Style master cylinder bracket. When it came I could see that it wouldn't fit and that the bolt holes didn't line up with the headset. The supplier was positive that he'd fitted loads of them and it must be something weird about my headset. Seeing as I seem to have to fettle almost everything on this scooter I'd thought I'd crack on and try and make the best of it. That and the new master cylinder turned up which gave me an incentive. Lots and lots of cutting, grinding, filing and trial fitting later the brackets finally on the headset and it's where it needs to be. Precision isn't a word I'd associate with a bit of bent stainless plate though and so if I didn't mind painting the headset I'd have gone for a weld on fixture. This was a tw@t to fit and even after all this I still had to turn down the stepped part of the lever pivot in the lathe by a couple of mm to get it to fit. 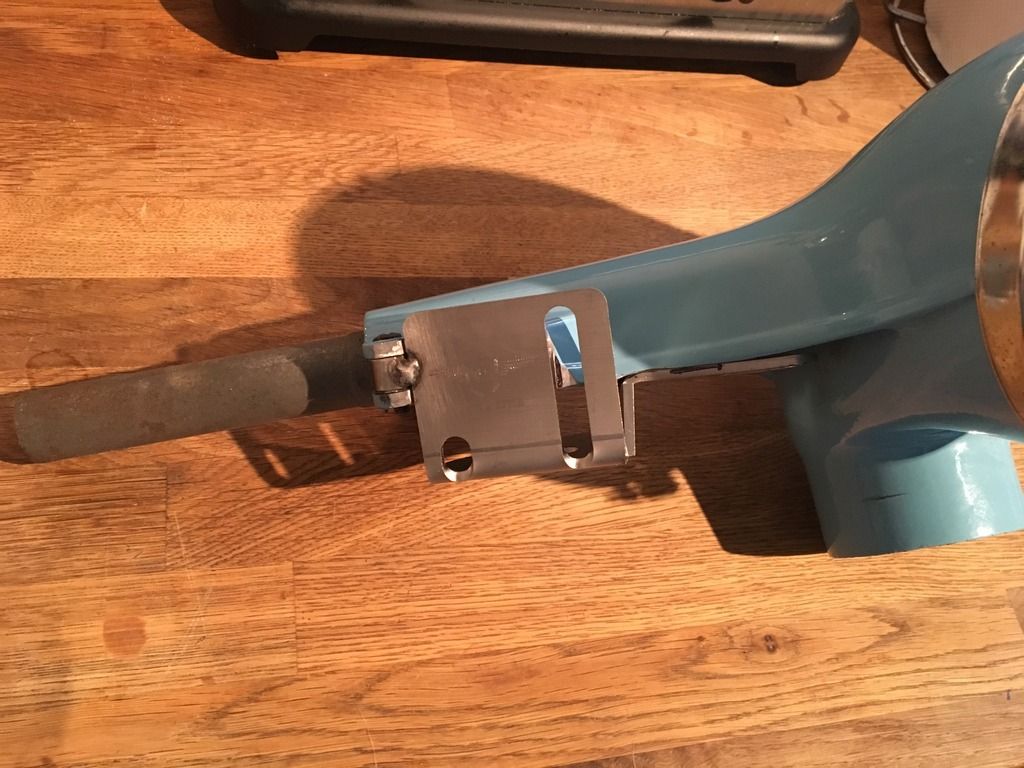 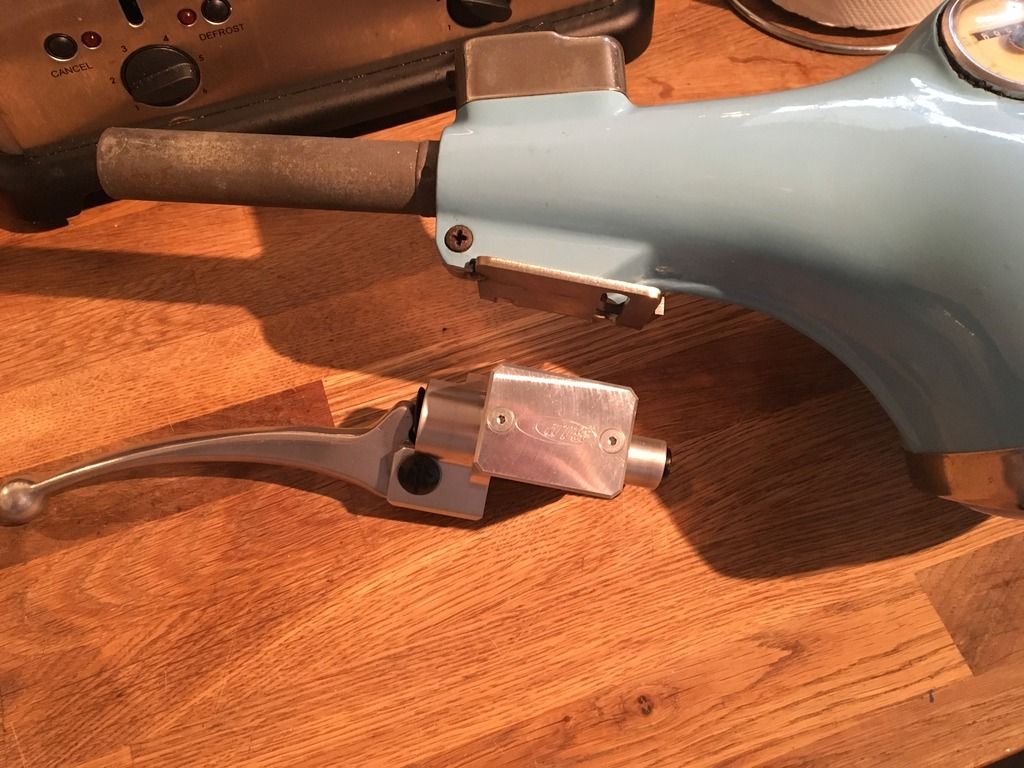 It doesn't line up underneath though and so next job is to make something up to solve that... 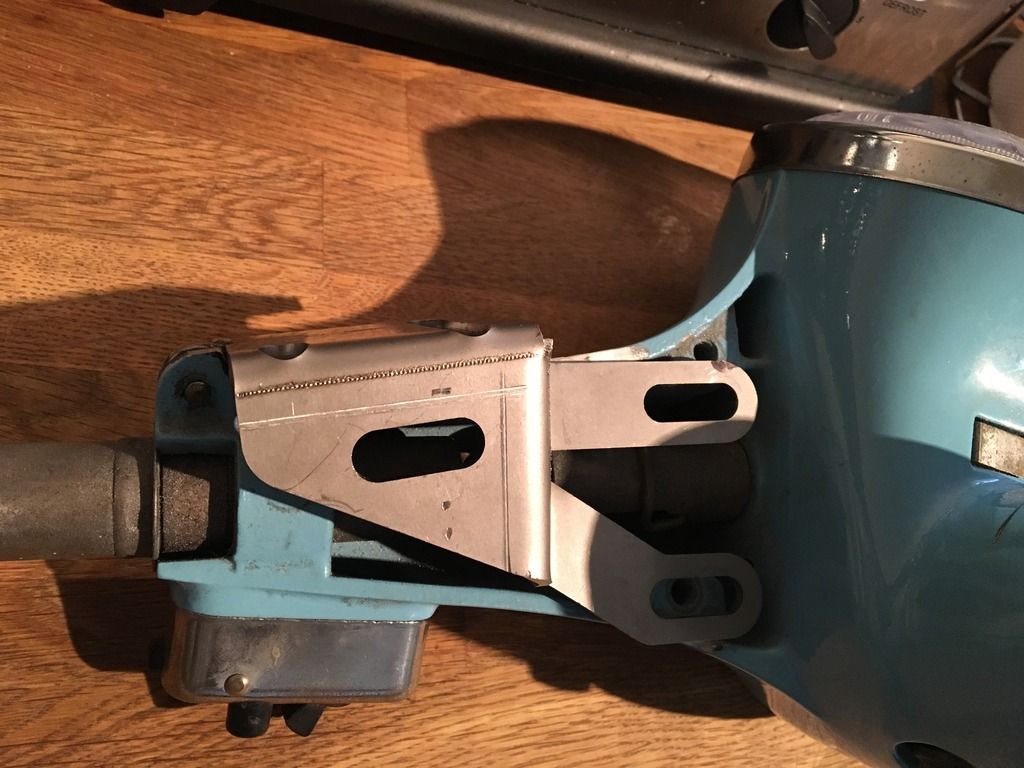 |
|