|
|
Post by sugarlump on Nov 29, 2009 4:05:51 GMT
In that case i'd probably make sure the angle was nicely cut, and clamp the whole lot down to the bench, i know that's easier said than done but if you get imaginative with bits of box and scrap you should be able to get it in a position where you can get a tack on it. What a lot of pro's do when building frames is put a single tack weld on then check alignment. If it's out gently persuade it right ;D Some times guys tack right angles joints at 85º cause when they come to fully weld it up it the shrinking action of welding will pull it back true. Pro's also have nice big metal welding tables with loads of movable toggle clamps when we have to contend with bits of wood and burnt fingers  ;D |
|
|
|
Post by tony on Nov 29, 2009 22:58:54 GMT
Ben get nick to speak to someone who has done this to a two stroke pipe. The thermal qualities change. I looked at this stuff the other day and picked up a car manifold thats been done by zircotec. its neat.. race cars use it...but our two stroke motors use heat in their running as you know. so he must be careful there.
|
|
|
|
Post by raff72 on Dec 8, 2009 9:09:54 GMT
That is one outstanding how-to, In a previous life I worked as a welder/fabricator and you have covered just about everything.
I think youll find that once you get the hang of tig you can do much more delicate work. I actually avoid mig these days as it is a pain to keep the heat out of the parent metal.
One trick I would add is to use heat sinks as much as possible but in balance with pre heating. The advantage with tig is that the heat is very precise and as long as you keep your stitches pretty small, as well as running the thinnest wire and electrode you can get away with you shouldn't have half as many dramas with warpage. Also, if you need to do some filling, give lead filling a shot rather than bog as the finish and longevity of your repairs will be superior.
And one last tip.... If youre gonna be doing precise stuff, get yourself an auto darkening helmet, you will be surprised how much easier it will make things
|
|
|
|
Post by sugarlump on Dec 8, 2009 17:11:12 GMT
That is one outstanding how-to, In a previous life I worked as a welder/fabricator and you have covered just about everything. I think youll find that once you get the hang of tig you can do much more delicate work. I actually avoid mig these days as it is a pain to keep the heat out of the parent metal. One trick I would add is to use heat sinks as much as possible but in balance with pre heating. The advantage with tig is that the heat is very precise and as long as you keep your stitches pretty small, as well as running the thinnest wire and electrode you can get away with you shouldn't have half as many dramas with warpage. Also, if you need to do some filling, give lead filling a shot rather than bog as the finish and longevity of your repairs will be superior. And one last tip.... If youre gonna be doing precise stuff, get yourself an auto darkening helmet, you will be surprised how much easier it will make things Good points raff, thanks. Deffo recommend an auto helmet too, they aren't even that pricey now - £50 will get you entry level one. I've been practicing my tig but for me i need the object on the bench so i can use the foot pedal (  ) so it's great for cases/manifolds/castings etc but i'm a bit of a way off using it on body work. One day when i've got the time ;D Good point about using lead too. I put some early beetle rear lights on to the back of my lambretta and used lead to smooth it all in so that i didn't have to get too cute with grinding the welds back - here's a vid i found a while back demonstrating what we're talking about - www.sovereigncoachworks.com/page2/files/page2-1002-pop.htmlAnd the lights (sorry tony and max, please don't spank me ;D ) 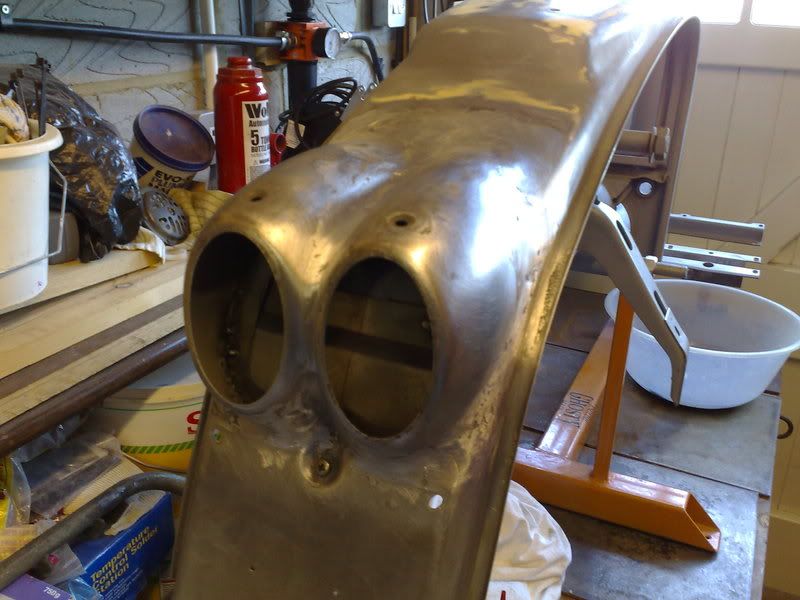 It's a bit time consuming and you need the right adjustable files but it's very flexible and hopefully won't crack like filler has the potential to. Frost's do a great starter kit for £30-40 iirc. Plus it's quite a satisfying process compared to sanding gob back for days ;D |
|
|
|
Post by jacques on Dec 13, 2009 15:59:50 GMT
Great stuff Ben! Excellent topic, very informative. I'm buying some shielding gas for my Clarke 130EN on Friday, woot! Can't wait to practice on some 1.5mm sheet.
-Jacques
|
|
|
|
Post by pedrodelgado on Jan 16, 2010 19:27:14 GMT
Great tips on welding for anyone with or without experience. It is well laid out. I recently did a course at college, best advice is practice as much as you can on scrap before attempting to weld the scoot, and make notes of the wire speed & amps so you know what settings to use (however do a practice run each time before you start). If you are looking for a good quality welder, thats easy to use & setup & will use mini & industrial gas bottles, then the Kemppi MinarcMig™ Adaptive 170 is a great welder, I use to have a cosmo, before I bought this & this knocks spots of it!! you can find out more about them at www.kemppi.comall the best ed |
|
|
|
Post by zbc on Feb 25, 2010 2:32:09 GMT
Heres something that I am getting sorted at the moment and may be helpful for you fellas in GB.
I am about to buy a small mig for panel work. I went to BOC and asked about hireage of bottles and filling them up and wow, talk about expensive. It works out to about $130/year hireage and $120 to fill the empty bottles with argoshield (Argon/co2 mix).
To me that seems like BOC have you by the short and curlys, you have to hire their bottle and no one else can fill the bottle with their gas, BOC will not allow it.
Anyway, I managed get my hands on an old 9 litre oxygen bottle from a mate that had it sitting in a garage. It has been there for years.
I called a fire extinguisher tester/refiller and priced the cost to test, fill with co2 and put a co2 valve on the bottle. Only $160.
The advantage is I get to keep the bottle and refill it when its empty. No rental cost and Co2 shielded welds are just as good as argoshield welds.
|
|
|
|
Post by swallow on Mar 28, 2010 18:10:49 GMT
thanks again Ben for the guide. I've finally got round to switching on a welder to repair my rotten frame. The results on the first area I tackled are too embarrassing to post but nothing that some time spent on the grinder won't sort out. Moving on to deseaming the rear next  |
|
|
|
Post by motovespa on Jan 31, 2011 12:34:05 GMT
I managed to completly miss this guide over the last couple of years, anyway I just found it and it's wicked, nice work Ben! It gives me inspiration for learning! I think I'll start off with the edging tools first before I go warping any Vespa frames  Rog |
|
|
|
Post by firej on Feb 1, 2011 3:08:03 GMT
the Arrow is so you dont forget which way to go!!! ;D
|
|
|
|
Post by sugarlump on May 18, 2011 13:20:25 GMT
Been working on a bit of a shit heap lately so thought i'd post a few pics and explanation on how i tackled it... Side impact dent.
The left bubble on this smallie had taken a nice whack from a car and needed pulling out. The problem here is there isn't much room to get a swing with a hammer/dolly/etc on the back... 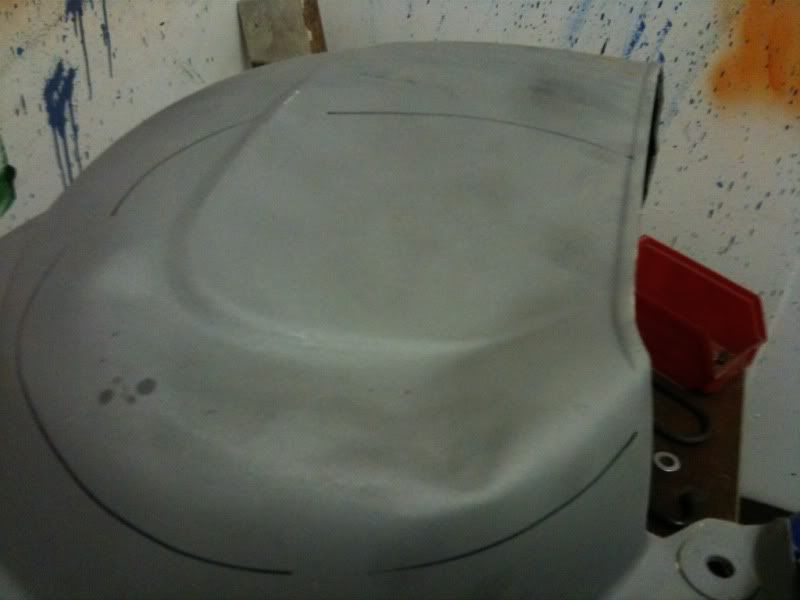 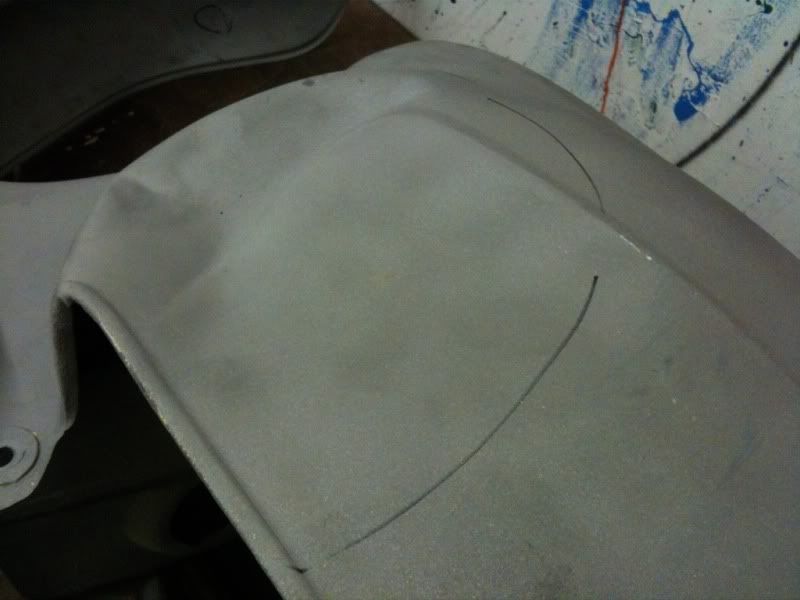 A trick i got out of an old school 70's bodywork book is to weld a series of washers in the low spots and progressively pull it out with a slide hammer. The washers will then either twist off or need a quick buzz with a cutting disc. If the dent is a long crease you can join the washers with a bit of rod and pull the lot together. 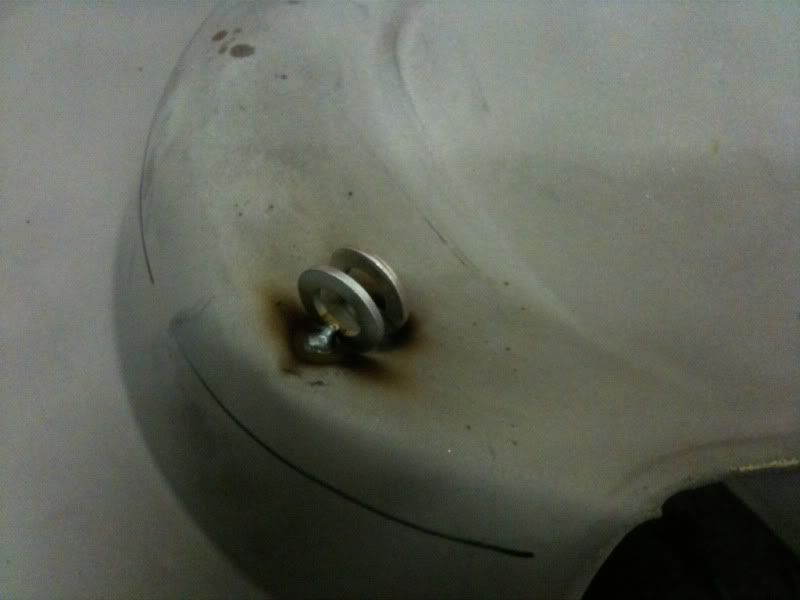 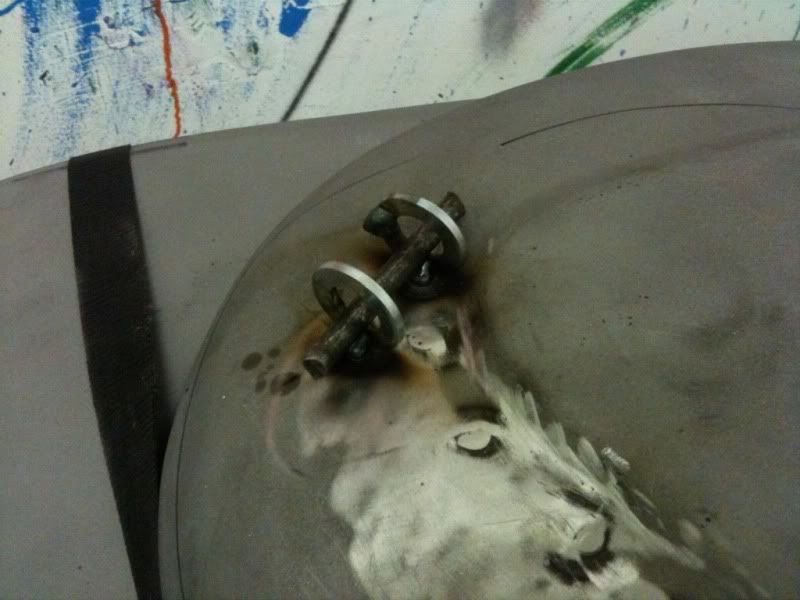 Cheap slide hammer is £20 from machine mart or screwfix... 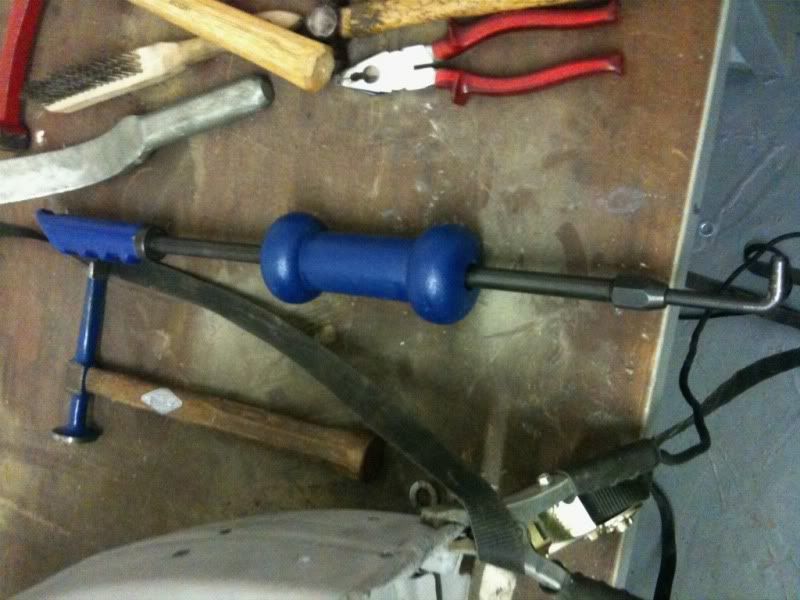 The bubble still needs dressing with a hammer and dolly and will still need a skim of gob but it's passable 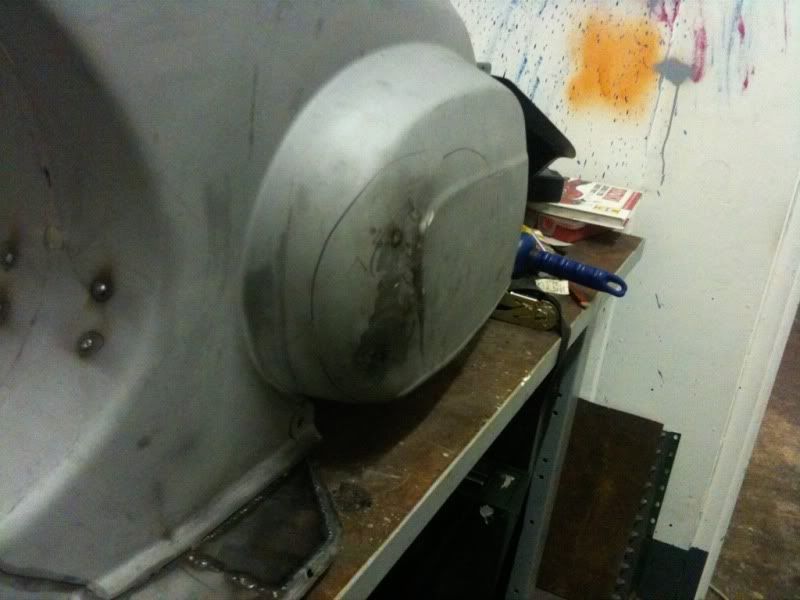 Copper heat sink. Copper heat sink.
The legshield beading had previously been welded and ground back within an inch of its life and looked like a sieve. Use a bit of plumbers 8mm copper pipe clamped to the back as a heatsink or watch the beading disappear with the slightest mention of welding. It also stops the weld building up on the reverse which is then a cunt to grind out  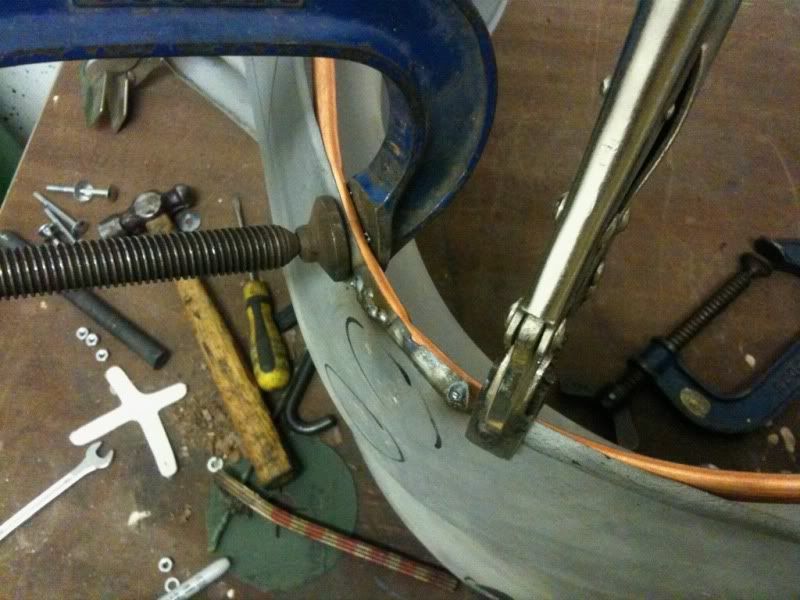 Floor brace Floor braceQuite often i see splits on the rear of the floor where it joins the body which is caused by the stand repeating clanging up against the underside. Once a bit of water gets inside the braces they'll rust from the inside out and it'll need replacing. I should note that SIP sell a set of x and k braces for €30 but if you can't wait five days here's how i did it. Knackered brace with was so thin even a tack weld at the lowest setting was blowing holes. The rust had permeated the actual floor too so i carefully cut with a 1mm disc both the brace and the floor out leaving the beaded edge intact so i could weld in a flat bit of steel first for the floor and then fabricate up the brace to weld over the top (the same way it was originally). 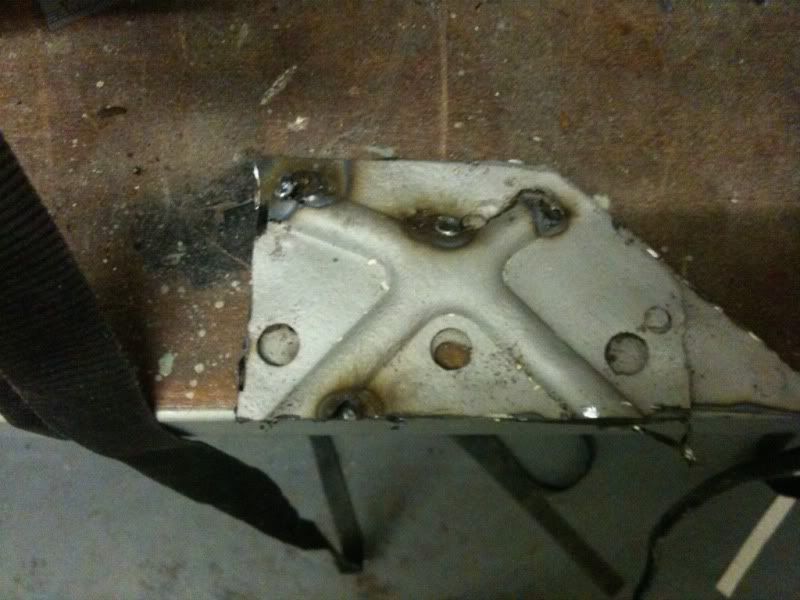 Using a pencil and paper, make a rubbing of the inside of the X brace and transfer to card to make a template. Cut two pieces of hardwood (about 150mm square/20mm deep, bigger than the finished brace basically) and clamp them together. Drill four alignment holes and bolt the lot together. Transfer the template shape on the wood and using a 13mm wood drill bit in a pillar drill, roughly chain drill the shape out. Finish to the outline of the template with chisels and files. The principal here is to clamp a piece of 1mm steel sheet in between the two bucks (bits of wood) and then bash the shape out using a home made punch which is just a bit of 10mm bar which i rounded the end off with a grinder (upper left in the picture below).  Once you've given it some good Roger Melly with a hammer, disassemble and put the metal punch upside down in a vice and planish the brace with a hammer to finish. Cut to size and drill a few holes to plug weld it to the underside... 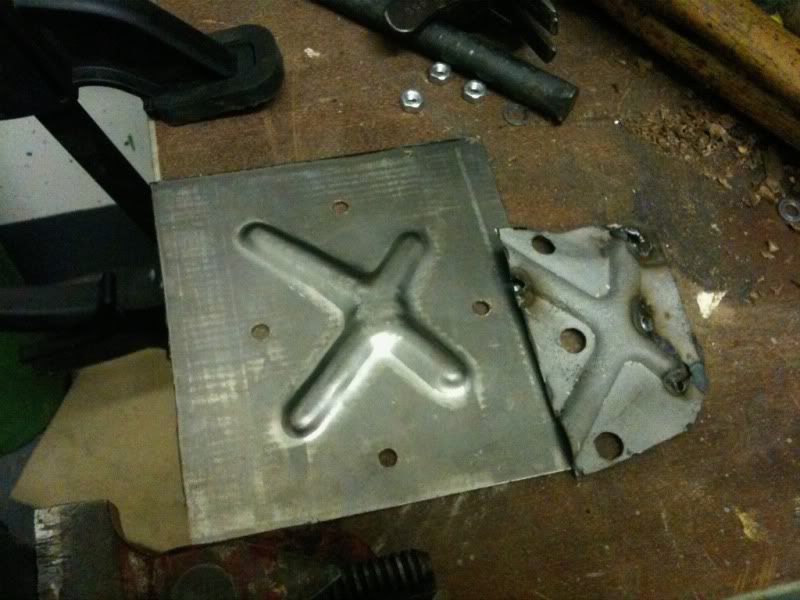 Not exactly concourse stuff but it'll get me out of trouble and do the job... |
|
|
|
Post by gioia on May 18, 2011 15:37:05 GMT
Nicely done mate...wish my skills where a fraction of yours, so thanks for sharing. |
|
|
|
Post by amazombi on May 18, 2011 16:02:29 GMT
That bubble is just amazing.
|
|
|
|
Post by madmax on May 18, 2011 16:04:17 GMT
Nice one Ben. Was wondering how to do something similar on the bubble on my V90, now I know.  ;D |
|
numpty
SS 90
 bloody cheep rubish from ebay wont stay lit
Posts: 231
|
Post by numpty on May 18, 2011 21:25:48 GMT
that is some mighty fine work there  thanks for sharing |
|
|
|
Post by iowsean on Jun 16, 2011 21:15:43 GMT
I`m a stell fabricator/welder and all i can say is 10 out of 10 for all the good tips.
make sure you get some scrap metal and keep trying on the scrap till you get it right.... it will come in the end
|
|
|
|
Post by sugarlump on Nov 5, 2011 23:14:33 GMT
More 'how-to' pics. This one belongs to barney and nearly broke me, it took considerably longer to finish than I hoped but it was so straight except for the rust it was worth saving from the scrap heap. Story goes it was a prop at a film studio and had been submerged in a swimming pool then left, which explains the inside out tin worm... 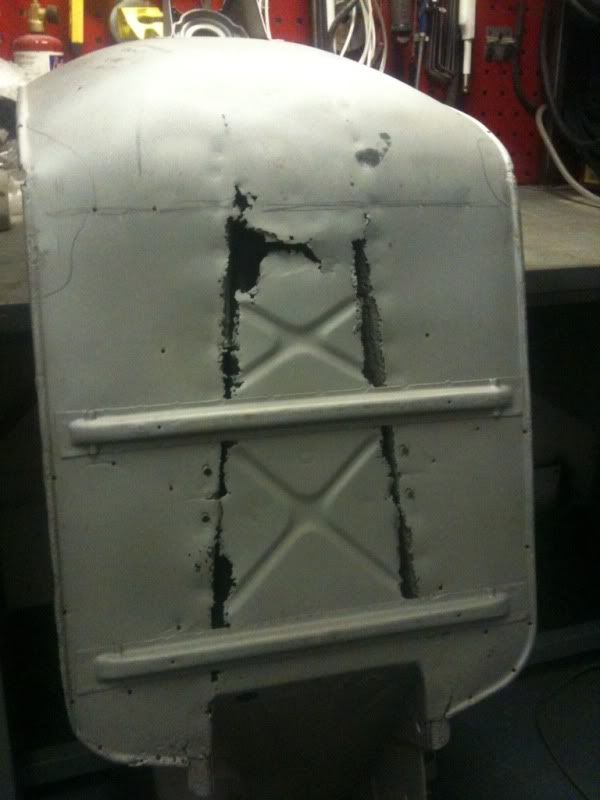 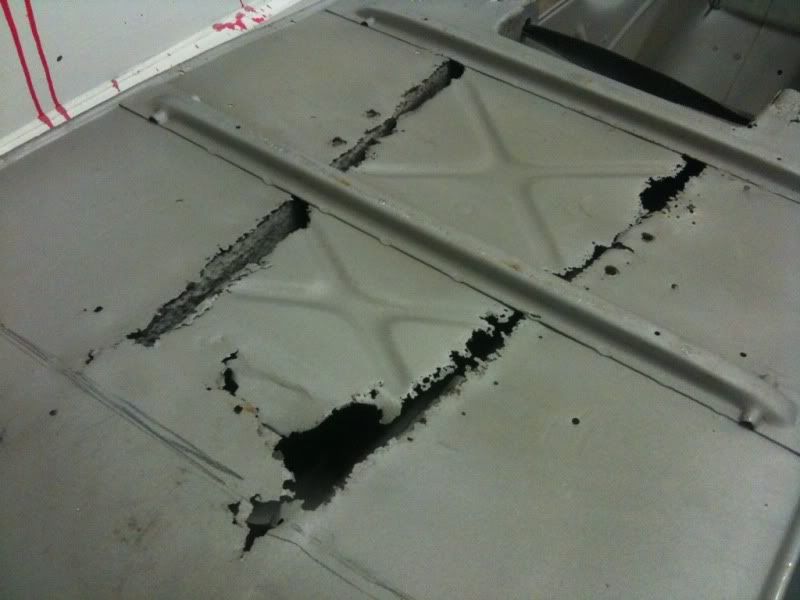 Not a pretty sight with the floor off, serious integrity issues, remember this tunnel looks A1 from the outside! 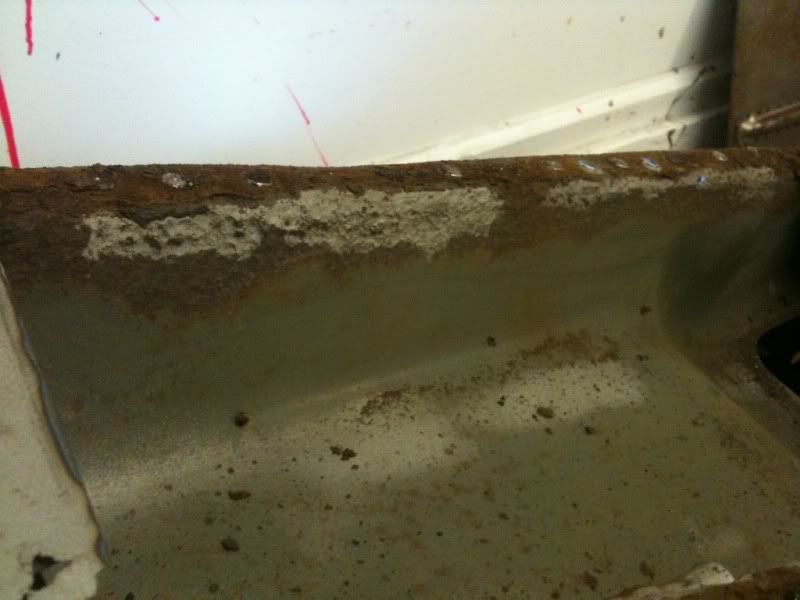 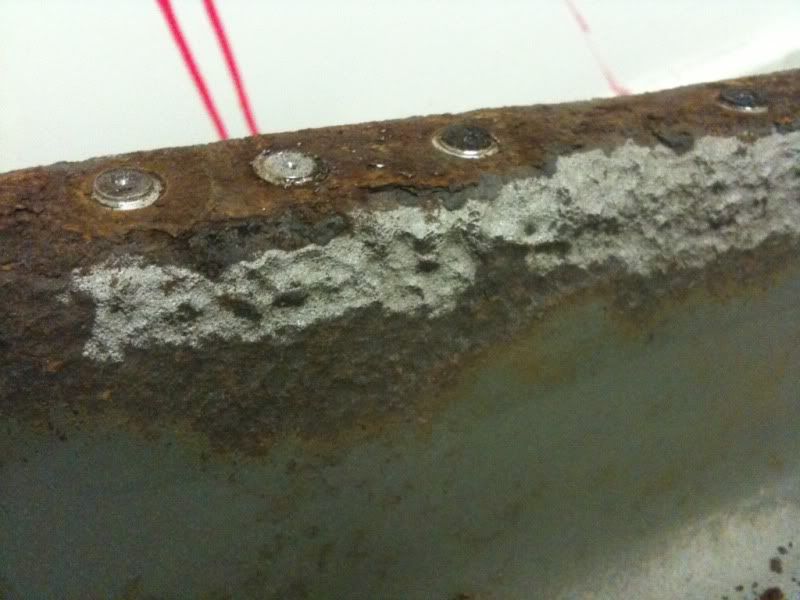 Carefully chopped off the flange 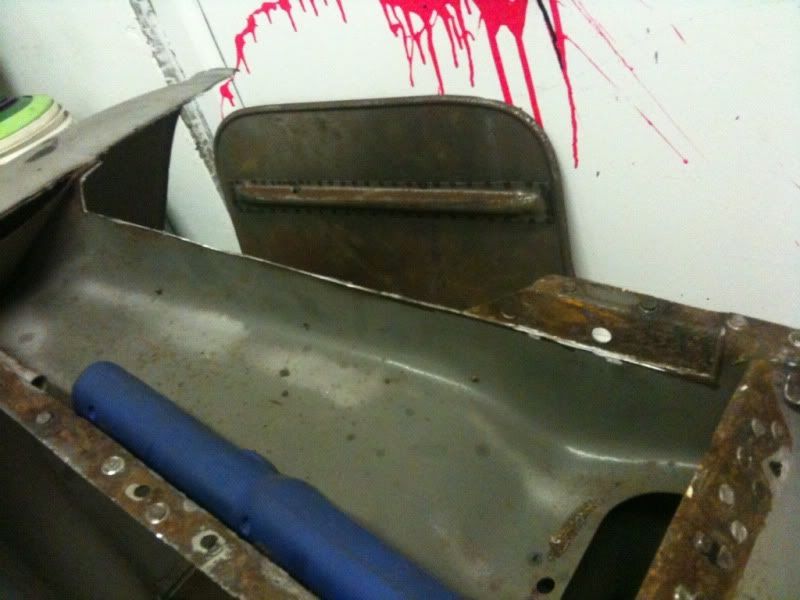 In order to replicate the new piece I used a tool I made a while back which basically works like a deep throat, wide jawed vice. There are three bolts on the back which close a loose piece of angle iron against the other welded stationary side (plans of which are on the welding forum if anyone's interested). 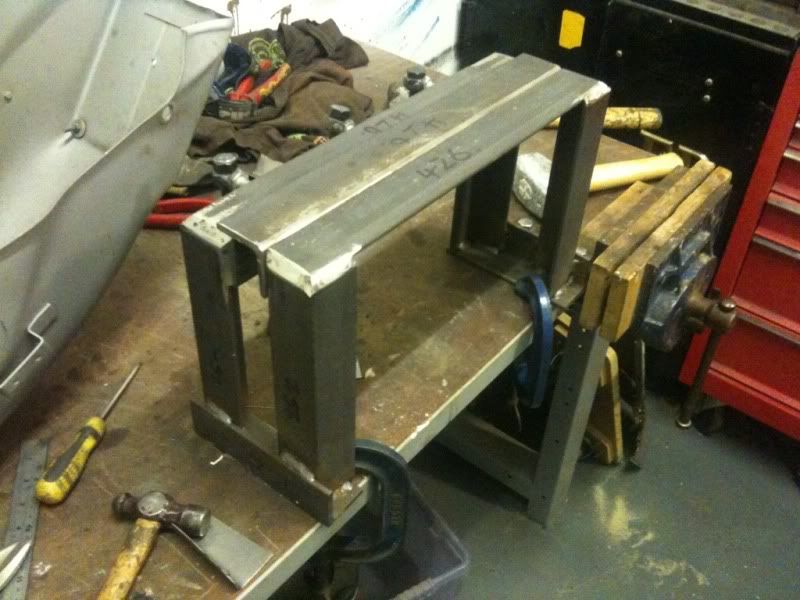 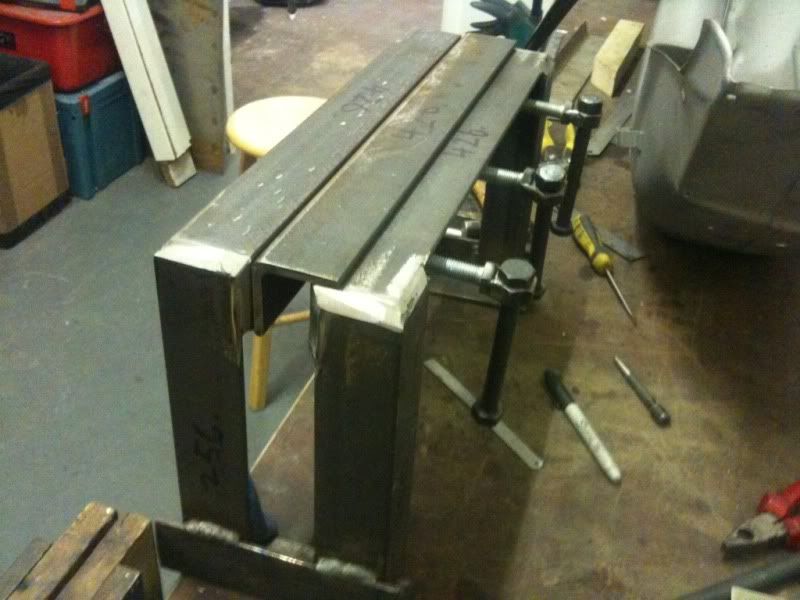 I rounded off the moving side with a grinder to match the curve of the tunnel and hammered over a piece of metal the same thickness as the tunnel, but larger in size then the bit I cut out. I figured it would be very hit or miss to cut it to the exact size and try to get the curve in the right place. Luckily I have a plasma cutter and using the rusty off cut as a template I shaved the new bit close to size then squared the sides with a belt sander so it was nice and straight. 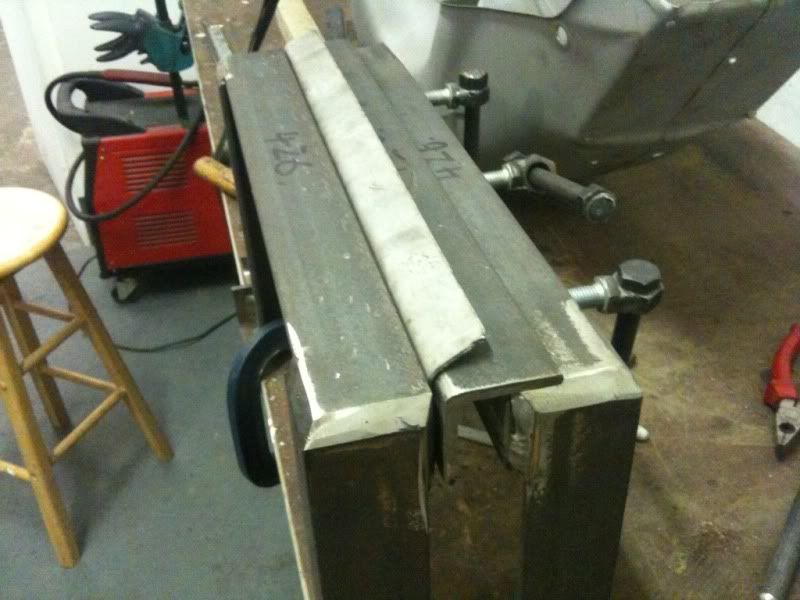 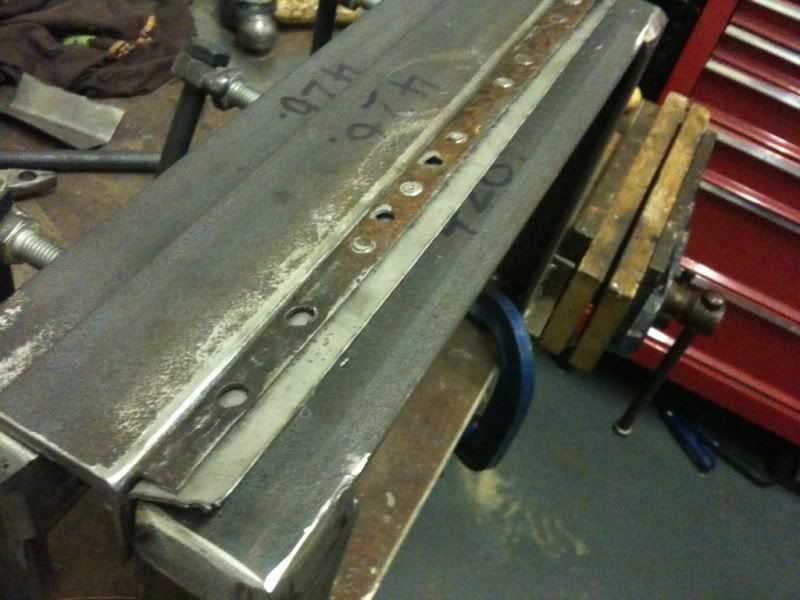 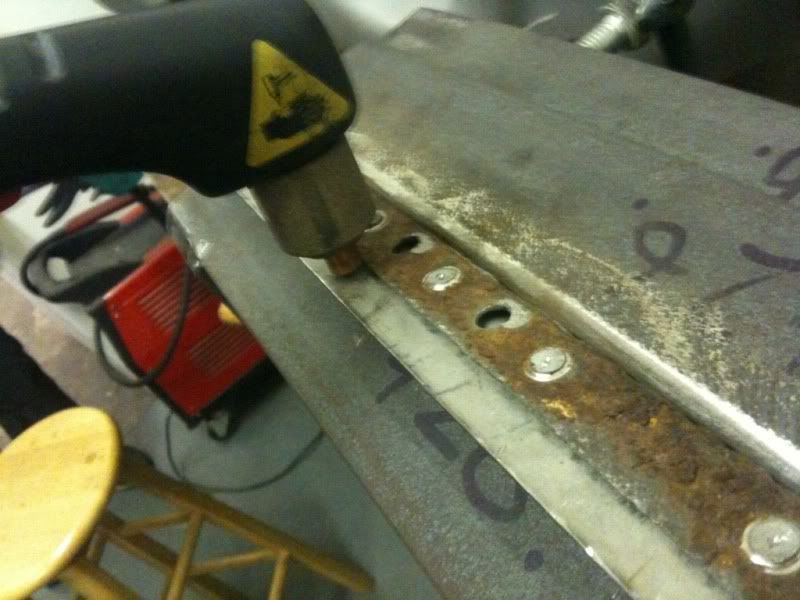  You can never have enough clamps, fact!  Get clever with copper plates so when you weld up to the edge of joins they don't dissappear or undercut  Slowly but surely doing 1" runs spread out over the course of many hours  Similar story with the other side except there is an external brake pedal on this lardie which enters through a welded tube to complicate matters so needed two pieces 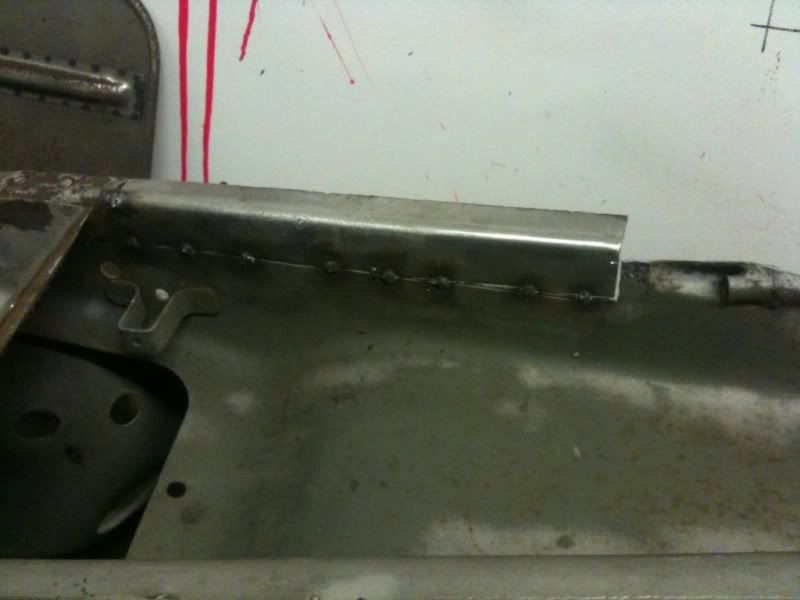 Had an iffy feeling the rust went beyond where the replacement floor would cover so took the plunge and cut an inspection window, not a happy sight 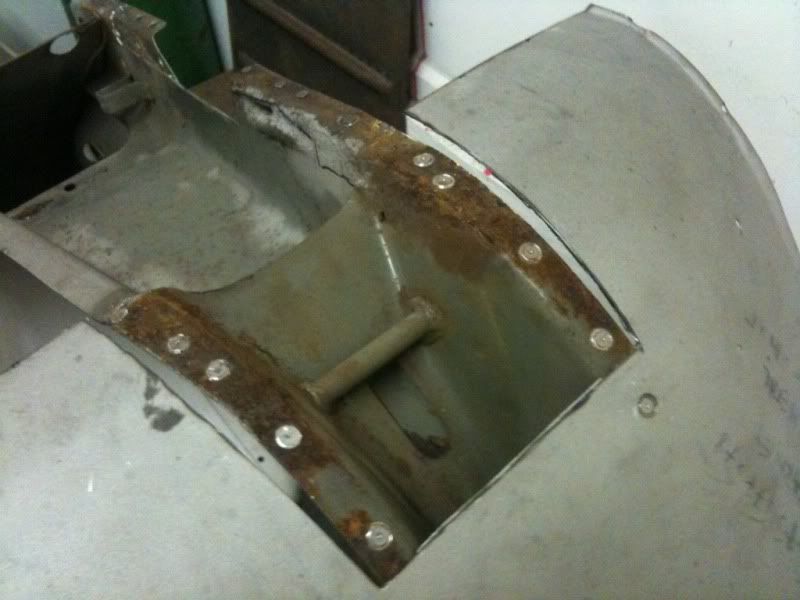 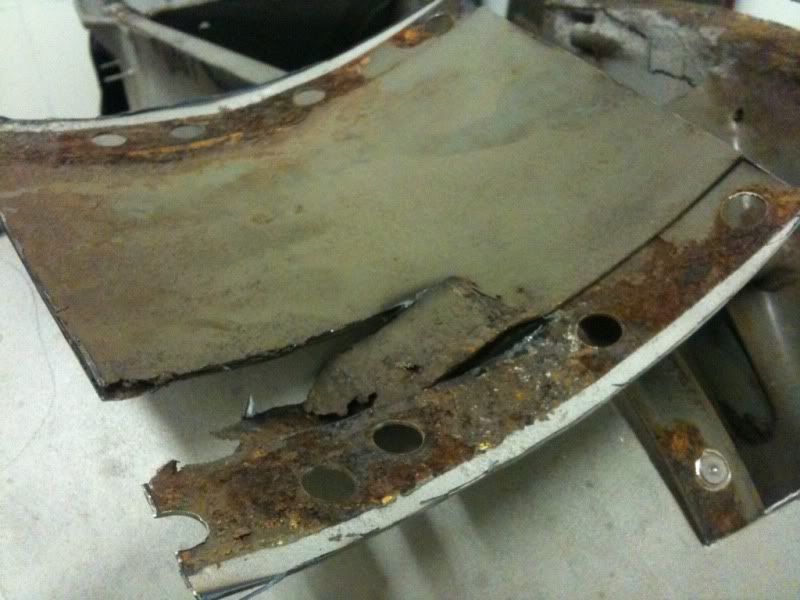 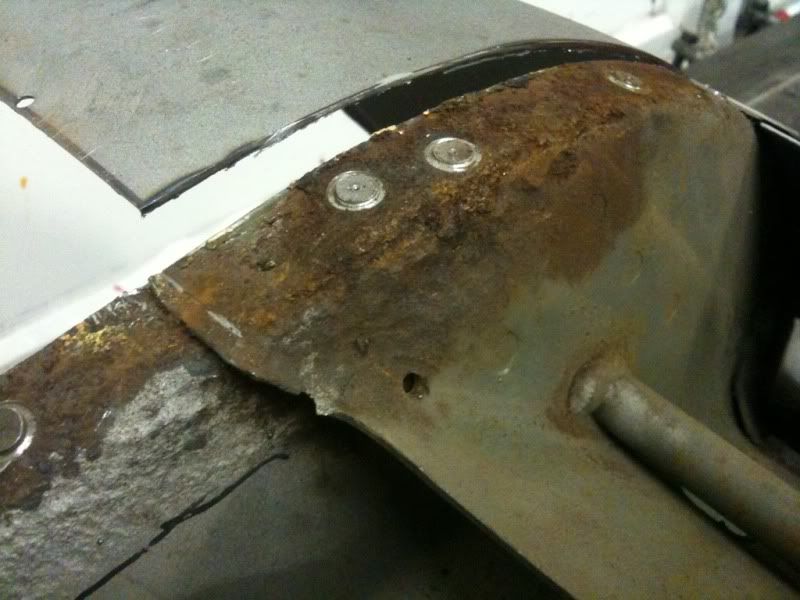 I'm just gonna keep cutting till it's not brown anymore 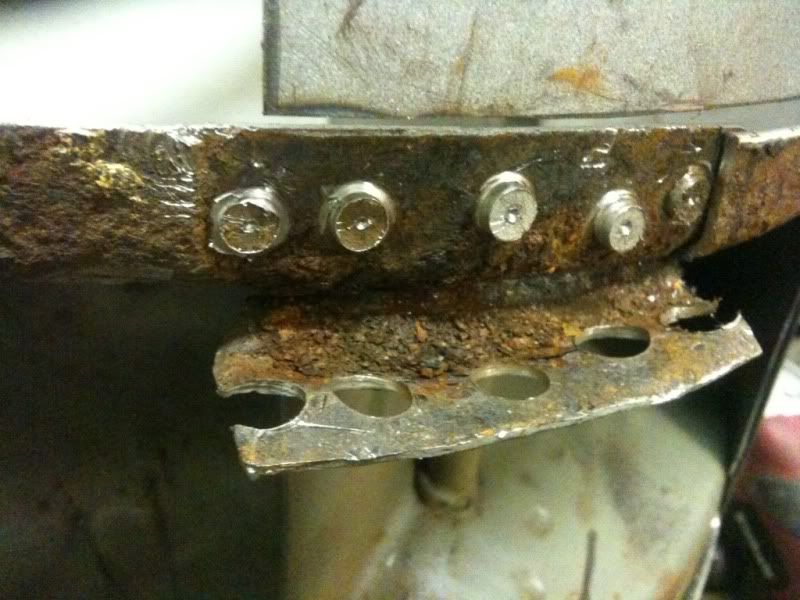 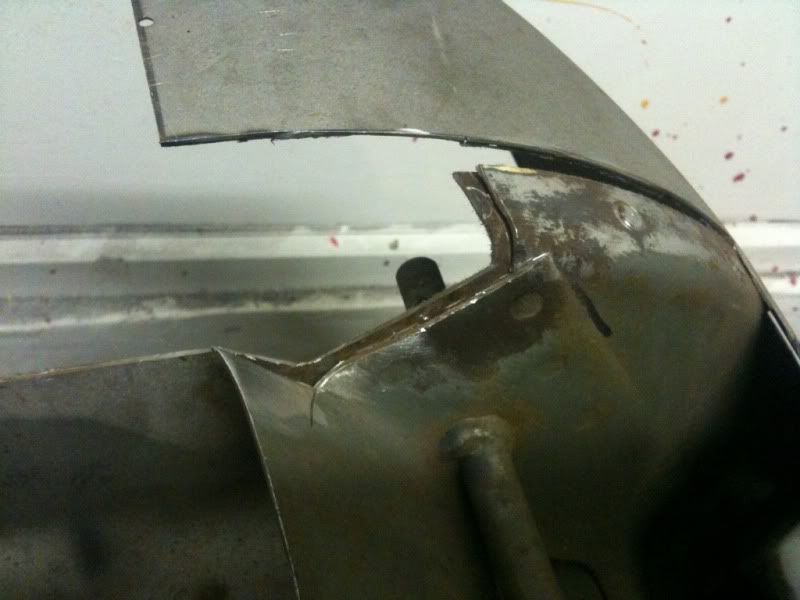 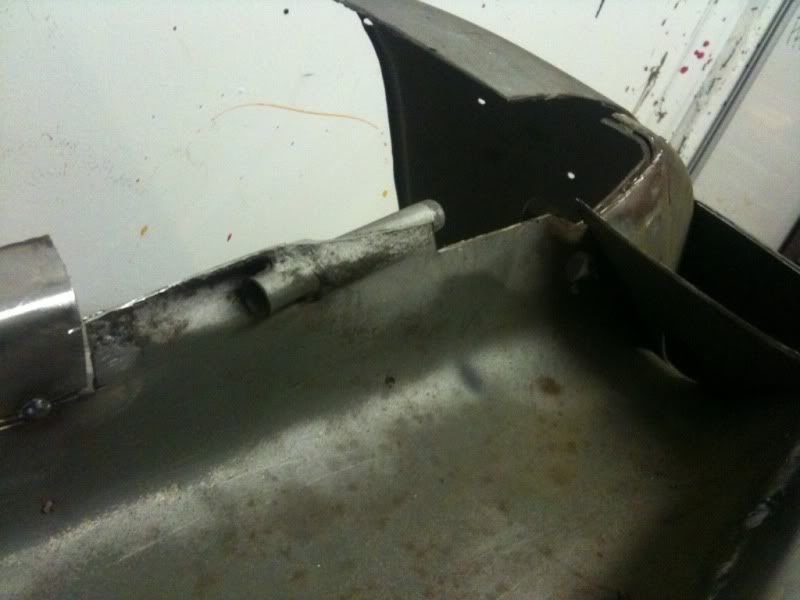 At last, new metal going in! 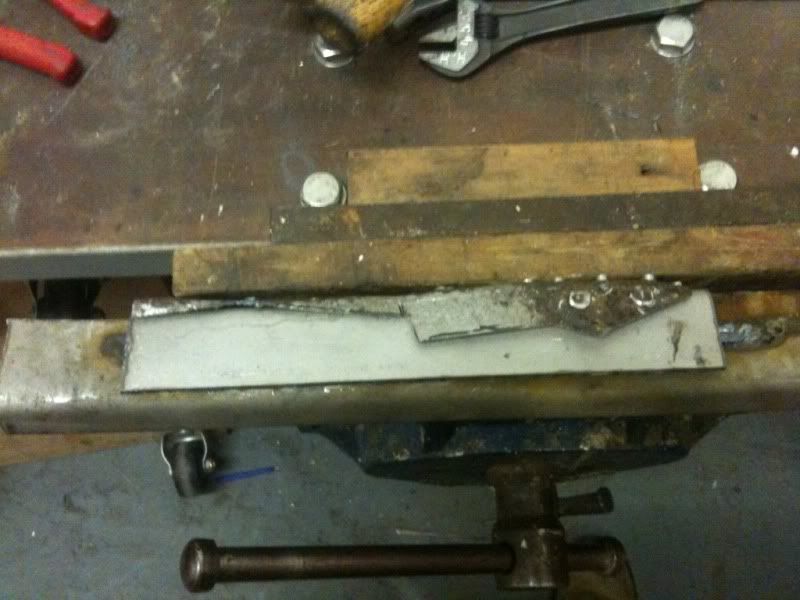 Dry fitting tricky bits 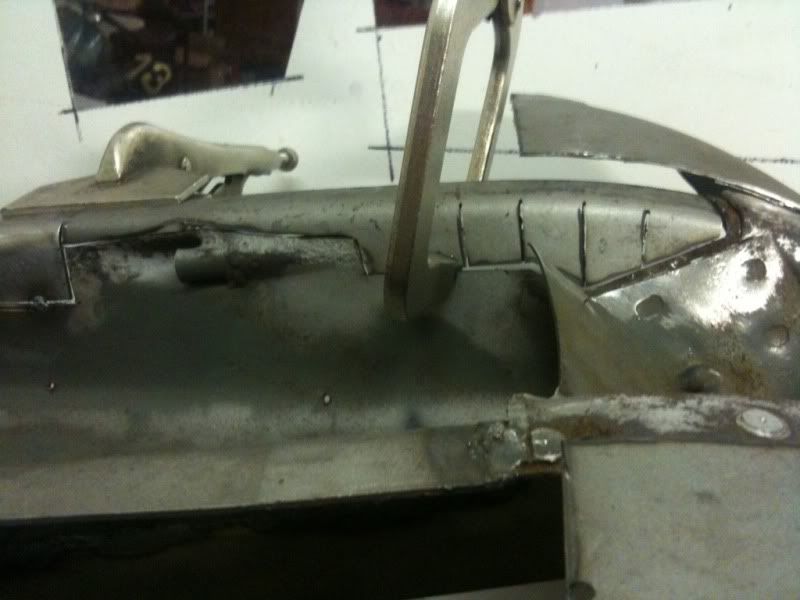 Welded up over time 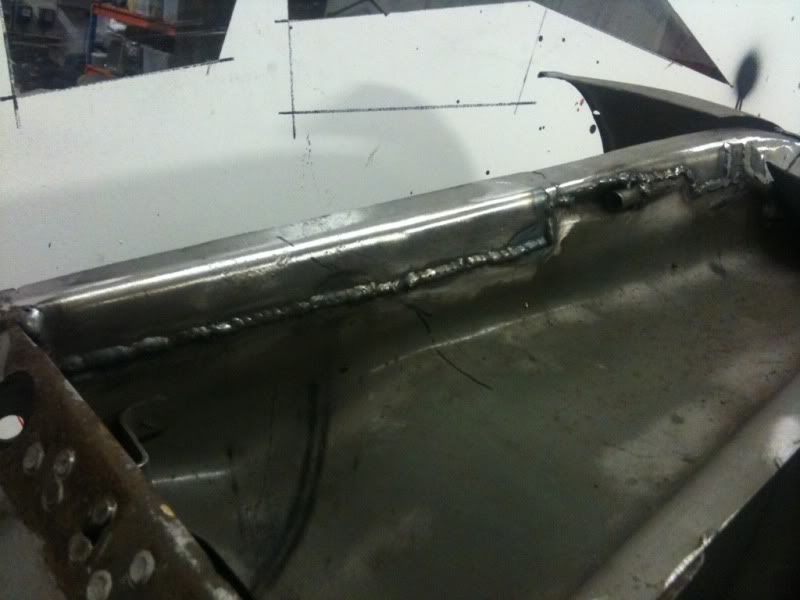 Undersealed (note the bridge support section was refabricated too) 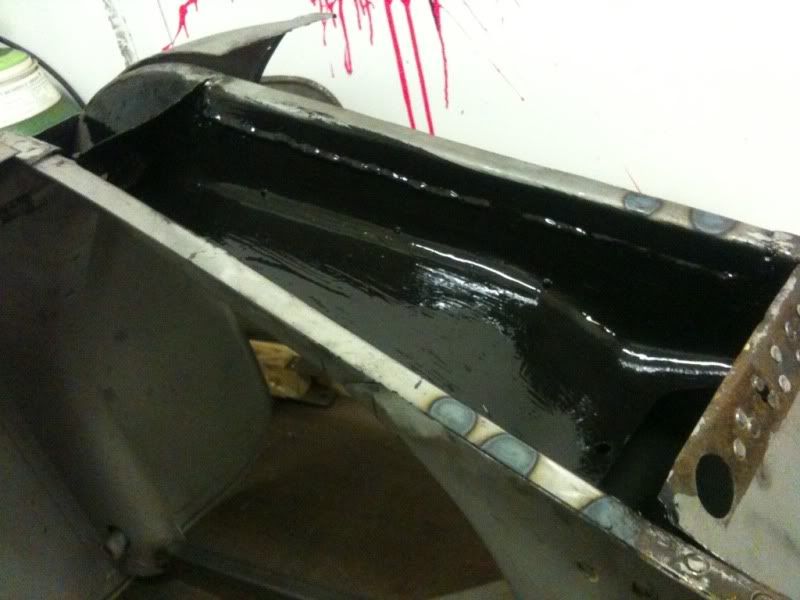 New metal (this bit is in two layers as per original) 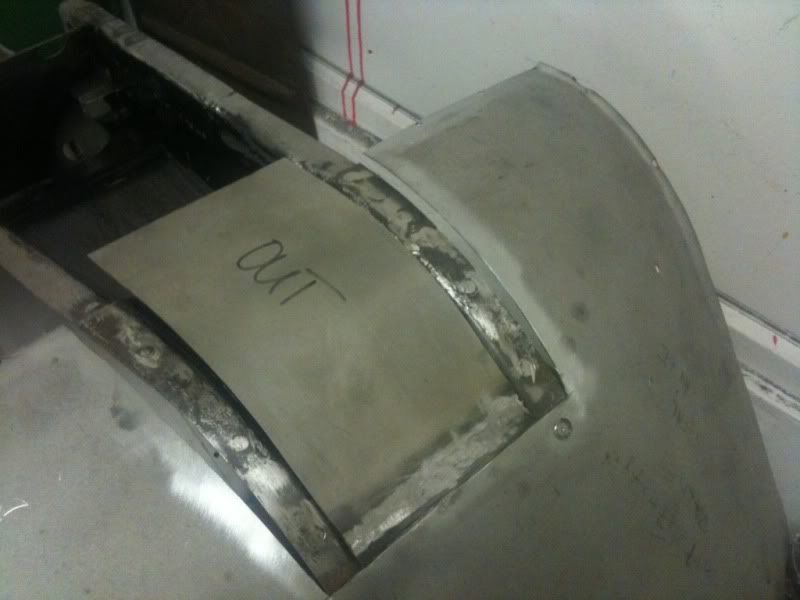 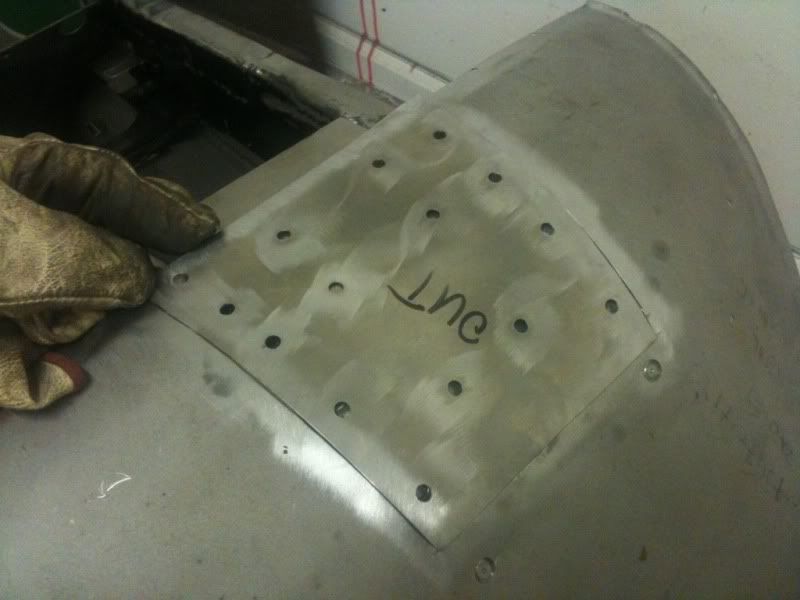 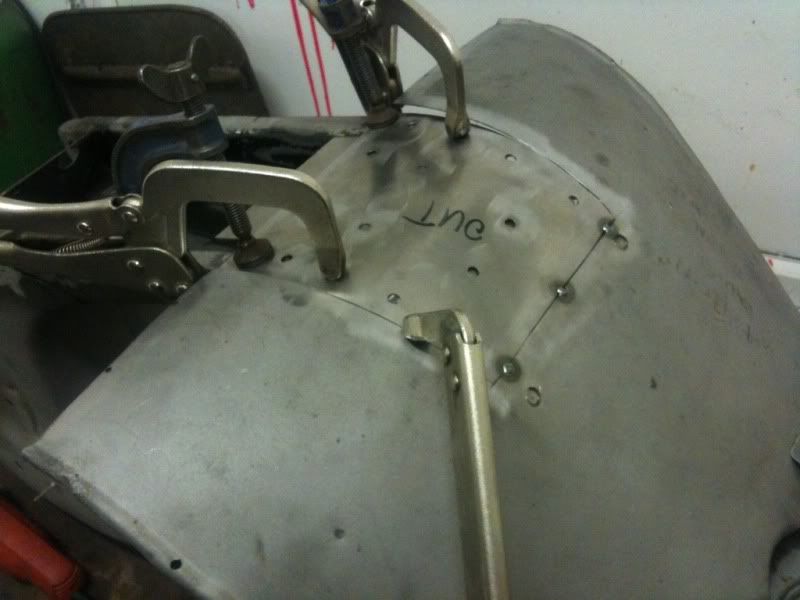 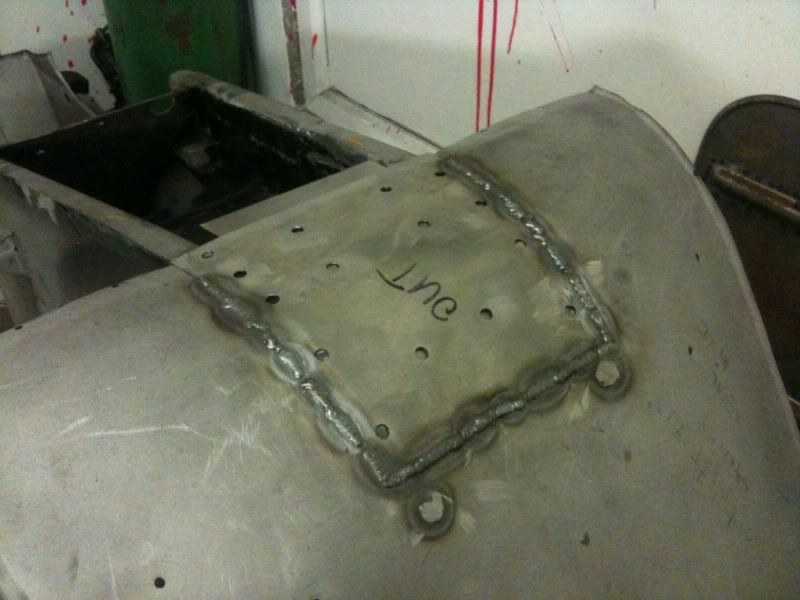 Dry fitting the floor, all plug weld holes need drilling, stand holes need marking, section where the rear attaches needed cutting, bending and drilling etc 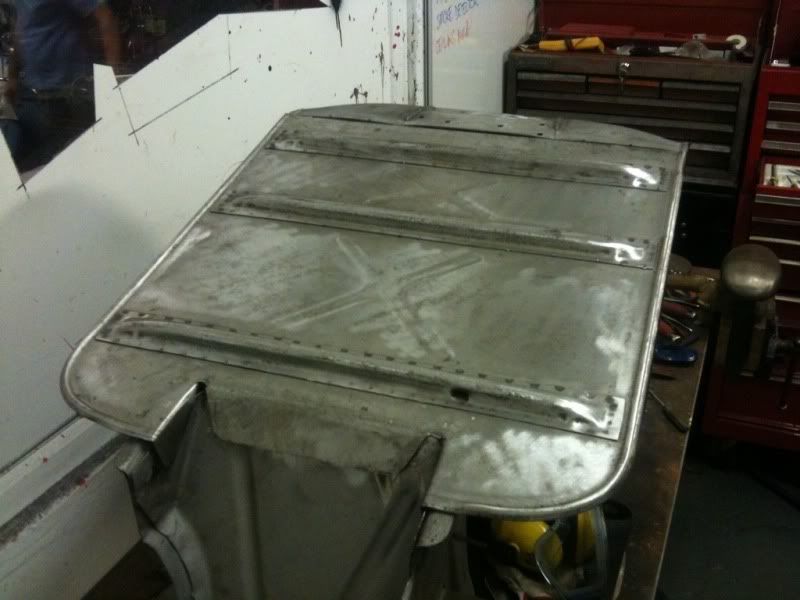 Beginning to get there (note there are sections on both sides of missing leg shield beading that needed fab'ing up) 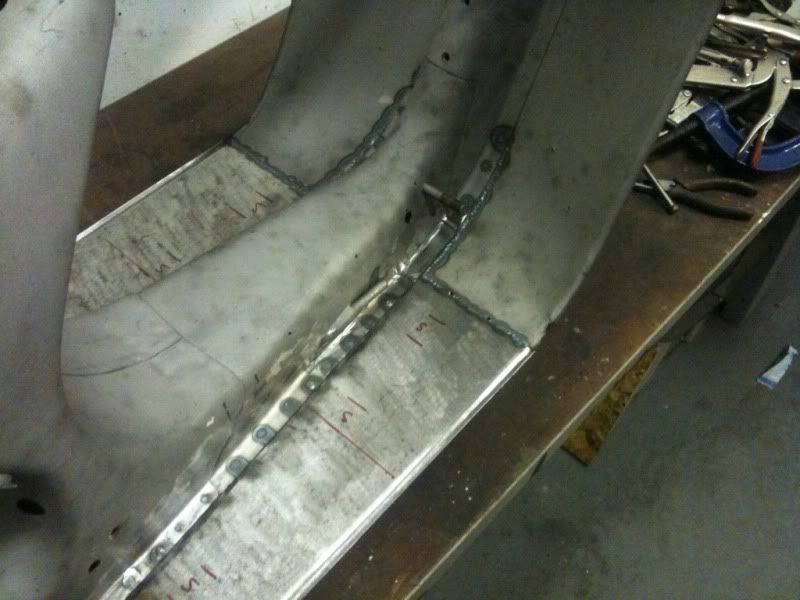 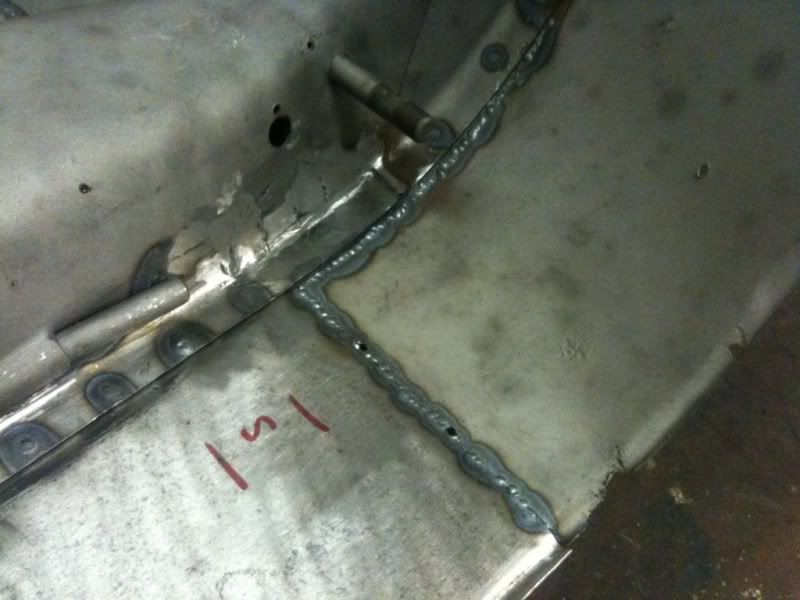 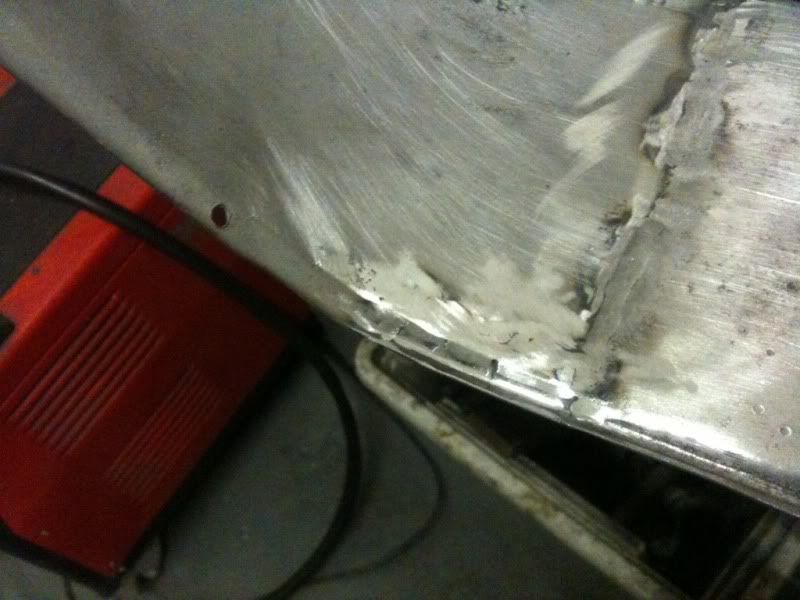 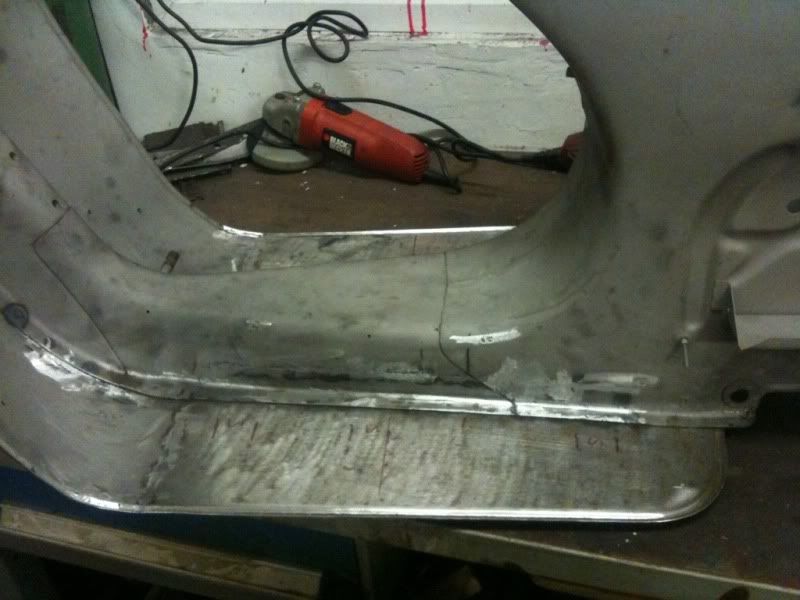 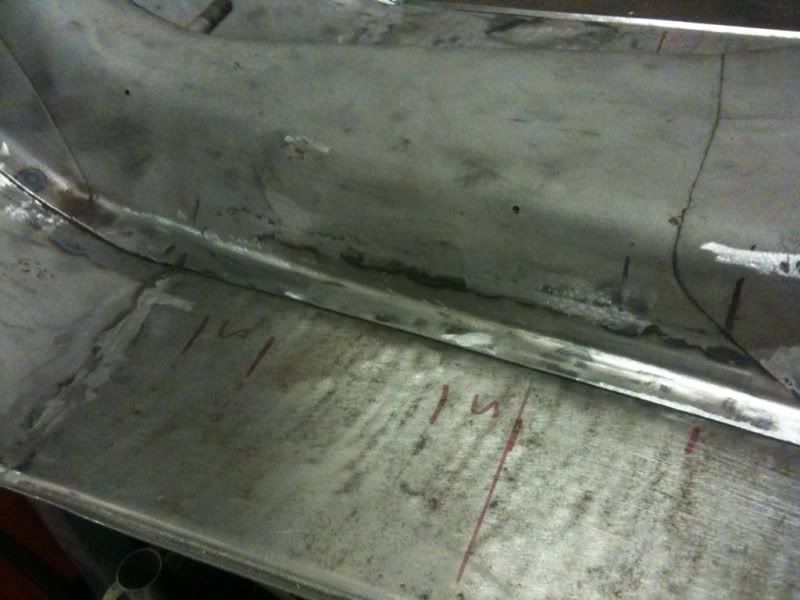 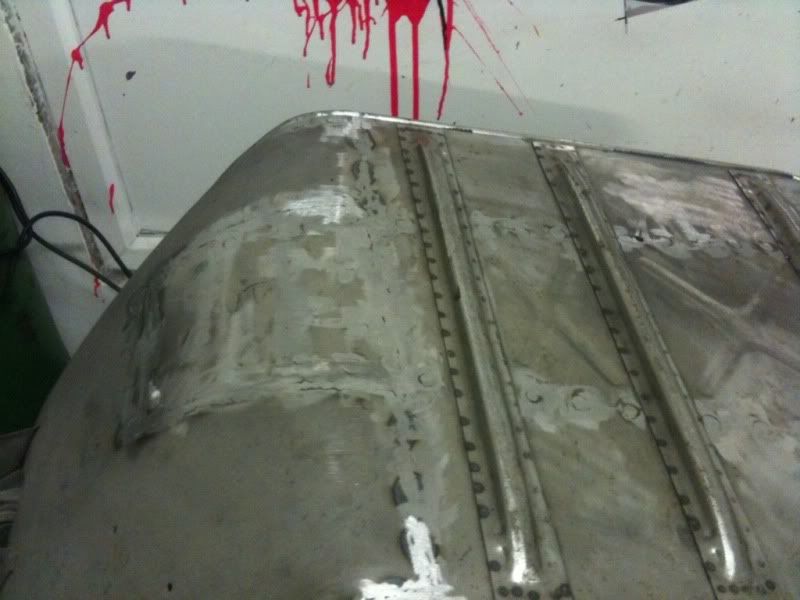 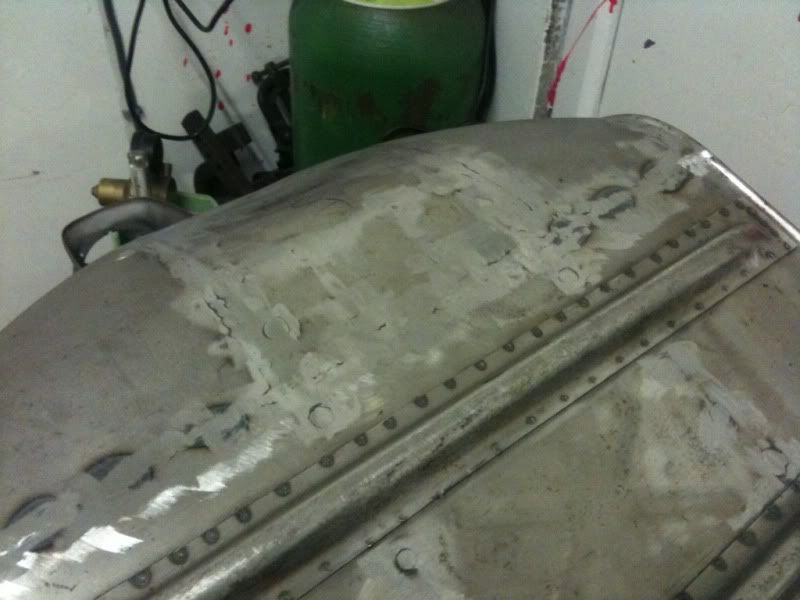 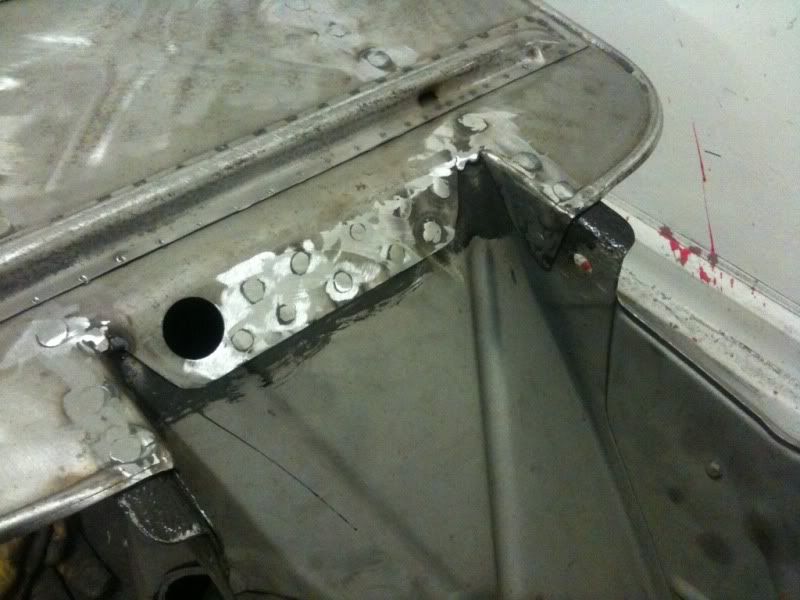 |
|
|
|
Post by amazombi on Nov 6, 2011 5:58:54 GMT
You're mad.
|
|
|
|
Post by madmax on Nov 6, 2011 6:51:27 GMT
Great work Ben.  |
|
|
|
Post by amazombi on Nov 6, 2011 8:16:19 GMT
Even though I don't think I'll ever bee man enough for that sort of surgery: Is that a bar you welded in between the front and the seat arch? Does that stop the frame from bending once the stiffening box section no longer is a box section?
Frankly, I enjoy working with sheet metal, but I wouldn't have the nerve to tackle a job like that. Your result is really amazing.
|
|


 ;D
;D


 ) so it's great for cases/manifolds/castings etc but i'm a bit of a way off using it on body work. One day when i've got the time ;D