|
|
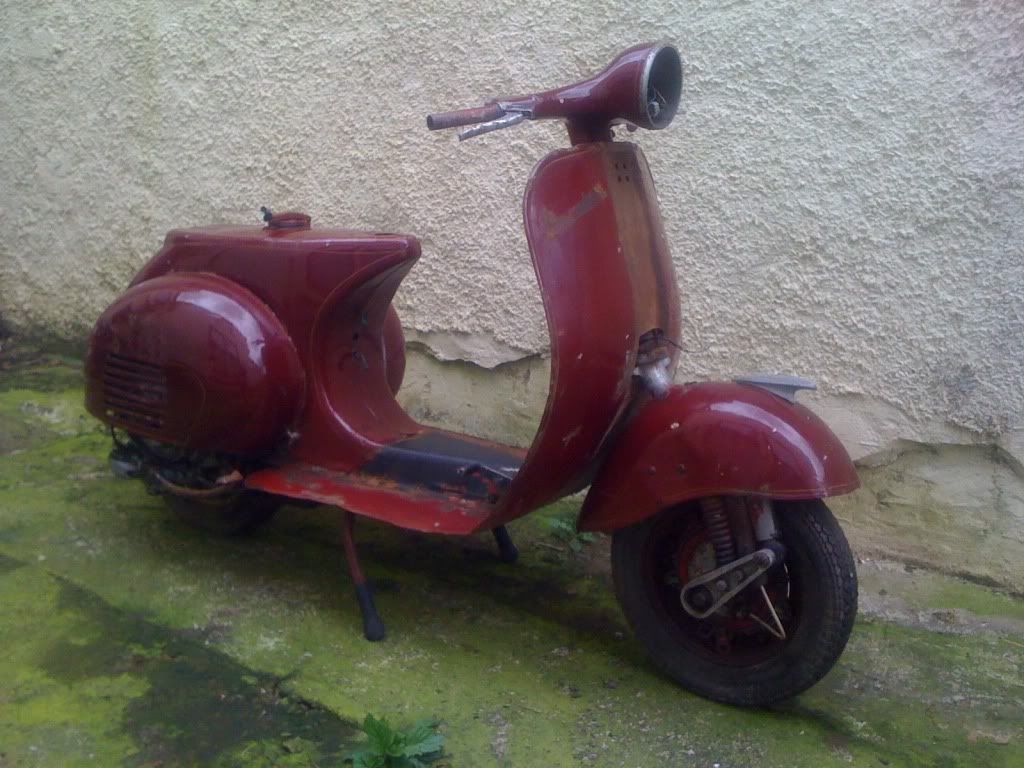
Post by benjirixon on Mar 20, 2012 18:59:21 GMT
|
|
|
|
Post by simon on Mar 21, 2012 13:16:40 GMT
Looks a good wee project  |
|
|
|
Post by triffid on Apr 6, 2012 22:03:47 GMT
solid project there bud, good luck with it
|
|
|
|
Post by Spanish Rob on Apr 7, 2012 12:32:42 GMT
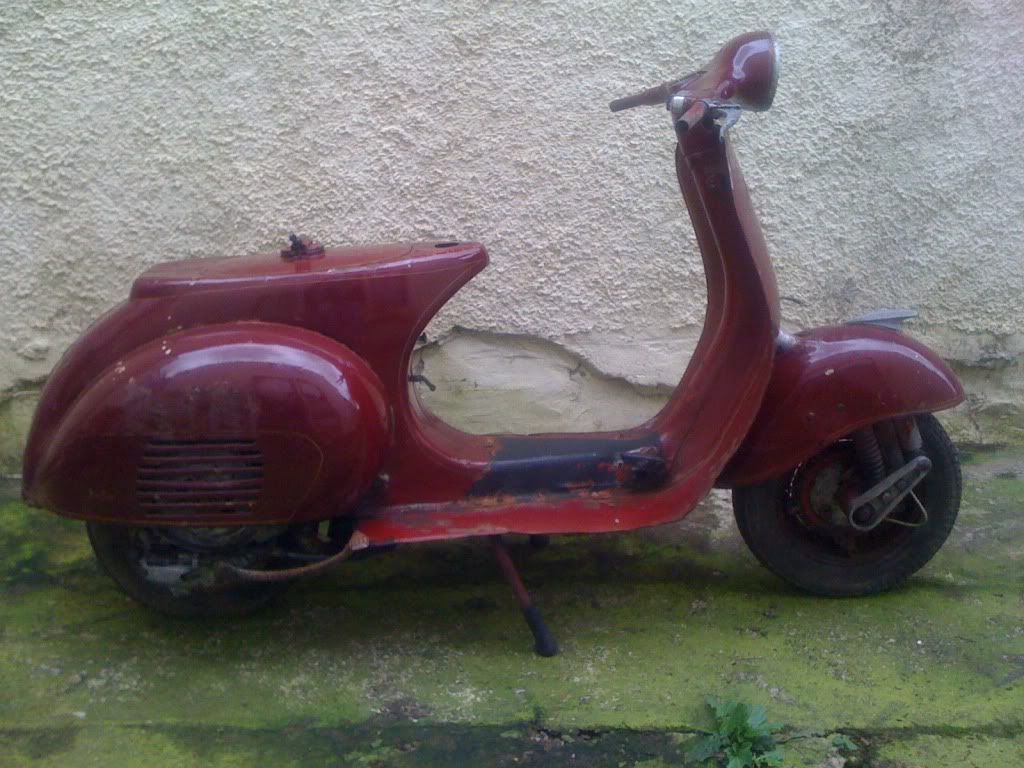
I have a single seat and stock rear carrier for something like that if you are interested I can email you pics (bought it thinking it would fit my Super  ) Either thats a nicely proportioned scoot. The coach pinstripes are very subtle - But whats with the horncast? |
|
|
|
Post by benjirixon on Apr 7, 2012 13:53:51 GMT
Well spotted Rob, I quite like the pinstriping but going for something pretty cool lined up for the paintwork.
Seat wise I will be using a single seat but not from a scoot ;-) but if it turns out to be more hassle than it's worth I'll give you a shout. PM me a pic of the rear carrier and I'll see where it sits/where I'd make it fit :-)
Wanna keep the rear and as free as possible to highlight the ' bulbousness of the panels and gonna de seam it to make it look as fat and round as possible lol.
|
|
|
|
Post by benjirixon on Apr 7, 2012 13:57:46 GMT
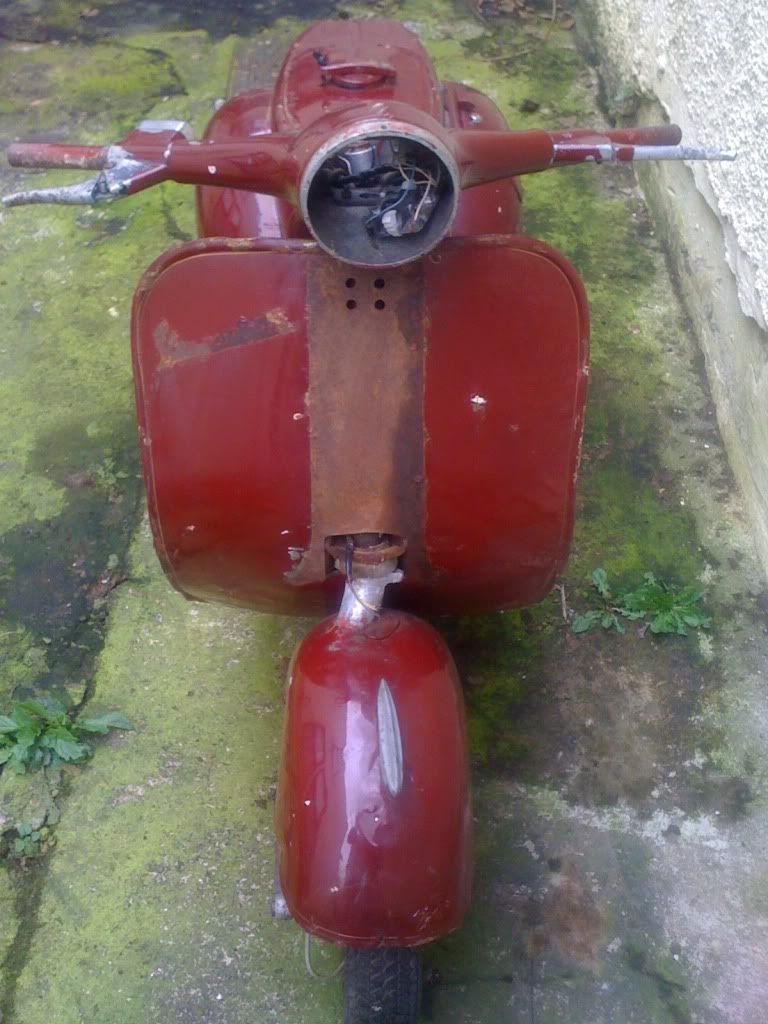
Oh and the horncast wasn't on her when I bought it. It's not rusted off so think it might of been taken off to repair another scoot and but be buying another
|
|
|
|
Post by benjirixon on Apr 19, 2012 13:11:25 GMT
Well I'm a bit stuck lol, The engine I have is the later px200 with the internal hub seal. On inspection of the layshaft I noticed the piece you put the split pin throu to hold the rear wheel nut had broken and also noticed that it was a early type layshaft as there was no surface for the internal hub seal to rest on. Anyway, got hold of the correct layshaft and new shiftrod and cruciform, started to rebuild the gearbox but the gears seem to wide for the shaft as I can't use the shims either end coz there's hardly anyspace. looked on beedspeed for thinner shims and they don't make thin enough ones  ? these layshafts use 2 shims one either side of the gears instead of one at the end so bit miffed on what to do |
|
|
|
Post by benjirixon on May 1, 2012 18:47:54 GMT
ok thought id add some pics see if it makes a bit more sense...  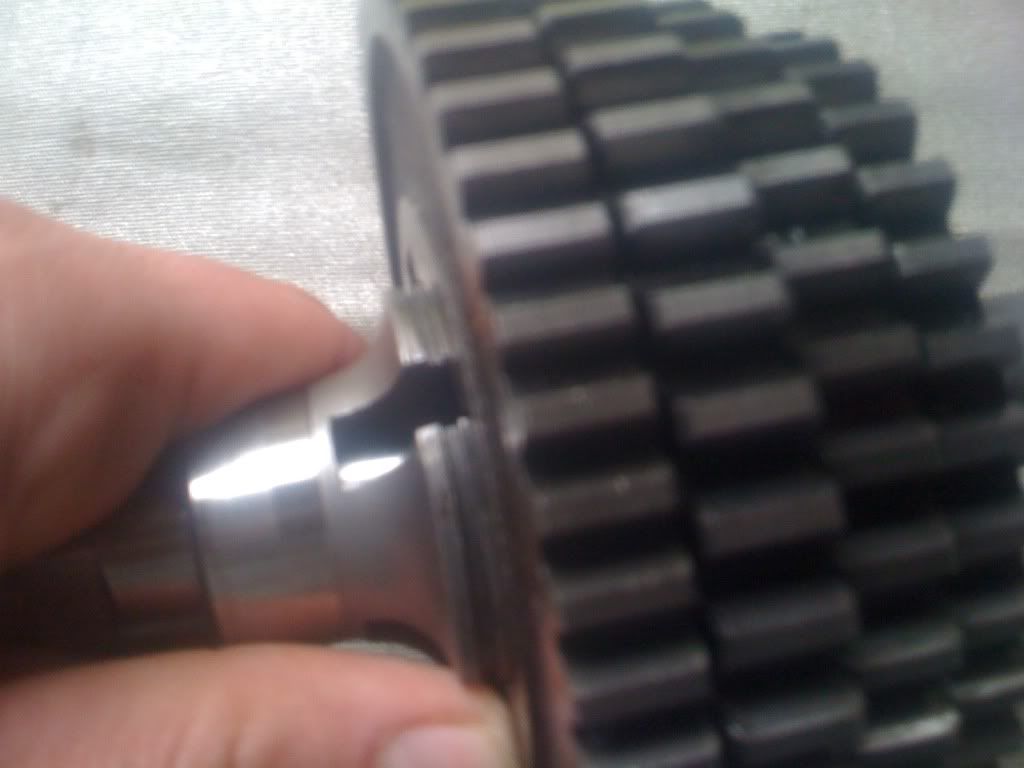 as you can see the layshaft should have shims eitherside of the gears, but put the gears onto this layshaft and have no space for shims. |
|
|
|
Post by tony on May 1, 2012 21:54:01 GMT
its been a long long time since i built on of these... just check you haven't got any gears on back to front... i.e. boss to boss. 4th looks wrong to me. Maybe you have the wrong gears for the layshaft? I thought that 4th tended to overhang on a prange lump. maybe i am mistaken.
|
|
|
|
Post by benjirixon on Jun 8, 2012 11:17:19 GMT
Nope your bang on the money there tony, wrong gears for layshaft. god knows what gears they are from but i compared/measured them with a few different gear sets and they are definately wong so the correct set will be sourced soon. Update wise, cranks has had 20mil taken off and smoothed out so should help a little, ordered new horncast yesterday so that should be here soon, loosened up the headset bars, still really stiff but not taken them apart yet, might even get a new VBB headset for it yet, still undecided. hopefully with any luck should be off to the blasters in a week or 2 and then finish then engine build  |
|
|
|
Post by GeorgeS on Jun 8, 2012 12:27:10 GMT
Ben, if you're working to a budget I can recommend the Home-Tuning article that Scootering published somewhere in the mid 1990's. I've not read Scootering for a while so perhaps they've revisited it and improved, but basically it was bolting on your barrel without the head and finding BDC, look at the ports and see if the piston crown is obscuring them. Pack the barrel up until at BDC the barrel ports are not covered by the piston crown, file the windows on the piston by the amount you raised the barrel.
Then there was a method of calculating your squish and finding the difference from some ideal figure they gave. All in all I have to pack my barrel up 3mm and then have 4mm machined off the top (3mm for lift, 1mm for squish) and it transformed a particularly slow bike in to something fantastic. I had a standard carb but a snazzy exhaust and instantly I gained a huge amount of grunt & a power band.
It was in a T5 frame (a Kegra 'T200'), and I remember being in the fast lane on the M25 pissing past everything, looking down and seeing my speedo needle had disapeared around the back of the gauge. That would indicate 90mph, but of course its not going to be that acurate. At that point it was a mixture of shitting myself but with a big smile on my face, so I eased off a little.
We did the same to a mates bike and got similar results (not quite as good as his had standard exhaust). We could sit a 3-quarter throttle at 70mph, and all for peanuts!
I'll have the article in the loft somewhere if there's any interest.
|
|
|
|
Post by benjirixon on Jun 8, 2012 13:21:05 GMT
Hey George, Yeah im working on a tight budget due to missis/kids/dog/house/car that all need money lol  ;D but not gonna rush it and prefer to wait till i got the cash and have it exactly how i want it otherwise i'll kick myself when its done. Plus i got my primmy i use anyway. ive heard about modding the standard barrell too, think i read somewhere that harry barlow first come up with the idea, dont quote me on that tho... But yeah id love to have a read of how its done, free power from adapting the stuff already there is defo worth doing. Ive got Norrie Kerrs ultimate guide to tuning vespa's coming soon so hopefully that will have some good stuff in that too and might even feature what youve just mentioned, but yeah give me a shout if you dig it out. |
|
|
|
Post by GeorgeS on Jun 8, 2012 13:59:34 GMT
Honestly, the difference was like night & day. I remember being 2-up and not getting over 55mph before I did the change. I guess its always a bit worrying taking a working bike & carving bits off it, but as soon as I tried it out I was like a dog with two cocks.
I'll have a search for the article and scan it in, but it might not be until Monday.
|
|
|
|
Post by GeorgeS on Jun 11, 2012 11:26:13 GMT
I've scanned the pages as images and made them available here www.photobucket.com/p200hometuneI've also got the pages as PDF files if those images are not great. I guess I should say that I'm reproducing this content from Scootering magazine and if there are any objections I will remove the content immediately on request etc. For info, the articles where run Oct, Nov and Dec 1994. |
|
|
|
Post by triffid on Jun 11, 2012 11:56:46 GMT
|
|
|
|
Post by benjirixon on Jun 11, 2012 17:24:06 GMT
good stuff triffid ! a little hard to read but interesting stuff, didnt realise piaggio had designed the top end on a friday def room for improvement if i do go the standard route then, few 210 kits on ebay cheap at the moment tho so will see what happens ps where did you get the scans from? |
|
|
|
Post by GeorgeS on Jun 11, 2012 18:33:06 GMT
They're the scans from the link I posted. I have them in PDF if you need them or if you follow the link you can zoom in I think.
|
|
|
|
Post by benjirixon on Jul 3, 2012 16:49:41 GMT
Well another quick little update - have stripped the scoot down totally now and the solid project is no longer as solid as i thought (pics to follow) was hoping to get away with not putting a new floor on but the tunnel has rusted from the inside out sorta thing so got a choice of cutting the rusty part out and putting a large plate over it or cut the floor off totally and put a new one on. Floors for these are twice the price as a normal VBB floor mind as its got two holes at the end for cables to come out of on a brighter note tho ...... managed to pick up a complete malossi 210 kit 2nd hand ;D also in the picture is the cut crank. The barrel has had a little work but i will be working on the piston as it has big room for improvement as someone pointed out to me  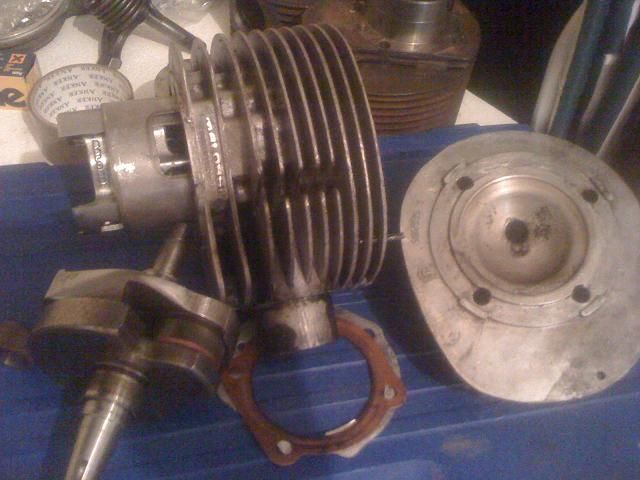 |
|
|
|
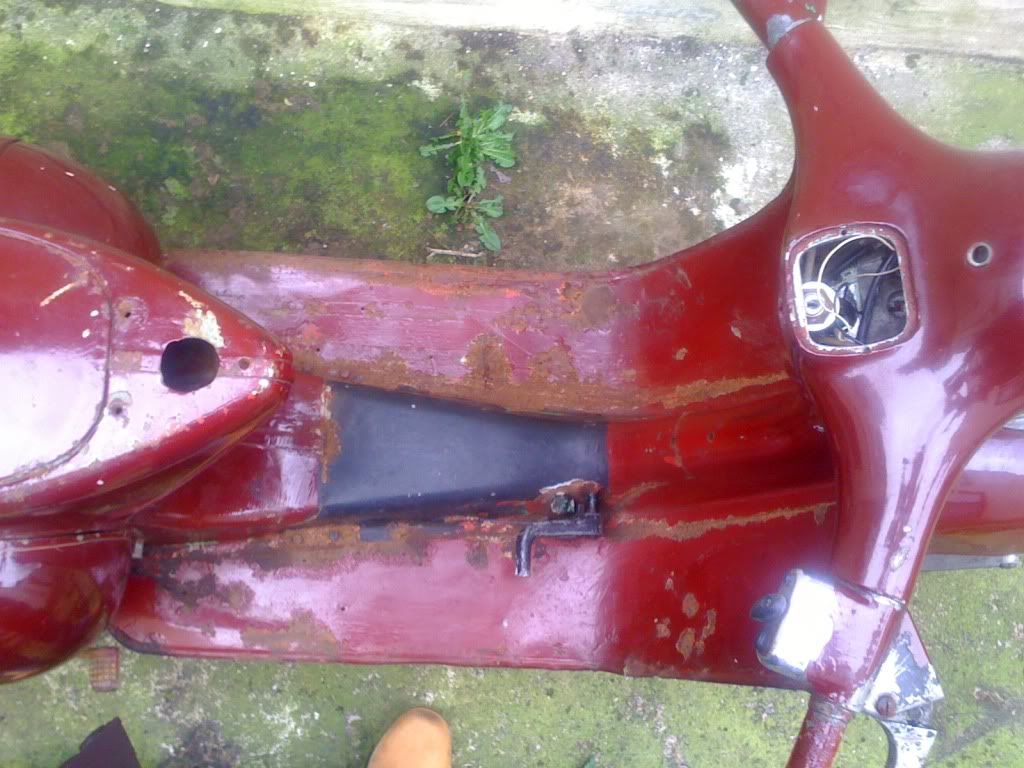
Post by benjirixon on Jul 5, 2012 18:01:04 GMT
The not so solid floor........... 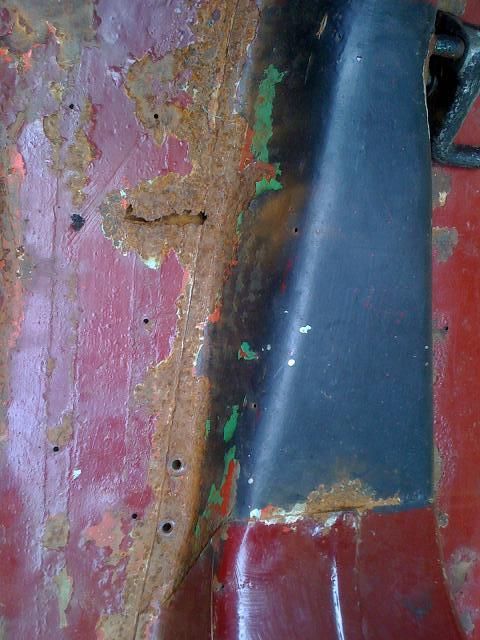 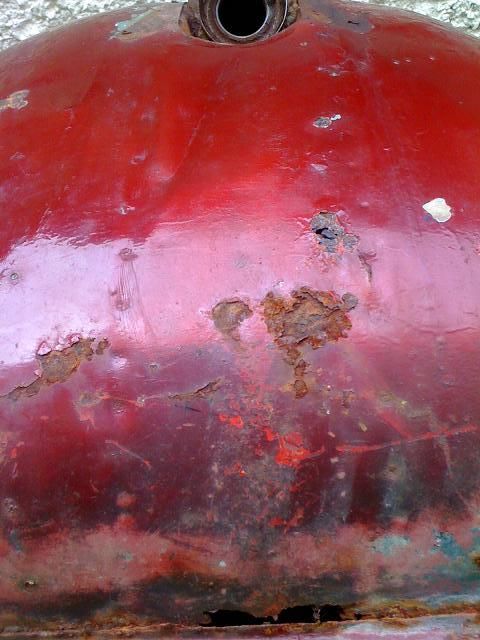 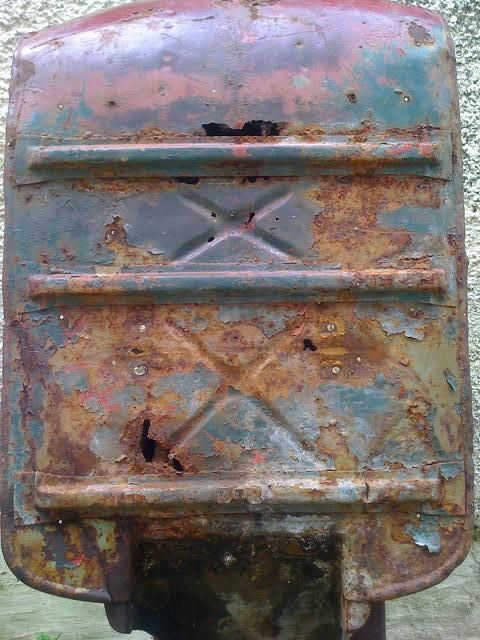 prob get away with cutting the floor under the tunnel out and patching the rest but prob just as much work to put a nice new straight floor on tho. Will take it to the blasters once the floor is off tho so they can blast the tunnel and also get the zinc primmer through it then have the new floor put on. the rest of the scoot is very very solid tho and about 100 layers of paint has preserved it well ;D |
|
|
|
Post by Wayne Miller on Jul 5, 2012 21:07:28 GMT
|
|


 1st one was perfect then realised i forgot the main circlip so out it came, 2nd one was all metal seal and fitted it too far in a stopped the main bearing spinning, all good fun tho ;D
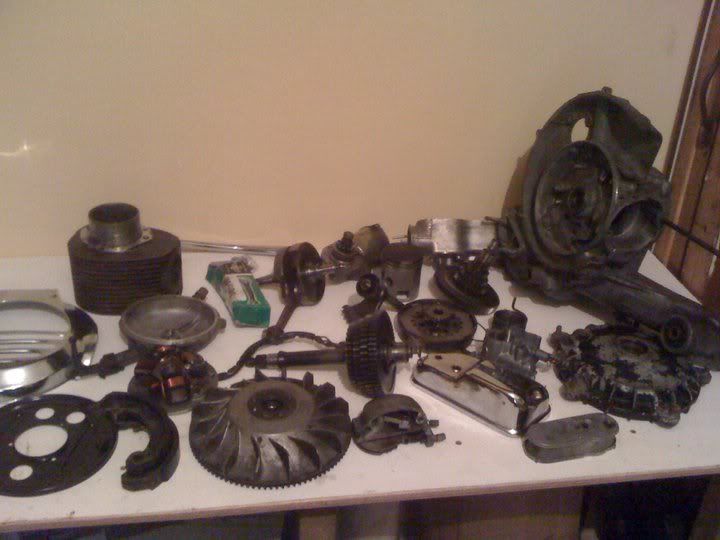


 )
) ?
? 

 ;D but not gonna rush it and prefer to wait till i got the cash and have it exactly how i want it otherwise i'll kick myself when its done. Plus i got my primmy i use anyway.


