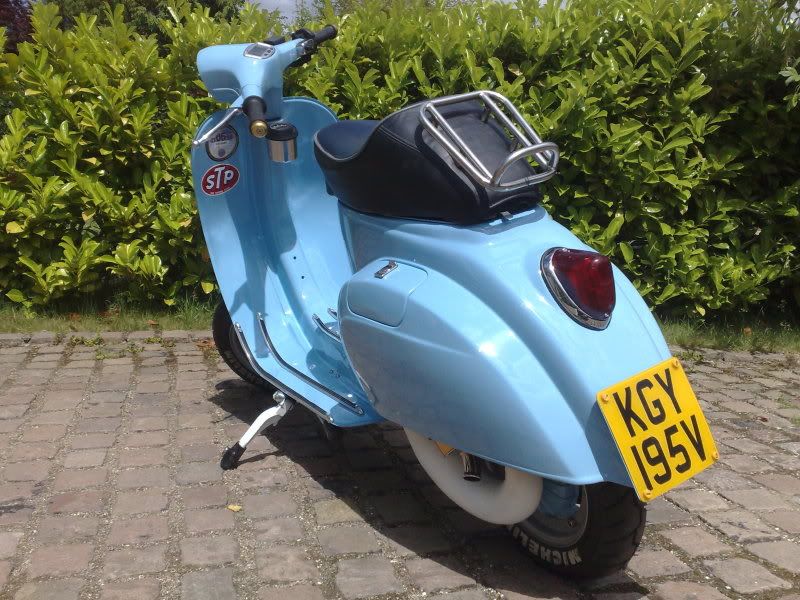
Post by sugarlump on Nov 23, 2009 21:33:35 GMT
Thought i'd put a how-to post up on weld repairs to scooters as it's a dead handy skill which'll save you money in the long run, it's by no means definitive, just a collection of my own experiences... ;D
The Basics.
First you need a welder and for body work and general ease of use a MIG machine is best. Basically the machine has reel of thin steel wire inside which is fed through a 'torch' and carries a current. The only parameters you change are the amount of current and the speed the wire comes out. When the wire touches the metal you're welding it creates a circuit (via an earth clamp back to the machine) and melts the parent metal with the wire. The trick is getting the current and wire speed to match to job in hand - too much current and you'll blow holes in scoot, too little and the molten wire will sit on top of the parent metal without penetrating. Same principal goes for wire speed, there's a positive correlation - more current needs the wire fed faster and vice versa.
For best results using a mig welder with a shielding gas is important. Basically this keeps oxygen from the weld pool allowing full penetration. Some wires contain a flux which precludes the use of gas but they tend splatter so i'd recommend using either carbon dioxide or argonshield light. These can be bought in disposable canisters but run out fast so it's best to go the whole hog and get a gas contract (from BOC or Airproducts or...). Set the regulator to 10 litres per minute, more if welding outside/in a draft.
Then practice, practice, practice. After a while you'll get a feel for your machines settings and how quickly you can move the torch. The most important thing is heat. Thin metal warps with not much effort and it's a fucker to correct, so it's best to go in small stitch welds than long beads.
Well thems the basics. If you're serious about learning then go to the mig welding forum, it's all there if you're prepared to research.
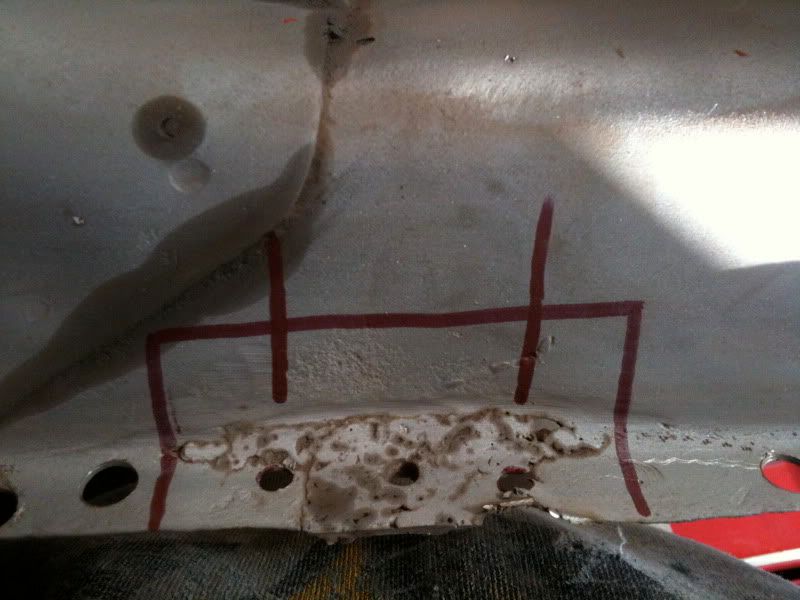
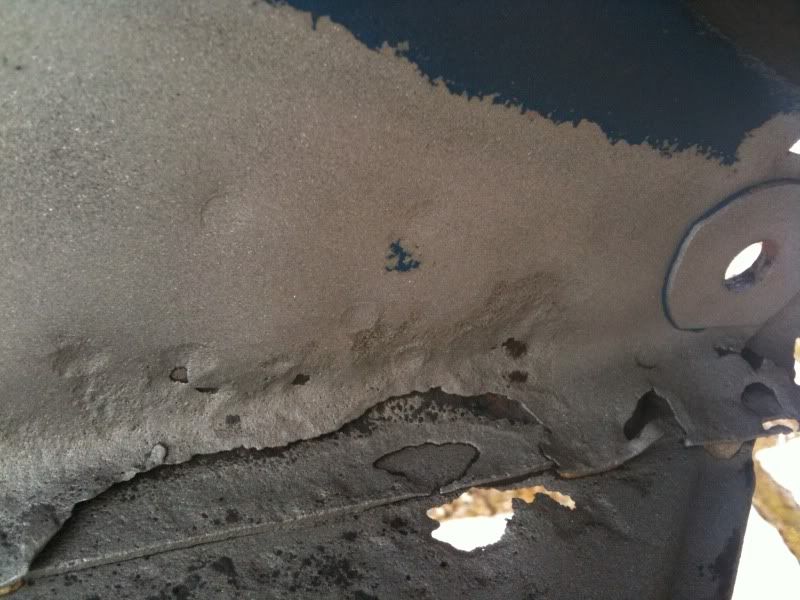
Practical applications. Rusty floors
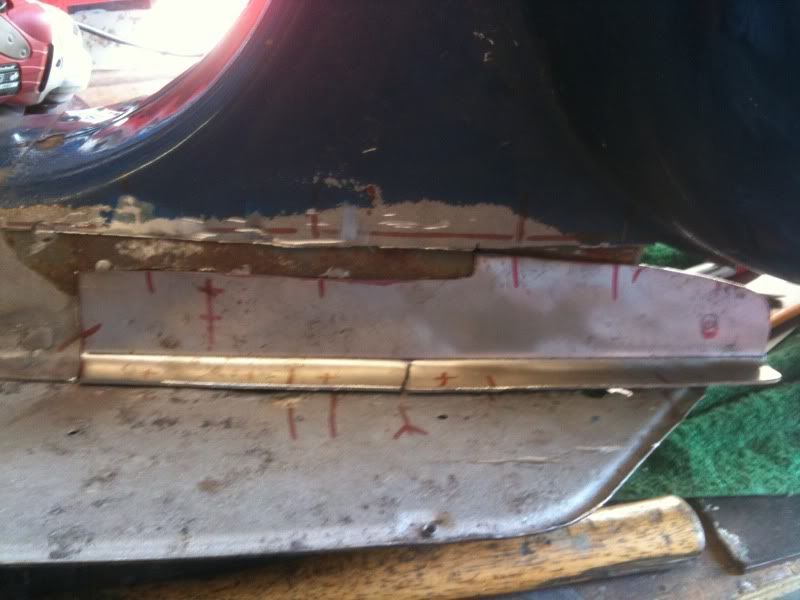
The floors on smallframes are really prone to tin worm, sitting water erodes it in no time. Luckily new floors are available and as long as the rust doesn't pervade too badly into the frame tunnel it's not beyond the skills of a first timer to fix (this was me a couple of years ago so any one can do it ;D ). Most will need a fettle to fit perfect but i've seen worse replacement parts. So first thing is offer the new one up to the old and begin to mark out where it'll need cutting.
Fucked floor -
New floor, poor fit -

Extra bit -
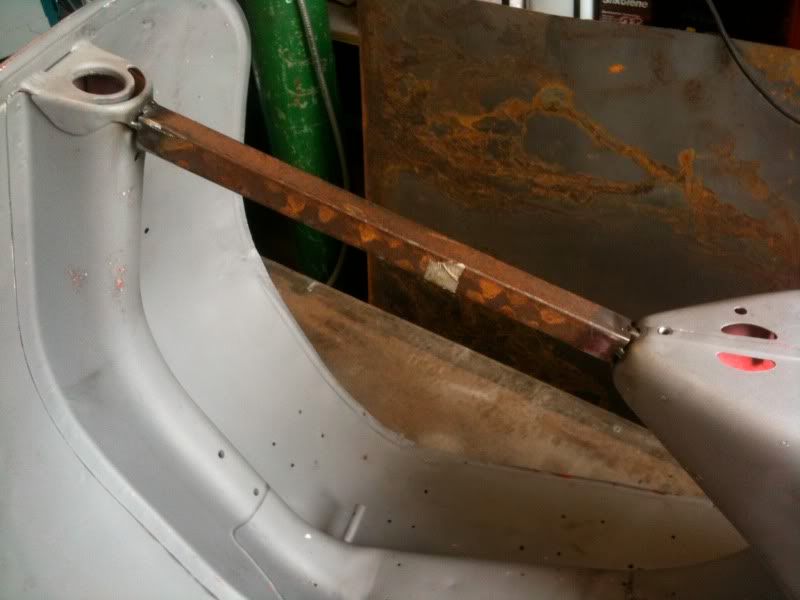
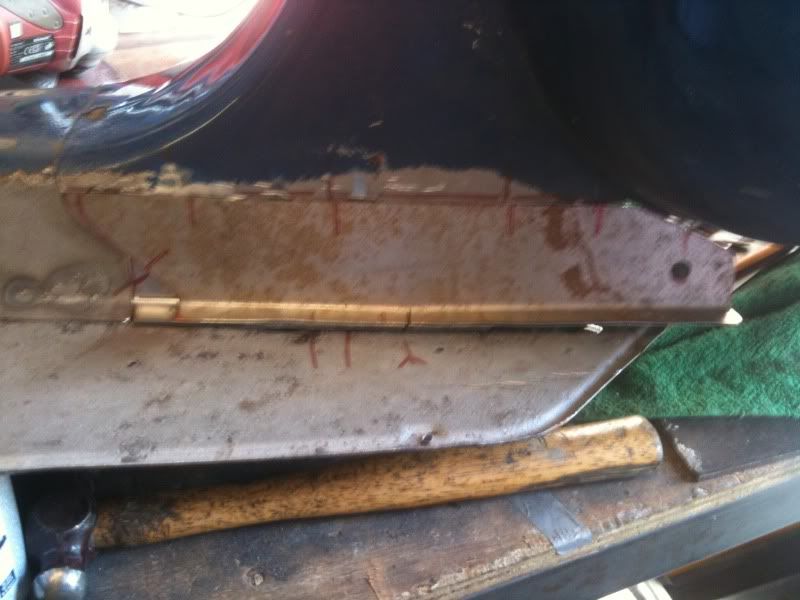
First thing to note is precautioning against chassis warping by welding a supporting bar between the fork stem and the frame loop. This scoot had just been jigged so i really didn't want it getting out of true.
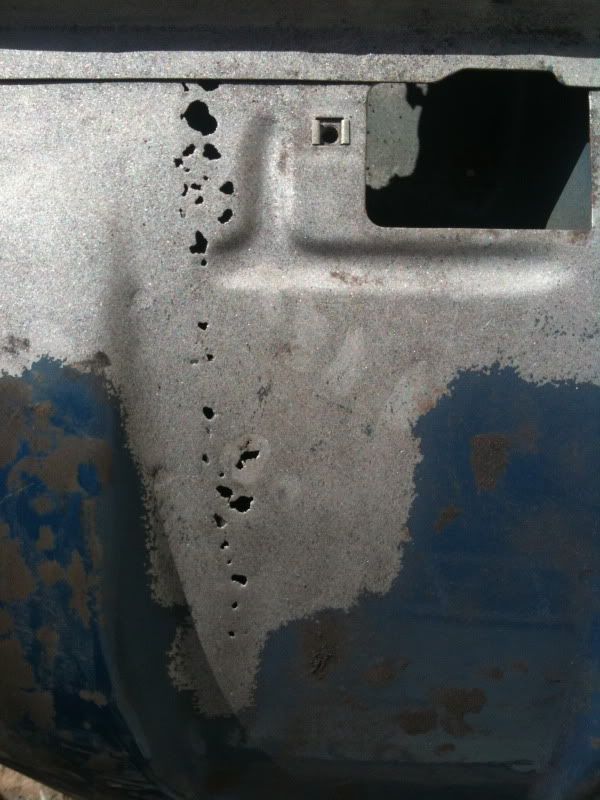
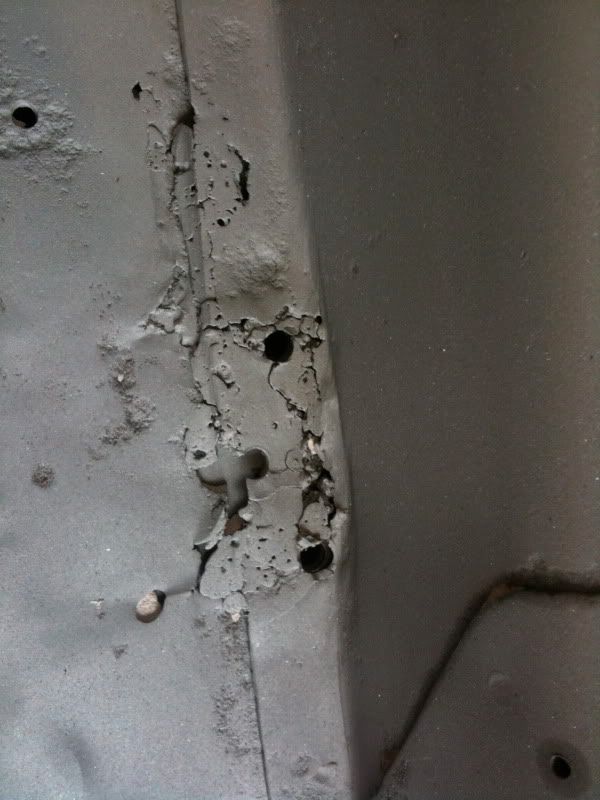
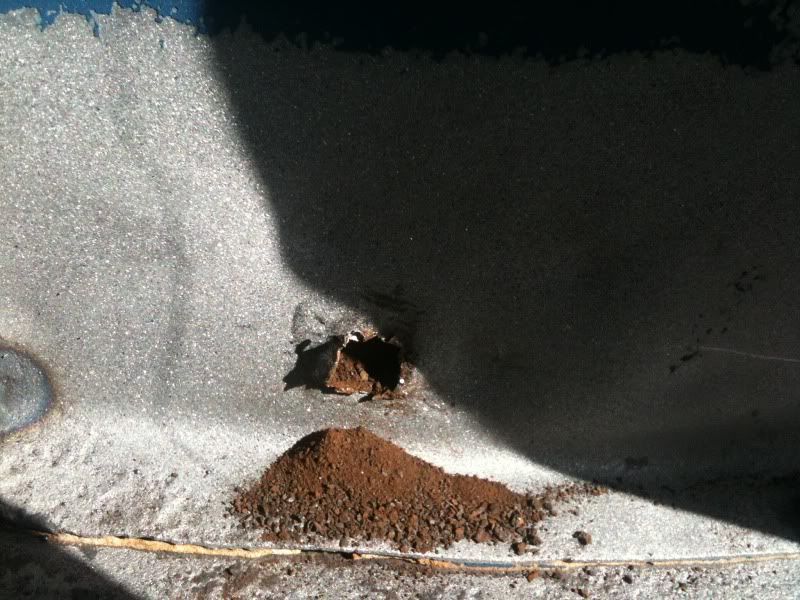
Second thing to point out is the usefulness of sandblasting in revealing the extent of rust damage. It will comprehensively remove all rust and reveal a bunch of holes you never knew existed. Better to know now though ;D
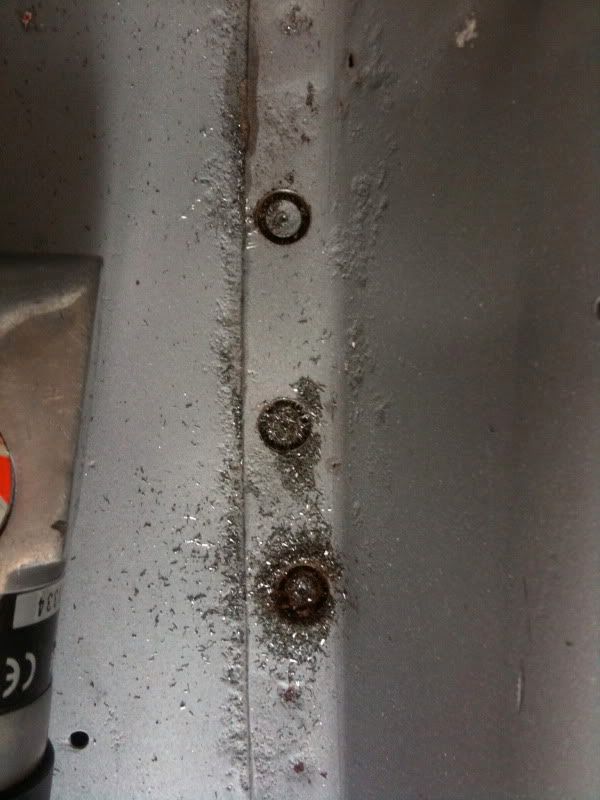
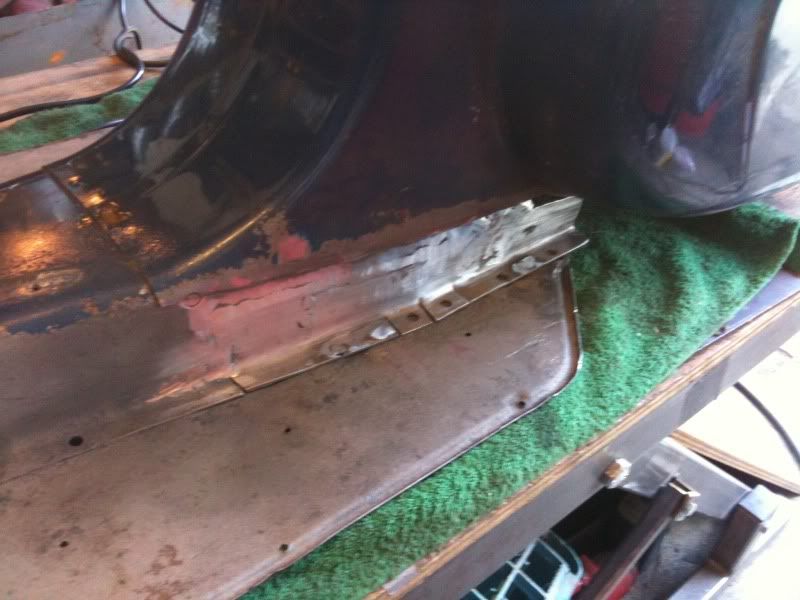
Getting the old floor off isn't much fun but it's made a damn site easier with a spot weld cutter. It's a little hole saw which you can set the depth on so you can cut through the top layer leaving the lower intact.

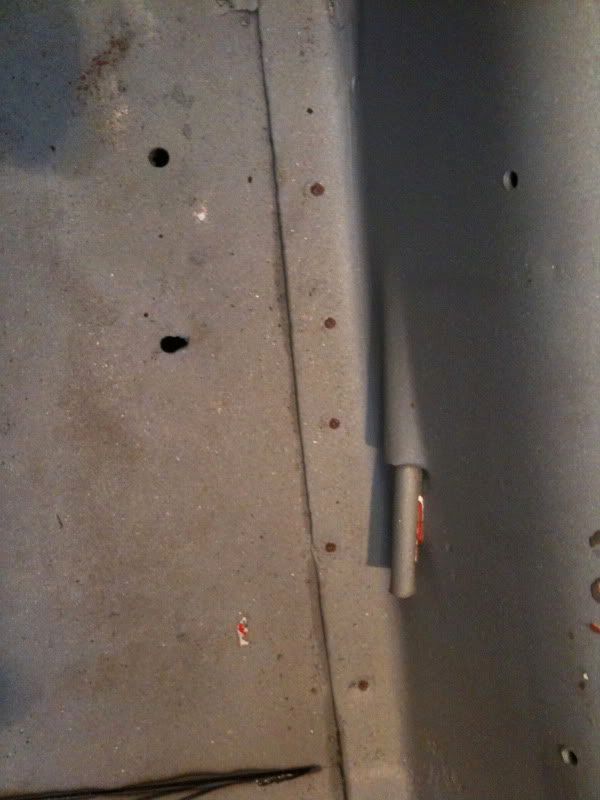
Mark the old spot welds with a marker pen, then centre punch, then drill slowly.
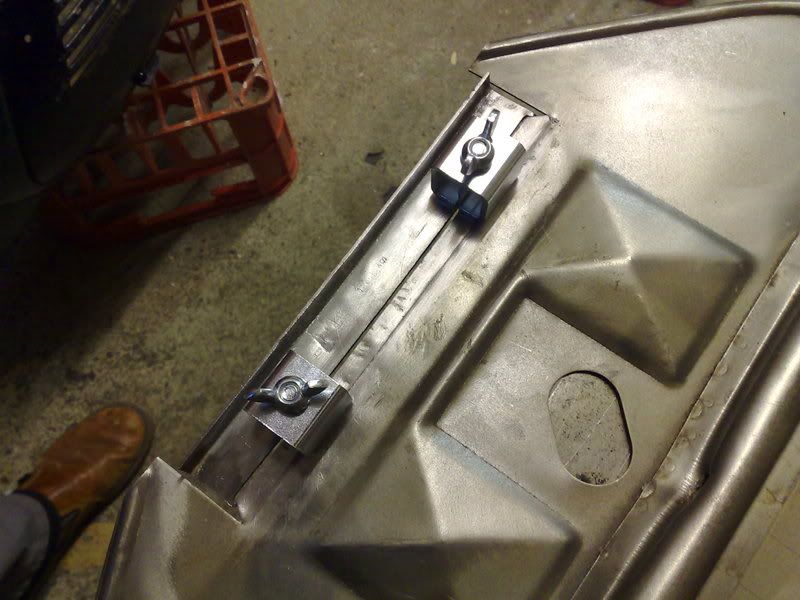
Observe the adage measure twice, cut once - using a 1mm cutting disc carefully severe the floor.
Use a pry bar to get the floor up, i always miss at least one spotweld so go slow and be inventive with drills and saws to get it off.
Hammer the remaining tunnel flange flat on a metal plate/table.
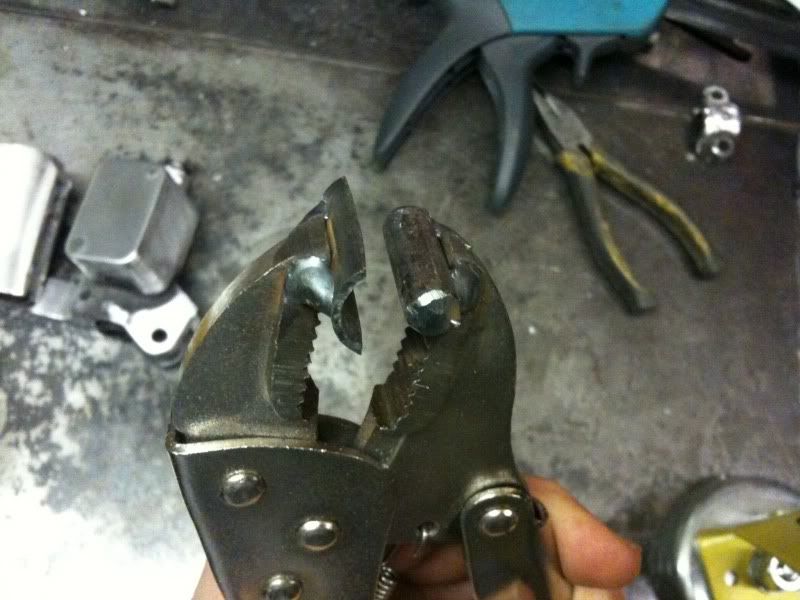
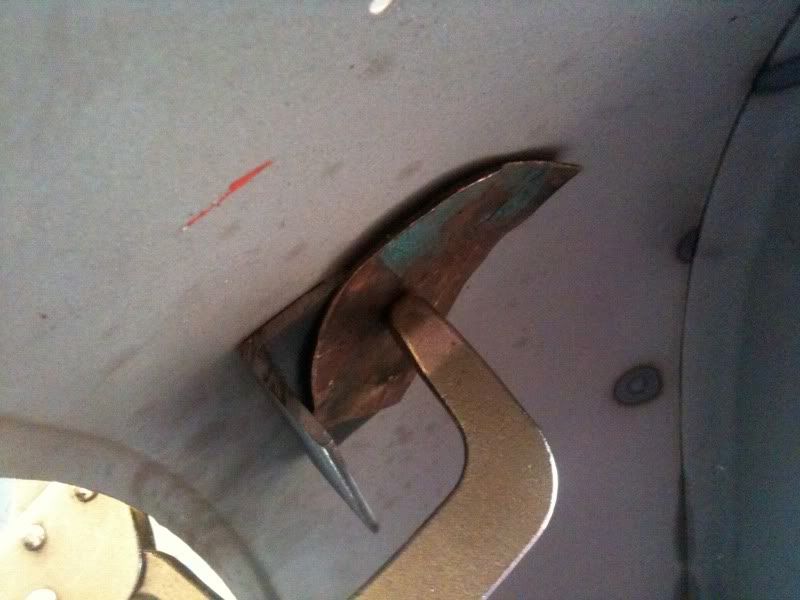
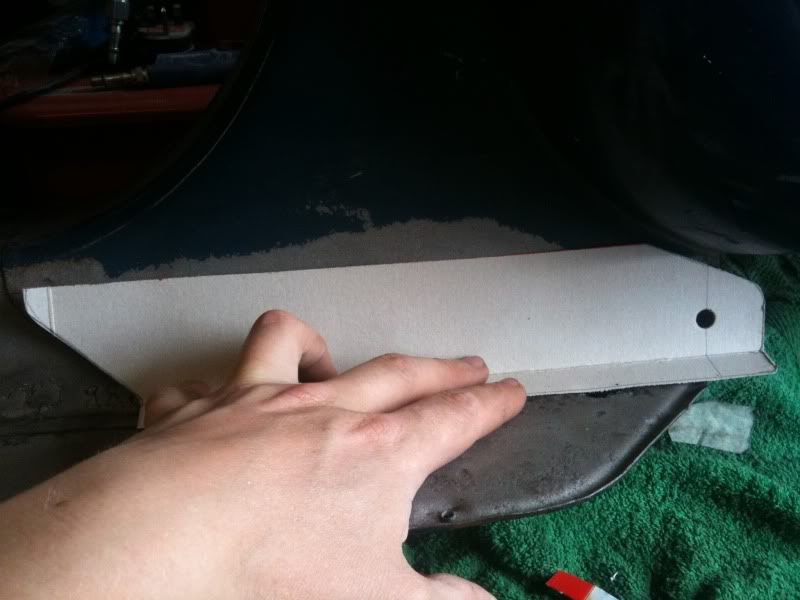
Before welding anything the legshield beading needs addressing. A good tool to make (with your new welder : is a pair of mole grips with a bit of rod on one jaw and half a bit of tube on the other (see pic). It works a treat and is featured in the 'how to restore your vespa motorscooter' book. Click on google preview page 124. I've got a couple of variations of this tool, bloody useful.
before-
after -
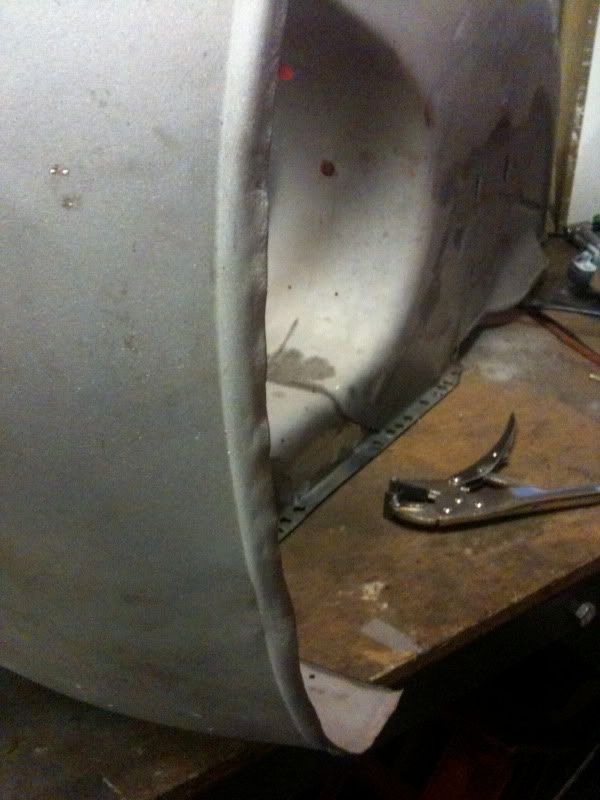
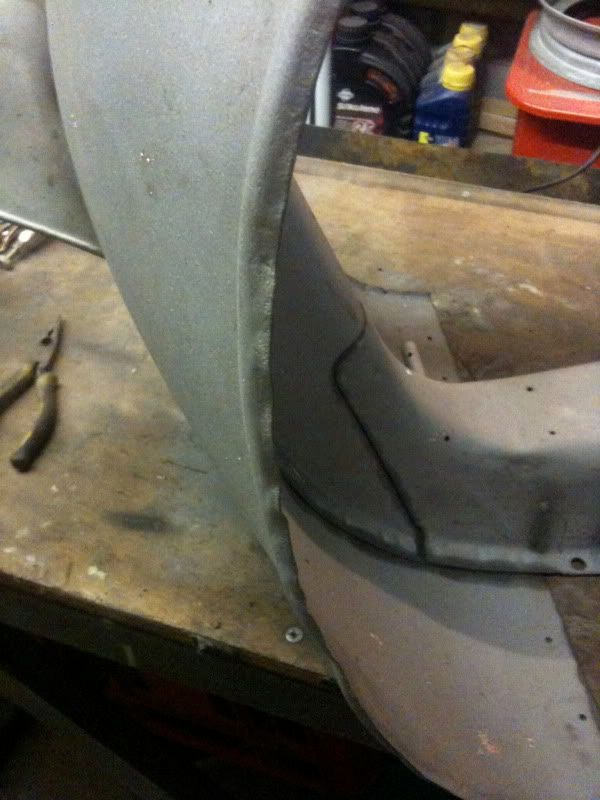
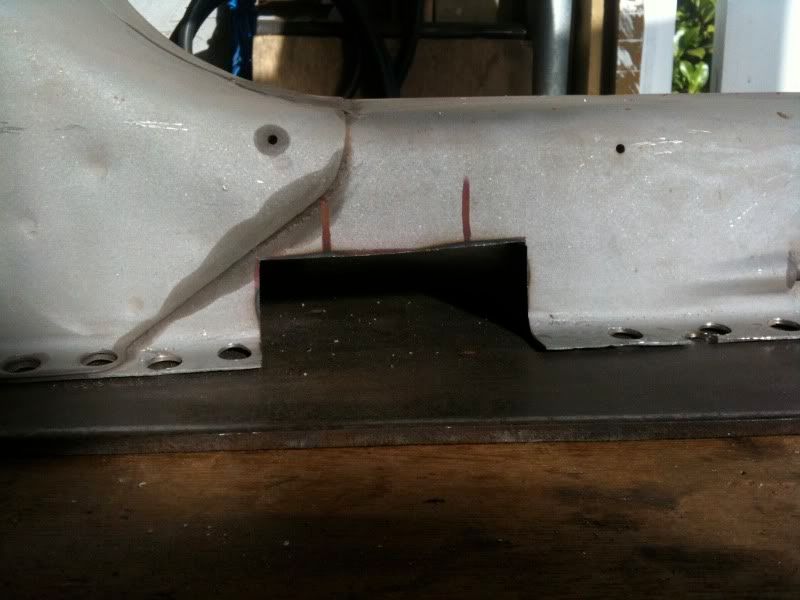
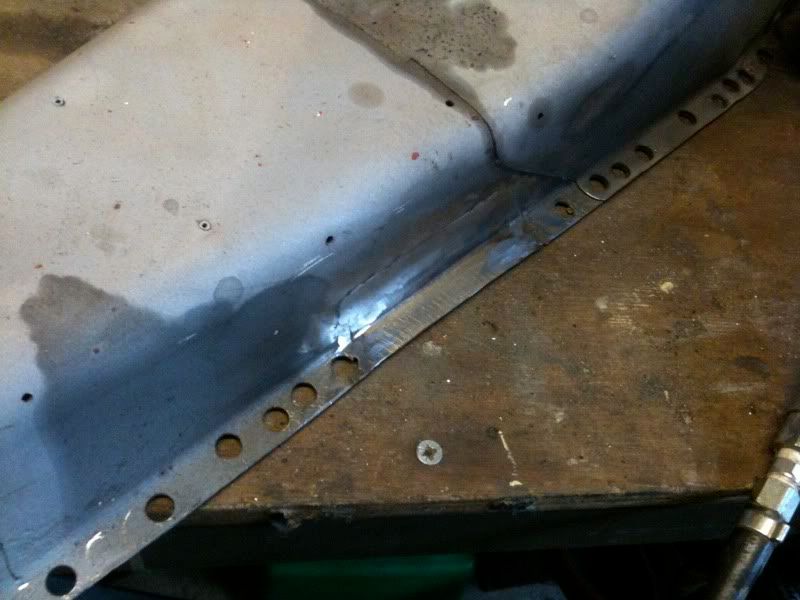
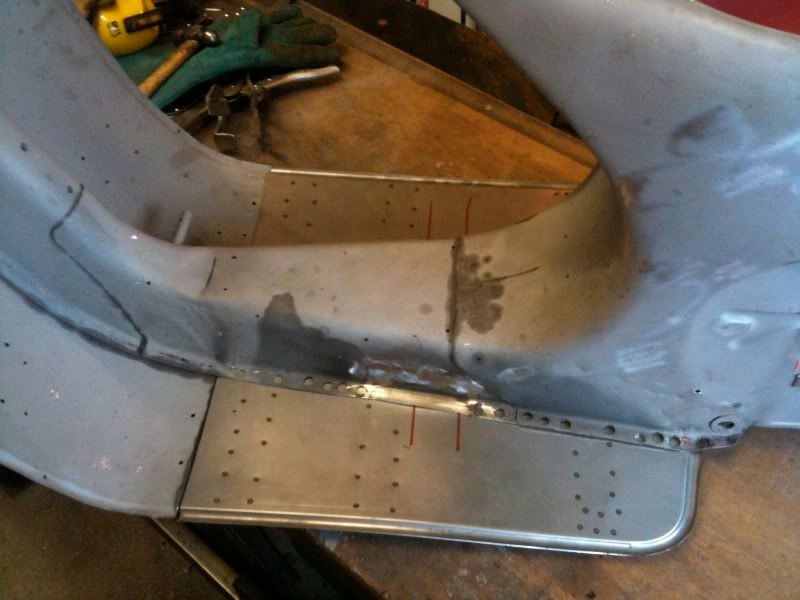
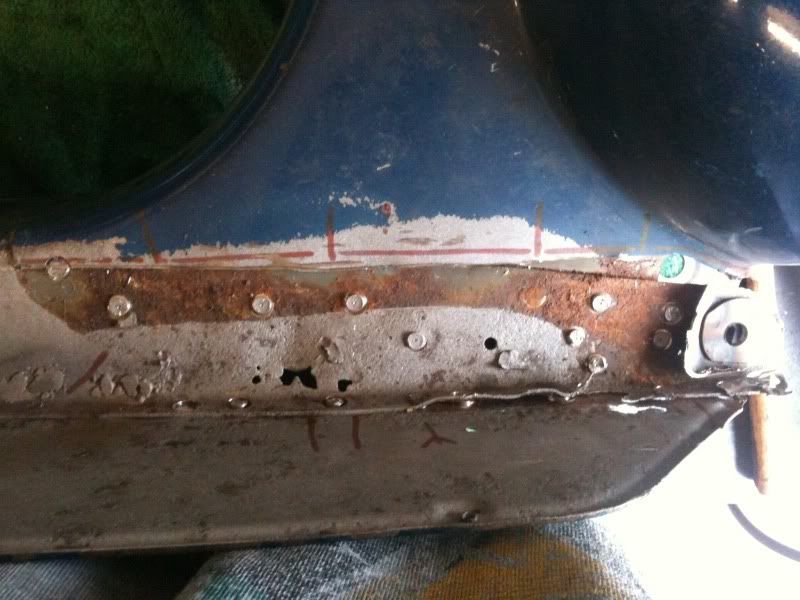
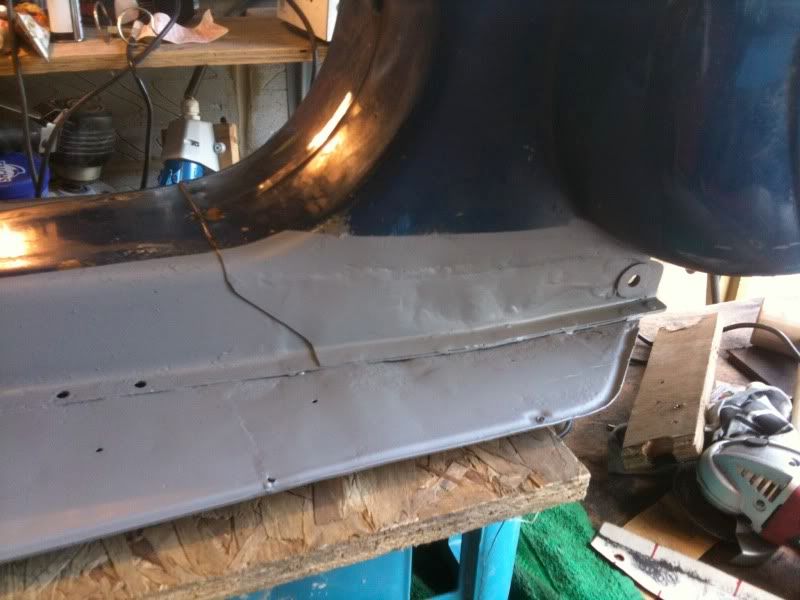
This lardy vespa needed some repairs to the tunnel. It's best to cut these half way up so that the stresses (welding and subsequent load from the stand) will be well supported...ie don't just weld a flange on at 90º at the bottom edge of the tunnel.

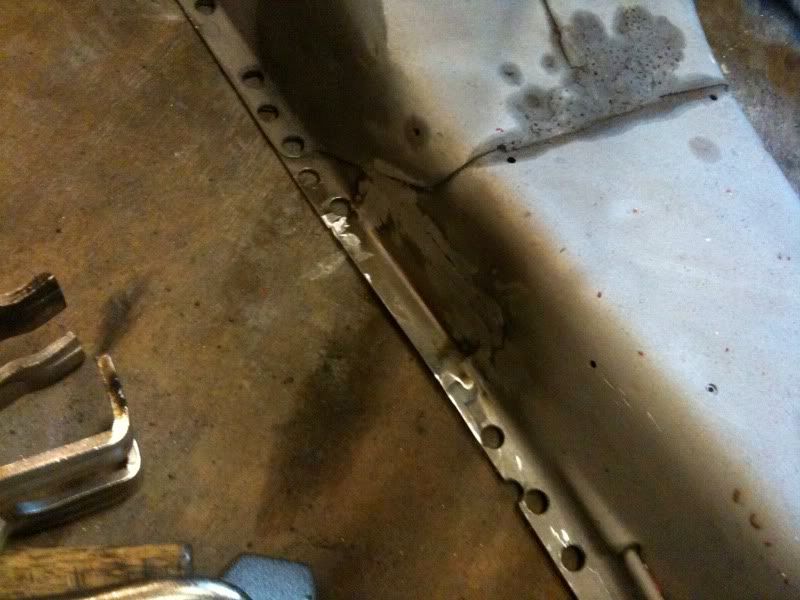
previous bad repairs -
after-
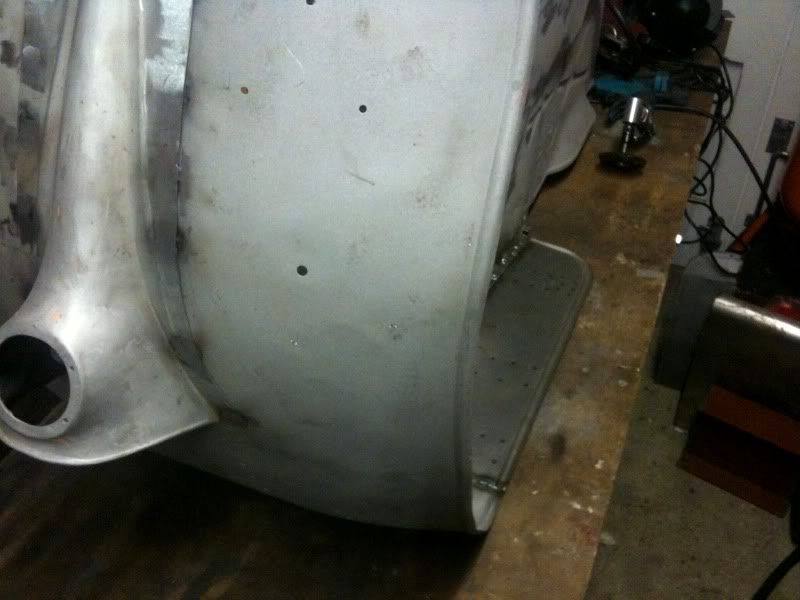
There's no easy way to explain how to fabricate up the bits of metal, imagination and patience i guess, it's something i struggle with so don't ask me. There are some good books out there, Ron Fourniers Metal Fabricators Handbook is particularly useful. Try to get a very close thickness match for substitute metal, welding thick to thin is hard and looks crap, nuff said.
A variety of clamps will make life easier. I can't stress enough how important it is to line up replacement metal parts with the body, time spent making stuff fit is paramount. Clamp it a bunch of times to check you're 100% happy with it cause once you start it ain't coming off again in a hurry
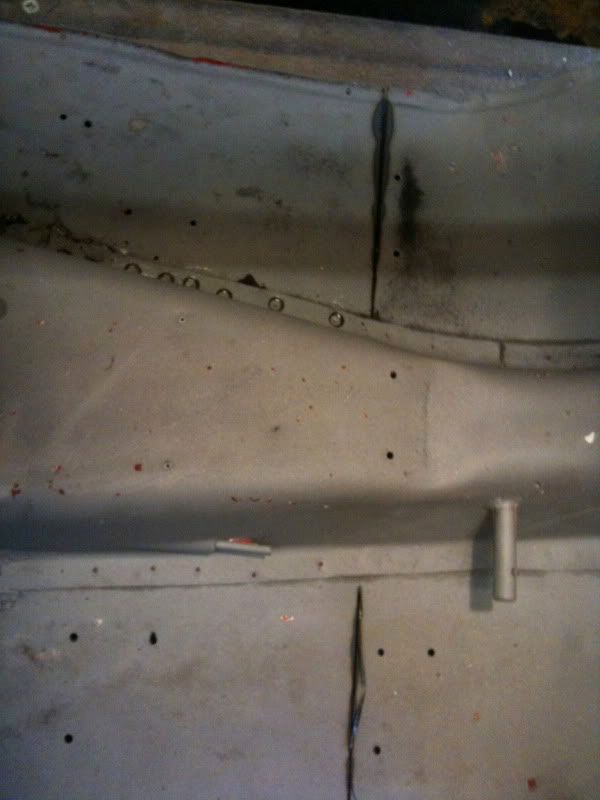
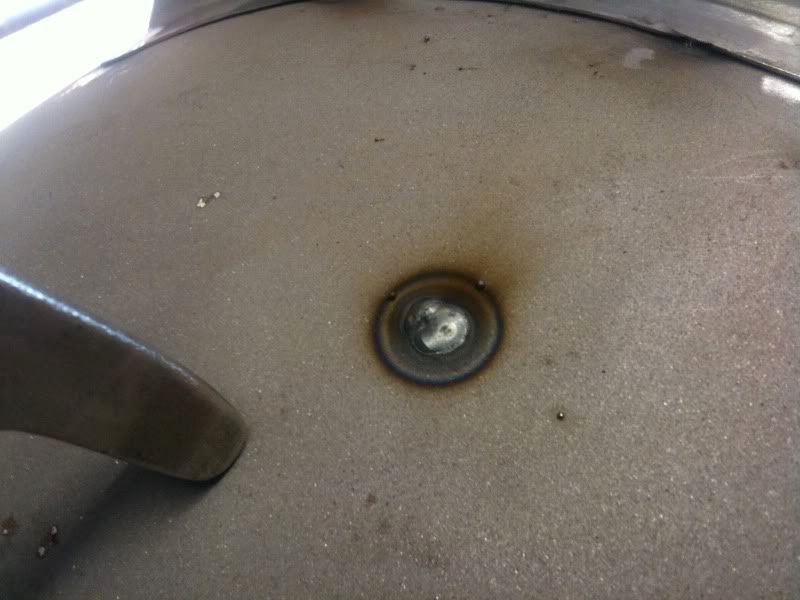
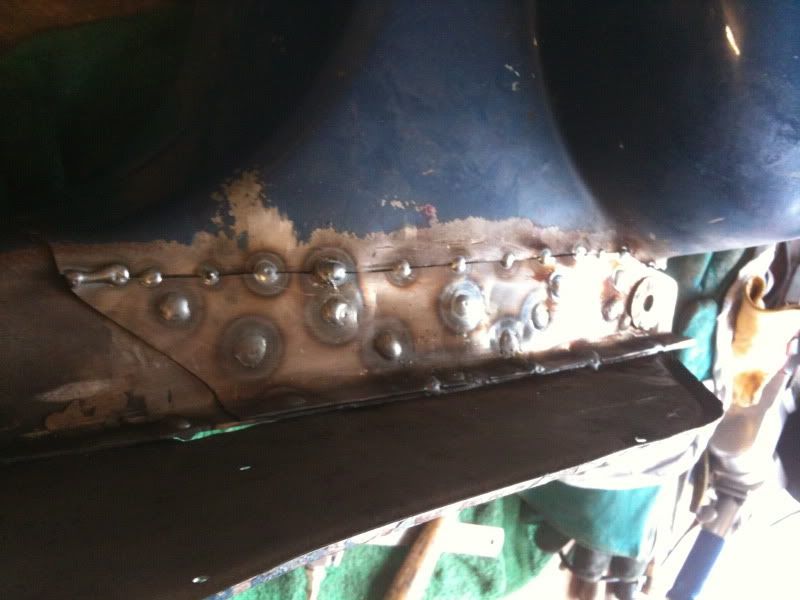
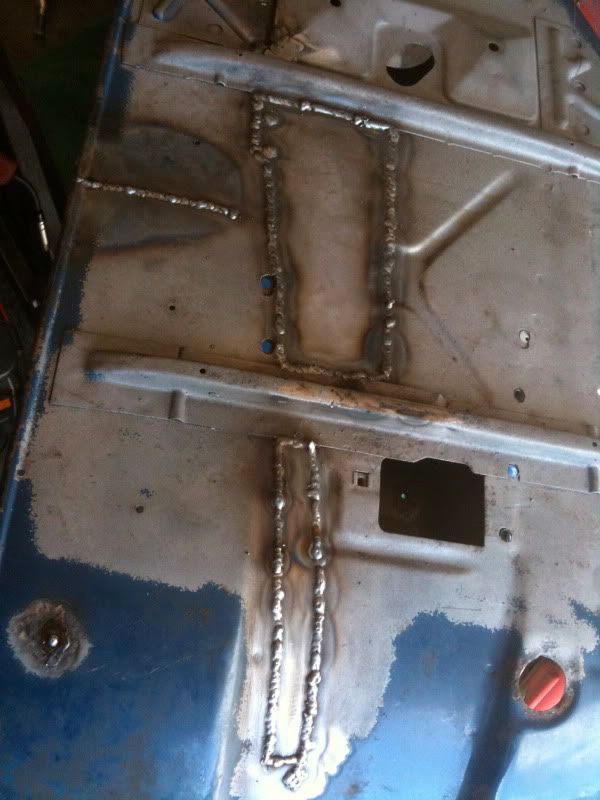
A technique called plug welding is used to 'fill' in the holes left from the spotweld cutter which also then adheres the floor underneth. Be careful not to weld straight through the floor, they are quite thin and the holes require a fair blob of weld. Don't do all the holes in a row, move from one side to the other, also alternate the ends. Go slow, let the heat dissipate otherwise the floor will get a slight buckle in it which is a bastad.
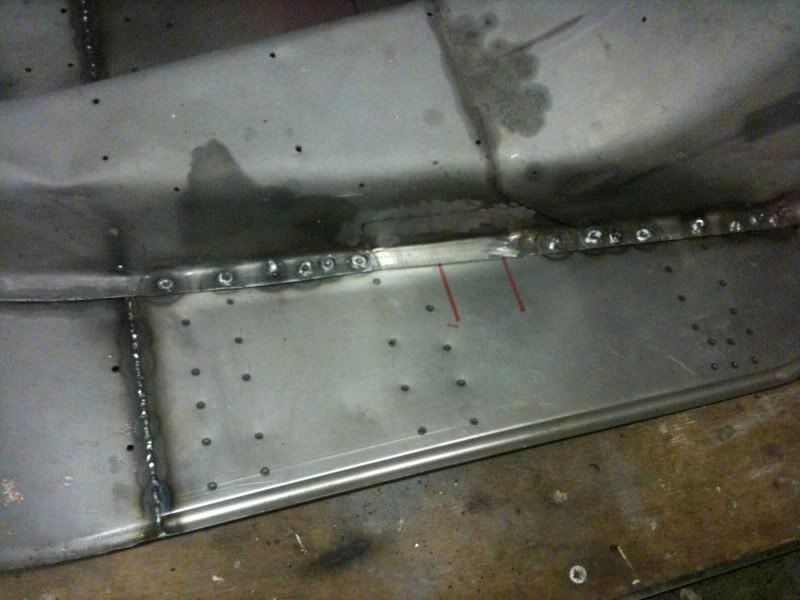
When welding the legshields to the floor, same principal, go slow, a series of overlapping tack welds is best (called stitch welding). Grind everything flush, i use zirconium sanding discs on a 4.5" grinder. Etch prime then finish with a skim of filler.
Rack holes
Some weirdos like to put racks on the front of their scoot, the worst offenders drill big holes for said purpose. Clamp a piece of copper to the back and weld from the front, the copper acts as a heat sink and the weld will not stick to it. Grind flush.

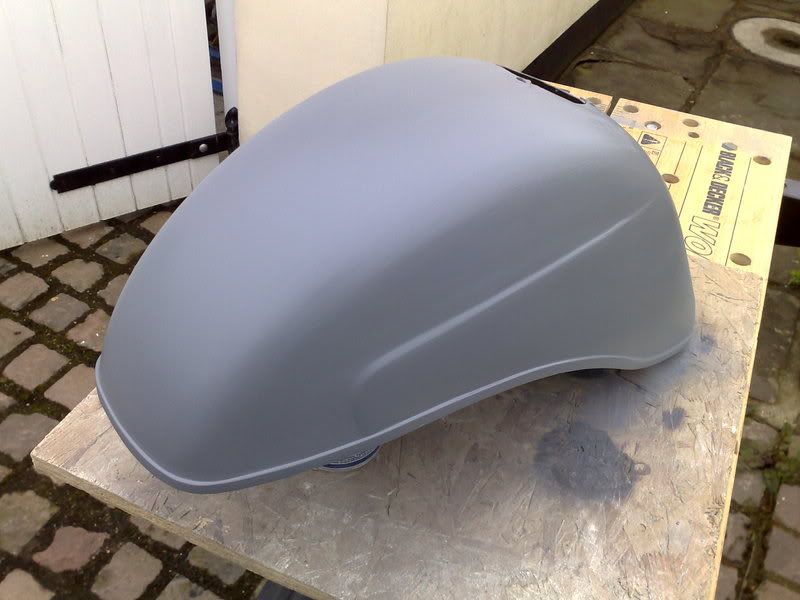
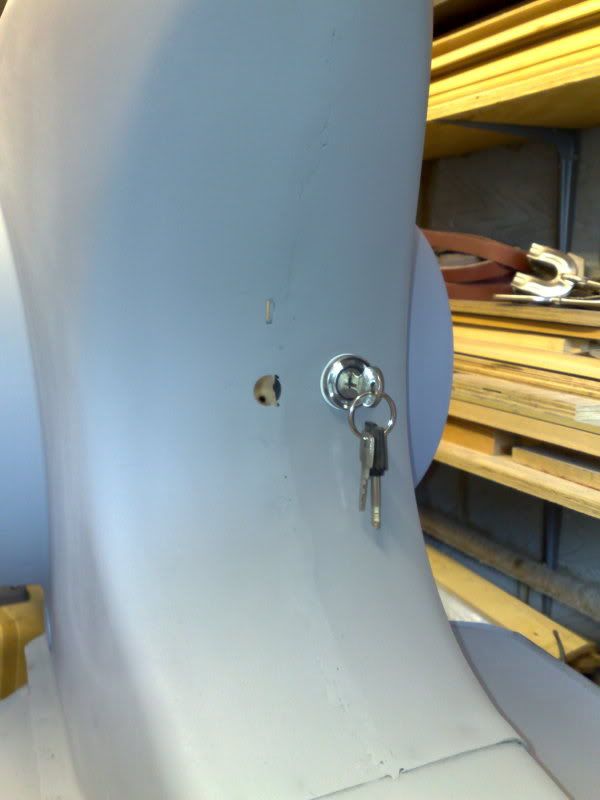
Horn cast
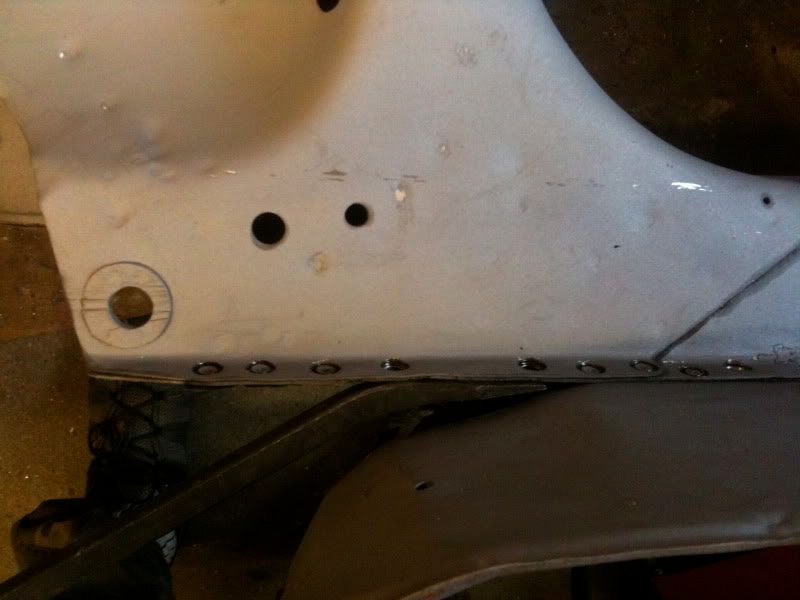
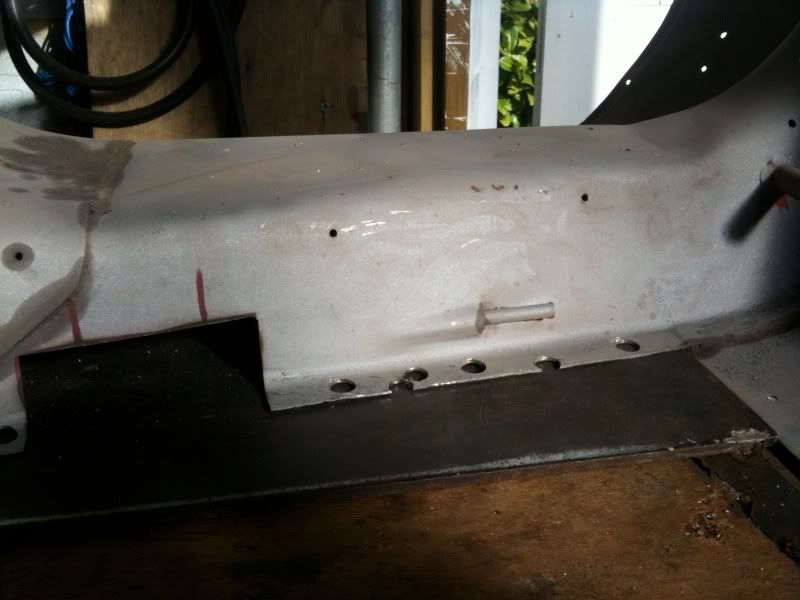
Same principal as the floor. Mark it up, centre punch, carefully drill. The replacement horncast needed plug holes pre-drillling before welding to the body. Use dividing calipers to check central alignment. Grind welds flush.
Seen better days -
-

Mark it and drill it carefully, only go through the horncast -
Pre drill new horncast for plug welds, measure twice, clamp and weld. Grind back welds.
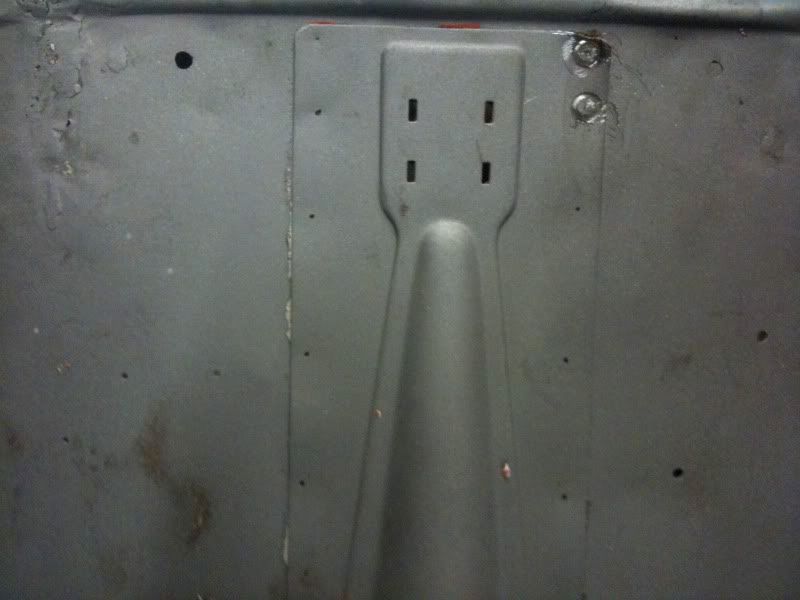
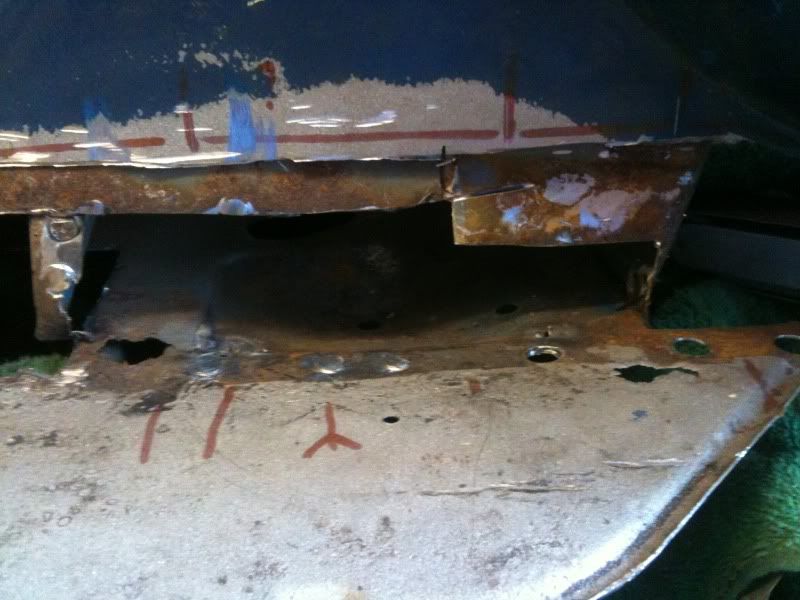
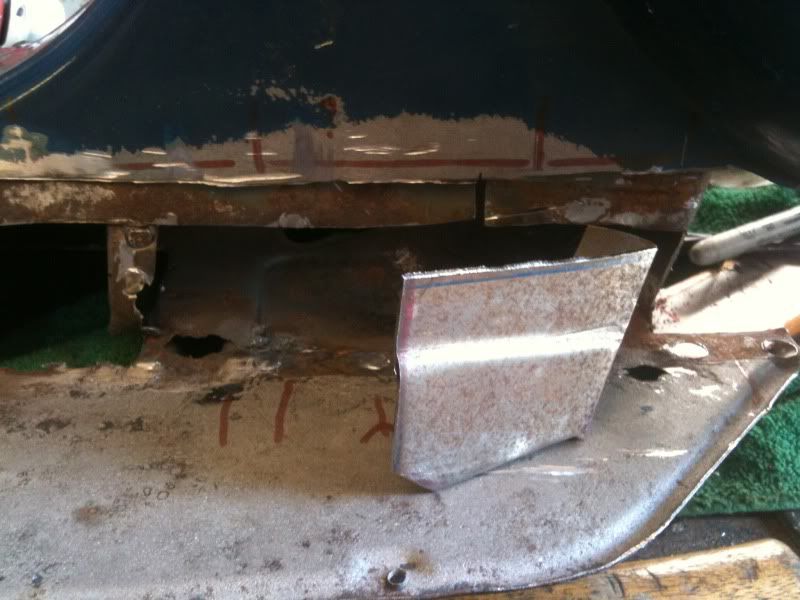
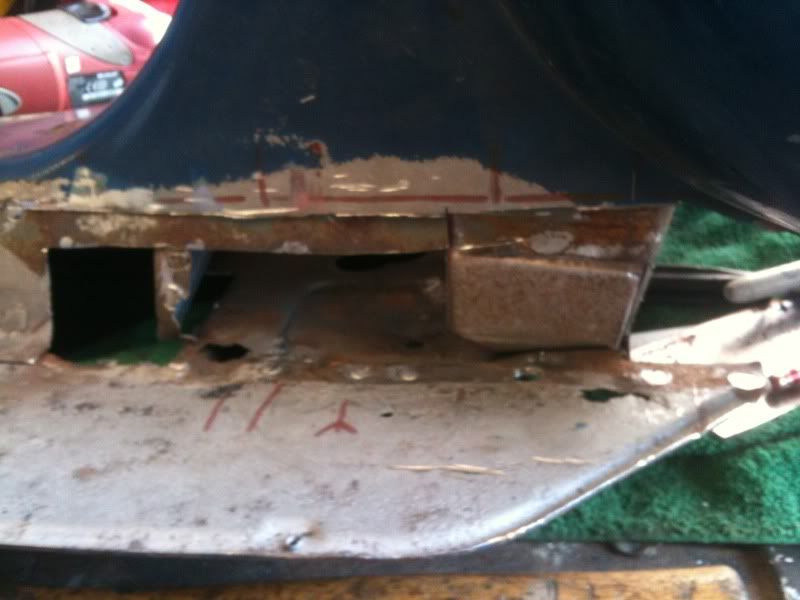
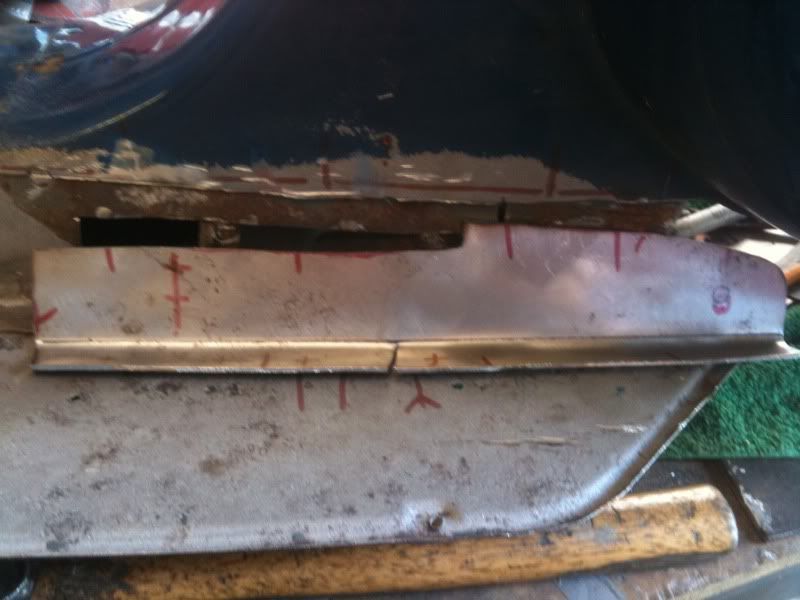
Engine Mount
I had a good think about this before tackling it and had assurance from the owner that if i tossed it up then he wouldn't get mad, nothing to lose! Still wish i didn't agree to do it cause it took ages and got paid peanuts. Ah well at least it's another smallie on the road ;D
;D
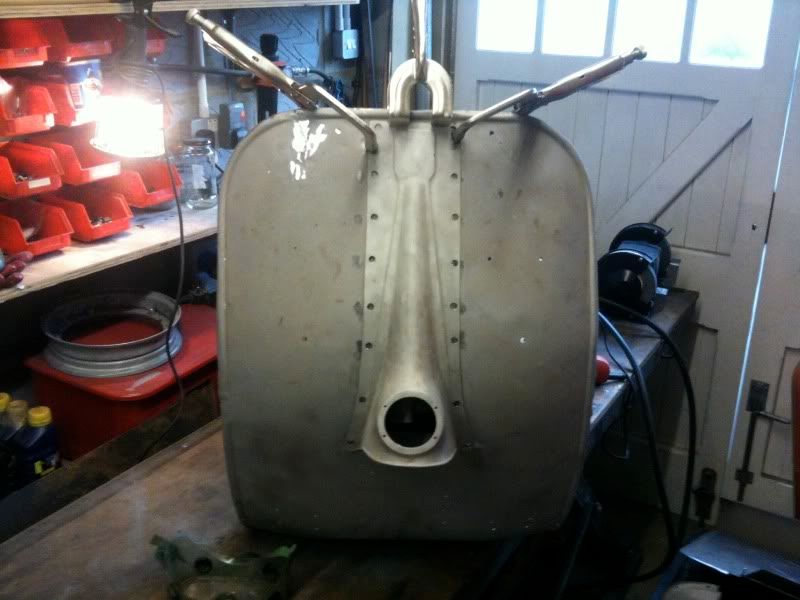
A small hole leaking rust after sandblasting was enough to warrant further investigation. After consulting a mate who's an expert i needed to make a series of templates for each layer before i removed it. There's lots of alignment marks going on too so that when it's all back together the new engine mount is level, square and strong. Pictures tell the story...
one layer off -
2nd one off -
bits to go in -
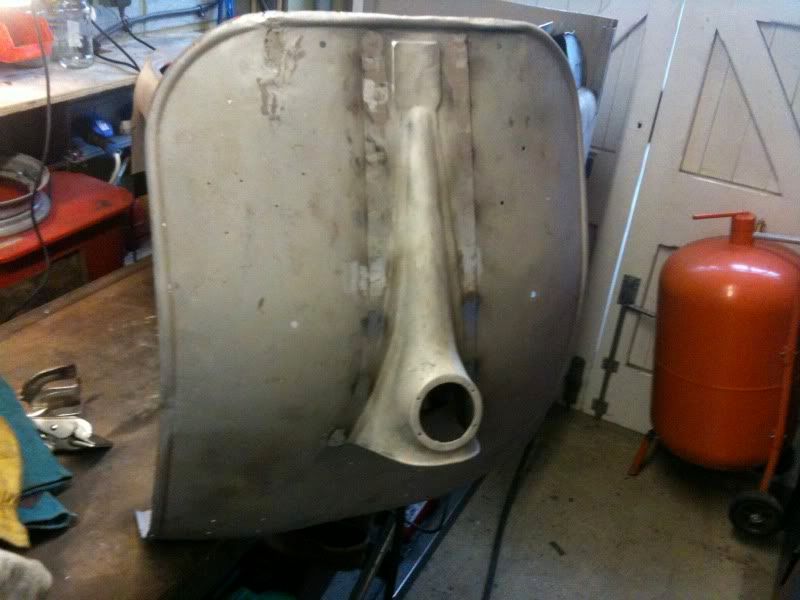
16g steel -
20g steel -
Layers welding back in -
Eventually finished and not too obviously repaired -
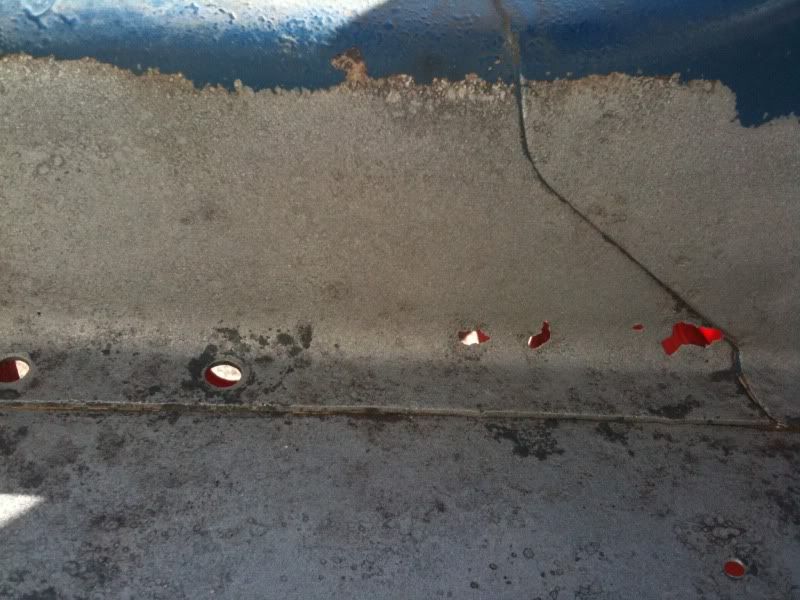
Floor holes -
Deseaming
Is the process of welding two panels together with a butt weld instead of the existing offset lap weld -

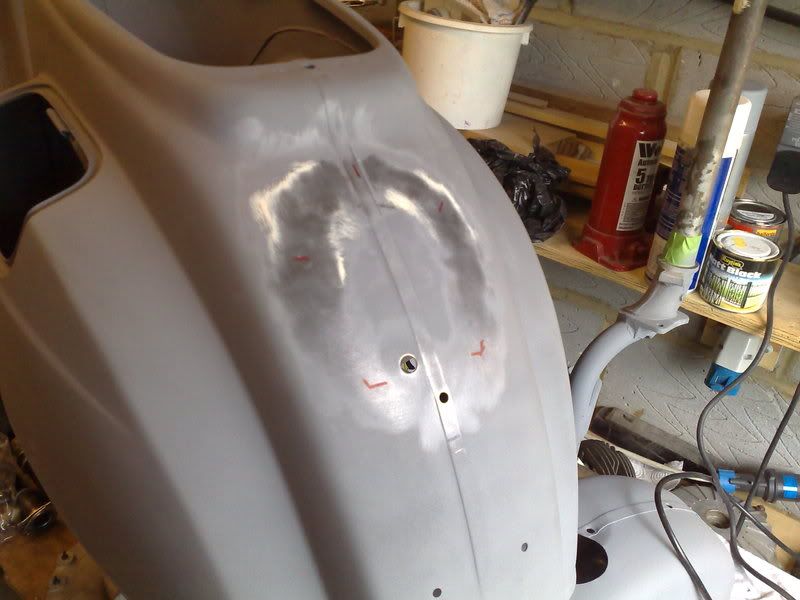
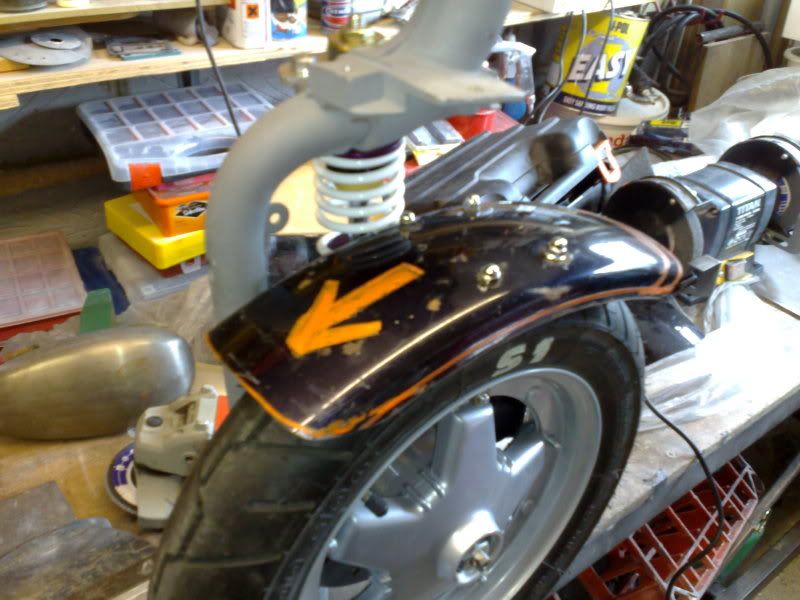
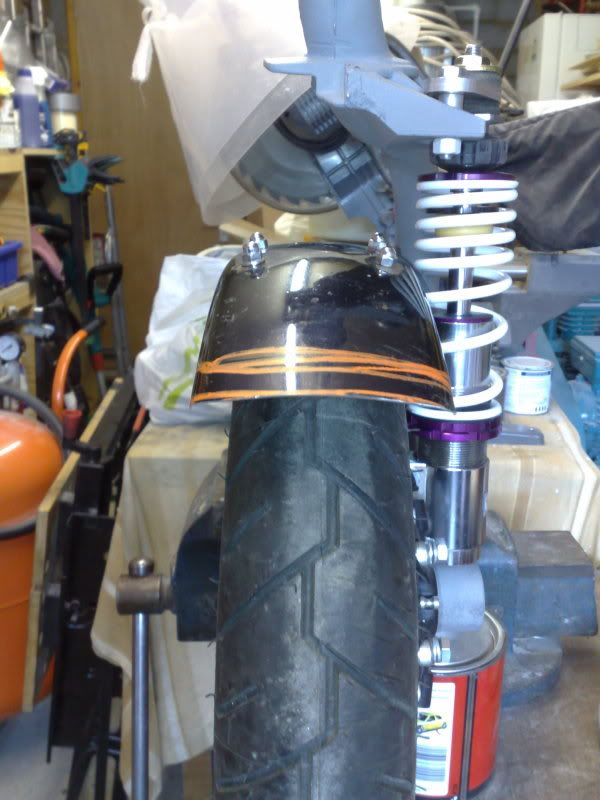
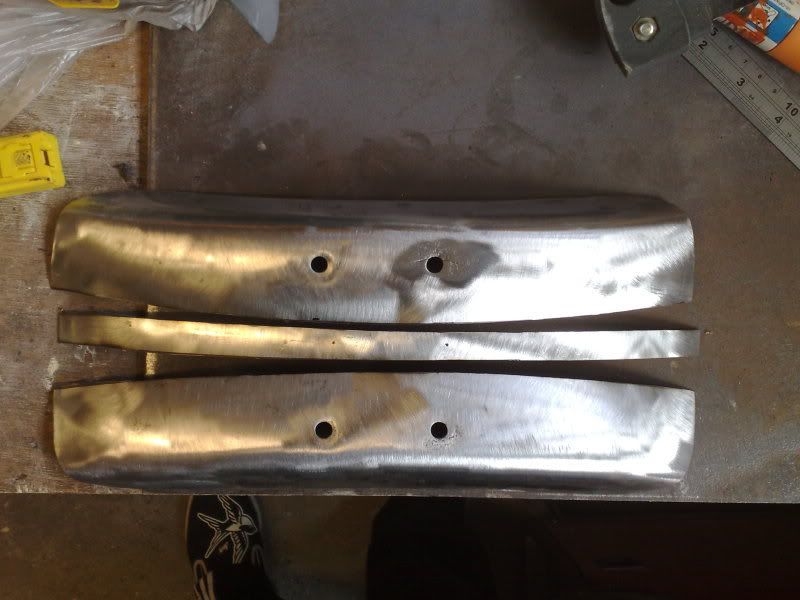
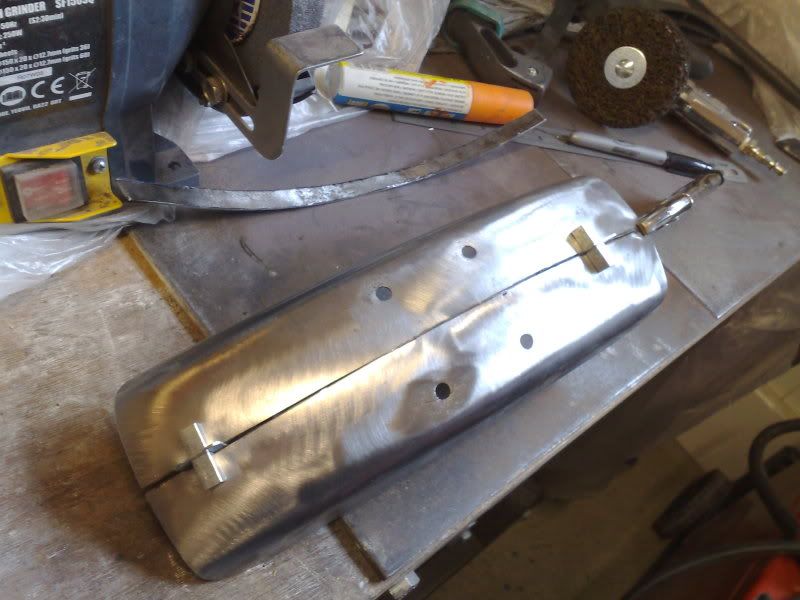
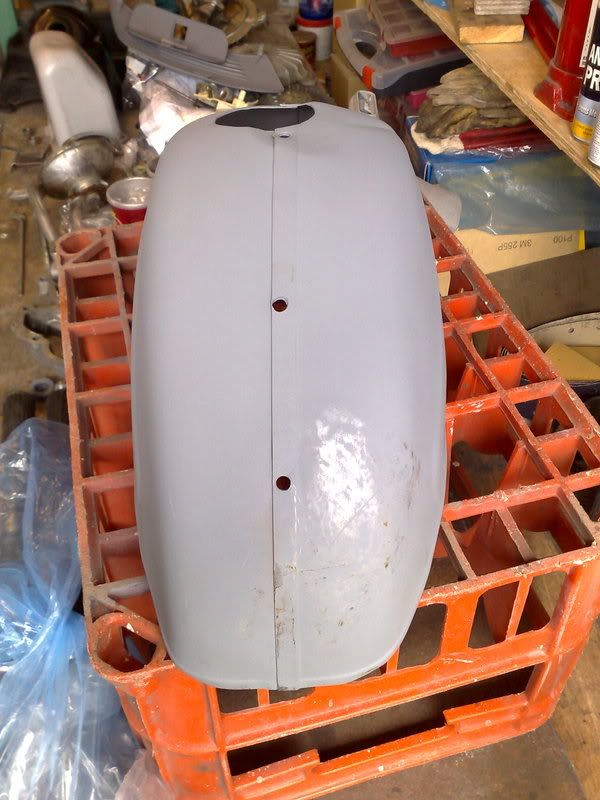
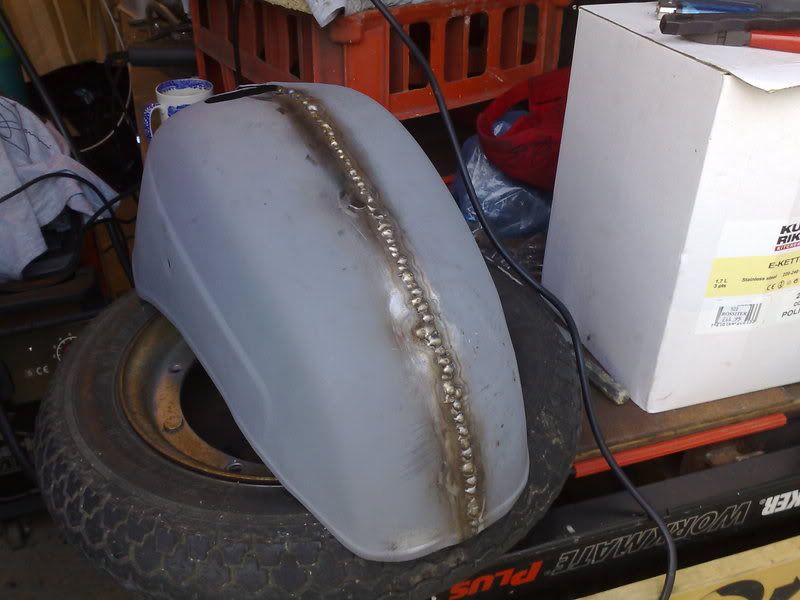
Most vespas are made as a series of panels lap welded together, which is great for fast production but crap for rust. I think it looks a bit ugly too. When deseaming, carefully grind a section 4 inches long off the top of lap weld and you'll be left with the two panel edges ready to weld. Don't forget to remove any surface rust, no welding really likes rust. By doing it in a series of sections you remove the possibility of it distorting. You can get nearly the same aesthetic by wacking a tub of filler over the seam but it doesn't get rid of the rust locked inside, requires a load of sanding, sags when painted, etc. Heres a mudguard, frame loop and rear section.
Mudguard -
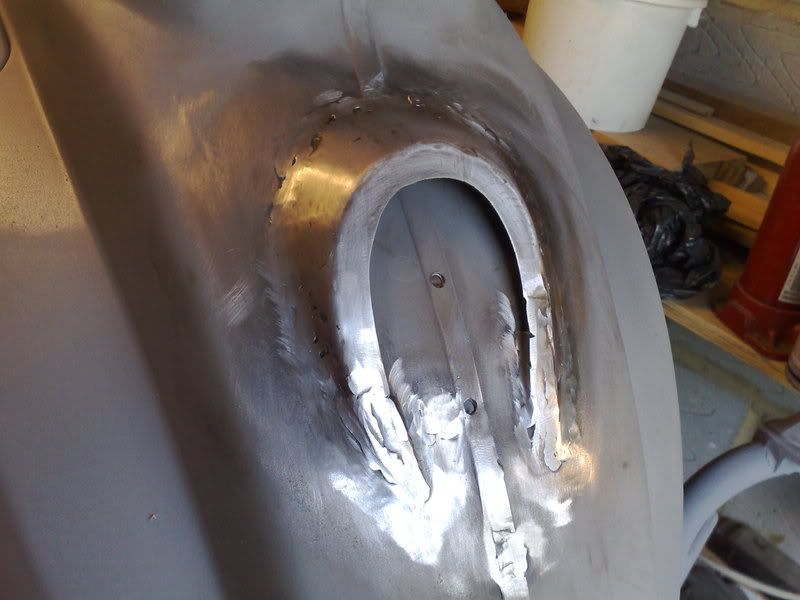
Seam removed and welded in stages -
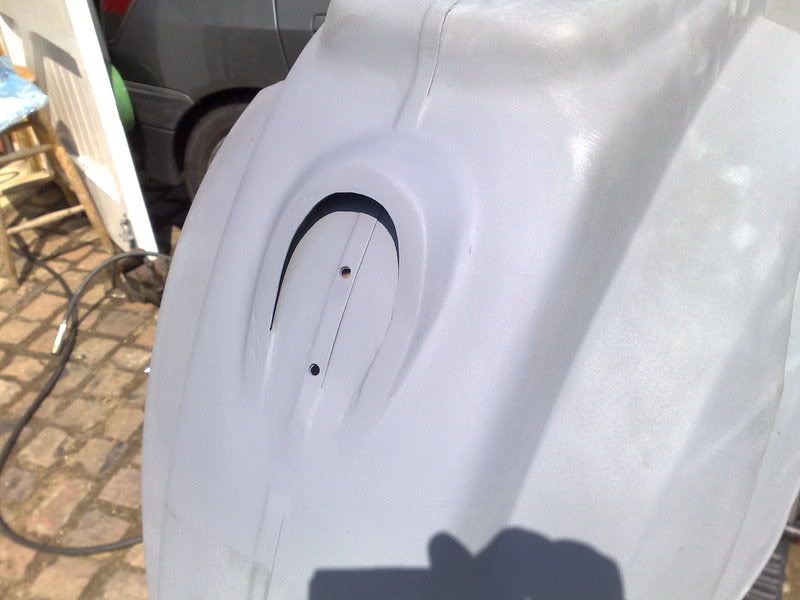
filled and primed -
Loop deseamed but before filler applied -
There are a million other uses for a welder, making tools and repairs are just the obvious, personally i wouldn't be without now.
Fun thing was sending annonymous pictures like this to the mod who owned this lardy informing him we were turning it into a grasstracking cutdown. He saw the funny side eventually ;D
The Basics.
First you need a welder and for body work and general ease of use a MIG machine is best. Basically the machine has reel of thin steel wire inside which is fed through a 'torch' and carries a current. The only parameters you change are the amount of current and the speed the wire comes out. When the wire touches the metal you're welding it creates a circuit (via an earth clamp back to the machine) and melts the parent metal with the wire. The trick is getting the current and wire speed to match to job in hand - too much current and you'll blow holes in scoot, too little and the molten wire will sit on top of the parent metal without penetrating. Same principal goes for wire speed, there's a positive correlation - more current needs the wire fed faster and vice versa.
For best results using a mig welder with a shielding gas is important. Basically this keeps oxygen from the weld pool allowing full penetration. Some wires contain a flux which precludes the use of gas but they tend splatter so i'd recommend using either carbon dioxide or argonshield light. These can be bought in disposable canisters but run out fast so it's best to go the whole hog and get a gas contract (from BOC or Airproducts or...). Set the regulator to 10 litres per minute, more if welding outside/in a draft.
Then practice, practice, practice. After a while you'll get a feel for your machines settings and how quickly you can move the torch. The most important thing is heat. Thin metal warps with not much effort and it's a fucker to correct, so it's best to go in small stitch welds than long beads.
Well thems the basics. If you're serious about learning then go to the mig welding forum, it's all there if you're prepared to research.
Practical applications. Rusty floors
The floors on smallframes are really prone to tin worm, sitting water erodes it in no time. Luckily new floors are available and as long as the rust doesn't pervade too badly into the frame tunnel it's not beyond the skills of a first timer to fix (this was me a couple of years ago so any one can do it ;D ). Most will need a fettle to fit perfect but i've seen worse replacement parts. So first thing is offer the new one up to the old and begin to mark out where it'll need cutting.
Fucked floor -
New floor, poor fit -
Extra bit -
First thing to note is precautioning against chassis warping by welding a supporting bar between the fork stem and the frame loop. This scoot had just been jigged so i really didn't want it getting out of true.
Second thing to point out is the usefulness of sandblasting in revealing the extent of rust damage. It will comprehensively remove all rust and reveal a bunch of holes you never knew existed.
 Better to know now though ;D
Getting the old floor off isn't much fun but it's made a damn site easier with a spot weld cutter. It's a little hole saw which you can set the depth on so you can cut through the top layer leaving the lower intact.
Mark the old spot welds with a marker pen, then centre punch, then drill slowly.
Observe the adage measure twice, cut once - using a 1mm cutting disc carefully severe the floor.
Use a pry bar to get the floor up, i always miss at least one spotweld so go slow and be inventive with drills and saws to get it off.
Hammer the remaining tunnel flange flat on a metal plate/table.
Before welding anything the legshield beading needs addressing. A good tool to make (with your new welder :
 is a pair of mole grips with a bit of rod on one jaw and half a bit of tube on the other (see pic). It works a treat and is featured in the 'how to restore your vespa motorscooter' book. Click on google preview page 124. I've got a couple of variations of this tool, bloody useful.
 before-
after -
This lardy vespa needed some repairs to the tunnel. It's best to cut these half way up so that the stresses (welding and subsequent load from the stand) will be well supported...ie don't just weld a flange on at 90º at the bottom edge of the tunnel.
previous bad repairs -
after-
There's no easy way to explain how to fabricate up the bits of metal, imagination and patience i guess, it's something i struggle with so don't ask me. There are some good books out there, Ron Fourniers Metal Fabricators Handbook is particularly useful. Try to get a very close thickness match for substitute metal, welding thick to thin is hard and looks crap, nuff said.
A variety of clamps will make life easier. I can't stress enough how important it is to line up replacement metal parts with the body, time spent making stuff fit is paramount. Clamp it a bunch of times to check you're 100% happy with it cause once you start it ain't coming off again in a hurry

A technique called plug welding is used to 'fill' in the holes left from the spotweld cutter which also then adheres the floor underneth. Be careful not to weld straight through the floor, they are quite thin and the holes require a fair blob of weld. Don't do all the holes in a row, move from one side to the other, also alternate the ends. Go slow, let the heat dissipate otherwise the floor will get a slight buckle in it which is a bastad.
When welding the legshields to the floor, same principal, go slow, a series of overlapping tack welds is best (called stitch welding). Grind everything flush, i use zirconium sanding discs on a 4.5" grinder. Etch prime then finish with a skim of filler.
Rack holes
Some weirdos like to put racks on the front of their scoot, the worst offenders drill big holes for said purpose. Clamp a piece of copper to the back and weld from the front, the copper acts as a heat sink and the weld will not stick to it. Grind flush.
Horn cast
Same principal as the floor. Mark it up, centre punch, carefully drill. The replacement horncast needed plug holes pre-drillling before welding to the body. Use dividing calipers to check central alignment. Grind welds flush.
Seen better days
 -
- Mark it and drill it carefully, only go through the horncast -
Pre drill new horncast for plug welds, measure twice, clamp and weld. Grind back welds.
Engine Mount
I had a good think about this before tackling it and had assurance from the owner that if i tossed it up then he wouldn't get mad, nothing to lose! Still wish i didn't agree to do it cause it took ages and got paid peanuts. Ah well at least it's another smallie on the road
 ;D
;DA small hole leaking rust after sandblasting was enough to warrant further investigation. After consulting a mate who's an expert i needed to make a series of templates for each layer before i removed it. There's lots of alignment marks going on too so that when it's all back together the new engine mount is level, square and strong. Pictures tell the story...
one layer off -
2nd one off -
bits to go in -
16g steel -
20g steel -
Layers welding back in -
Eventually finished and not too obviously repaired -
Floor holes -
Deseaming
Is the process of welding two panels together with a butt weld instead of the existing offset lap weld -
Most vespas are made as a series of panels lap welded together, which is great for fast production but crap for rust. I think it looks a bit ugly too. When deseaming, carefully grind a section 4 inches long off the top of lap weld and you'll be left with the two panel edges ready to weld. Don't forget to remove any surface rust, no welding really likes rust. By doing it in a series of sections you remove the possibility of it distorting. You can get nearly the same aesthetic by wacking a tub of filler over the seam but it doesn't get rid of the rust locked inside, requires a load of sanding, sags when painted, etc. Heres a mudguard, frame loop and rear section.
Mudguard -
Seam removed and welded in stages -
filled and primed -
Loop deseamed but before filler applied -
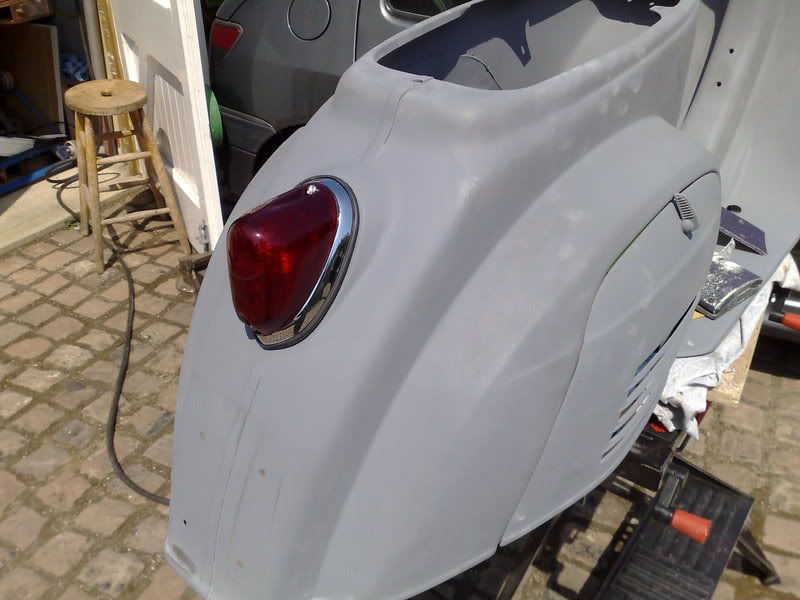
There are a million other uses for a welder, making tools and repairs are just the obvious, personally i wouldn't be without now.
Fun thing was sending annonymous pictures like this to the mod who owned this lardy informing him we were turning it into a grasstracking cutdown. He saw the funny side eventually ;D


 The engine mount and the deseaming were smallframes though ;D