|
|
Post by Hugoagogo on Jun 10, 2013 19:17:28 GMT
Hi everyone. I'm a big time follower of the forum and have been looking forward to offering up my own thread on my current project. I started this just over a couple of years ago when I bought a Primavera from Ebay. Had so much fun riding it around town, that is until MOT time.... And from the list of failures I'm pretty sure all previous MOT's were well dodgy. Basically what I had was a recent Italian import that had been knocked around a bit, badly repaired, smeared in filler and then lazily spray bombed to make it look saleable. In some ways I didn't care, the engine ran great and while the MOT was good, I was happy. The scoot was by no means knackered, but gave me a great opportunity to undertake my first ever project. I had lots of ideas and wanted to use it as an experiment to learn every skill required for a full custom i.e. Engine rebuild, tuning, bodywork, welding etc. I could have gone for a full resto, but couldn't resist doing something different. Unbelievably an eye for detail took over and this is what happened.... Pictures to follow.
|
|
|
|
Post by Hugoagogo on Jun 10, 2013 19:20:33 GMT
This is what I started with 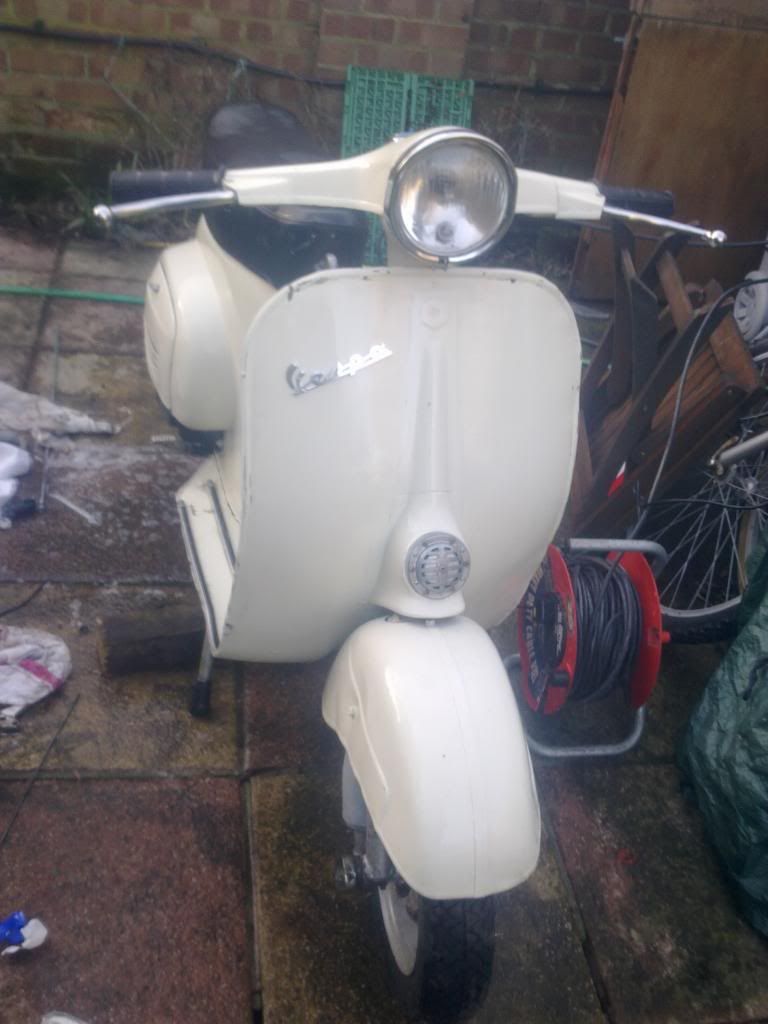 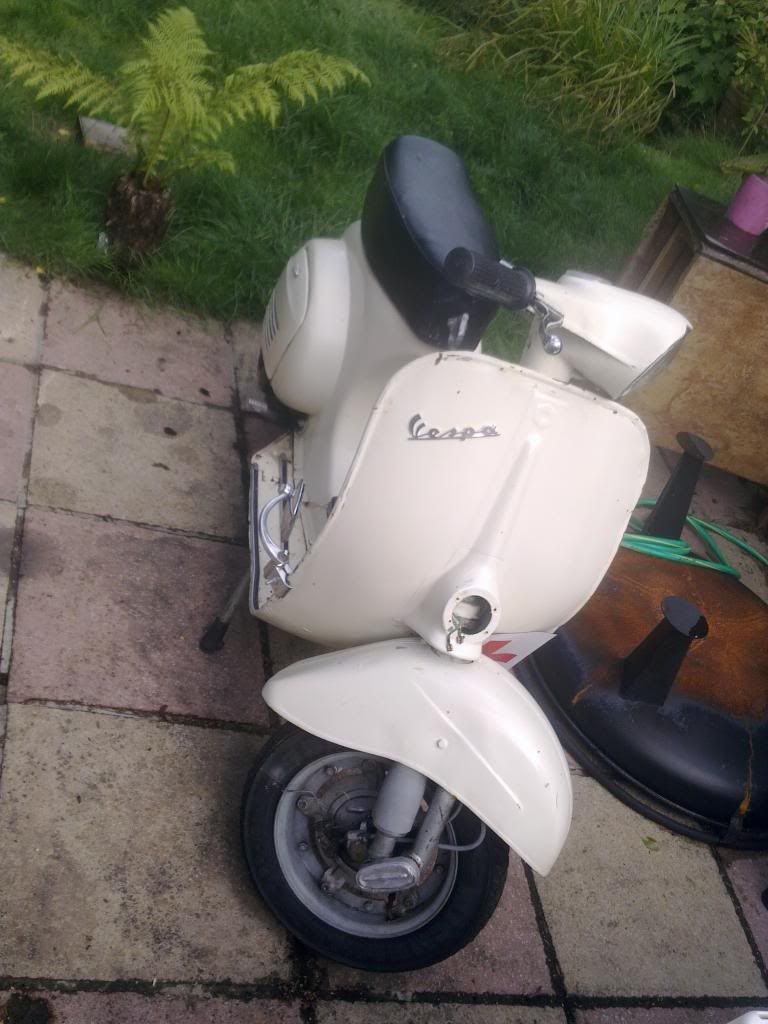 It actually looks pretty good in these pictures, but just didn't look right as you got closer. |
|
|
|
Post by Hugoagogo on Jun 10, 2013 19:22:26 GMT
No going back 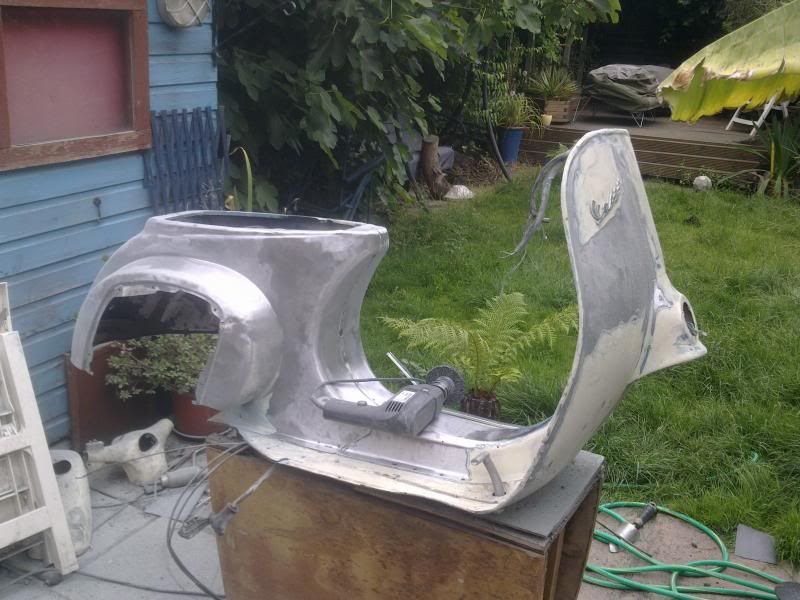 |
|
|
|
Post by Hugoagogo on Jun 10, 2013 19:24:24 GMT
Wobbly body work, poorly prepared  |
|
|
|
Post by Hugoagogo on Jun 10, 2013 19:35:10 GMT
Frame Jigged and straightened (Thanks to Vespa Frame Jig) and box section welded in to hold it all in place. Gutted I lost those pics though. Next. Floor and leg shields removed, and then thought fuck it. Removed the entire right hand side. 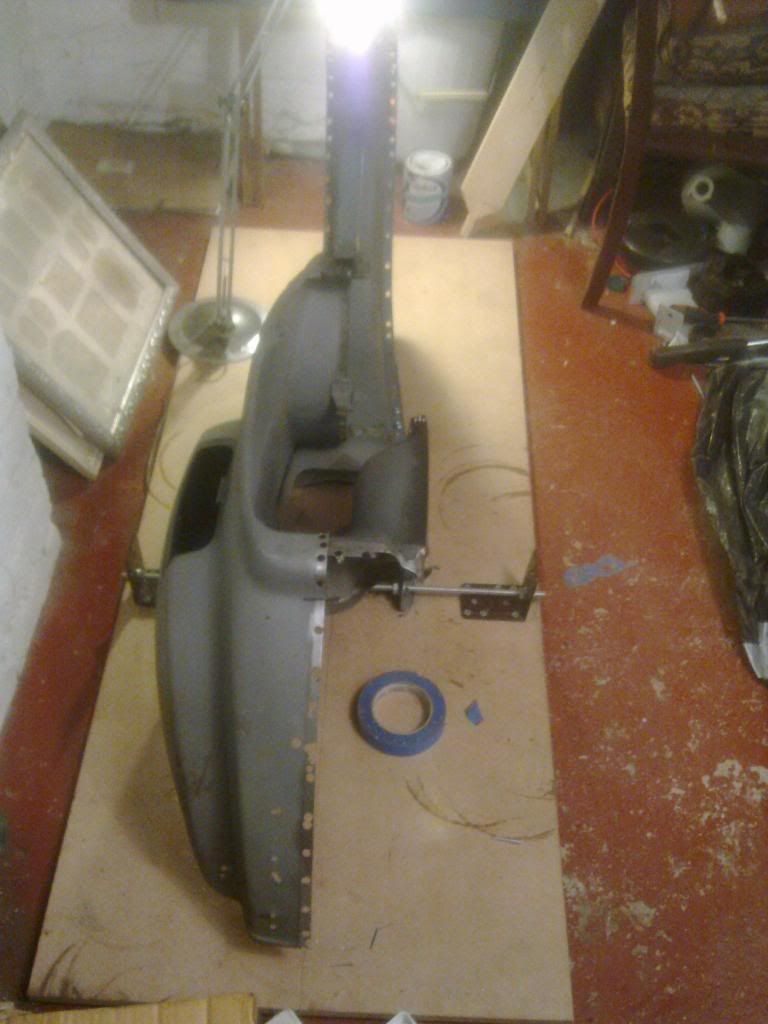 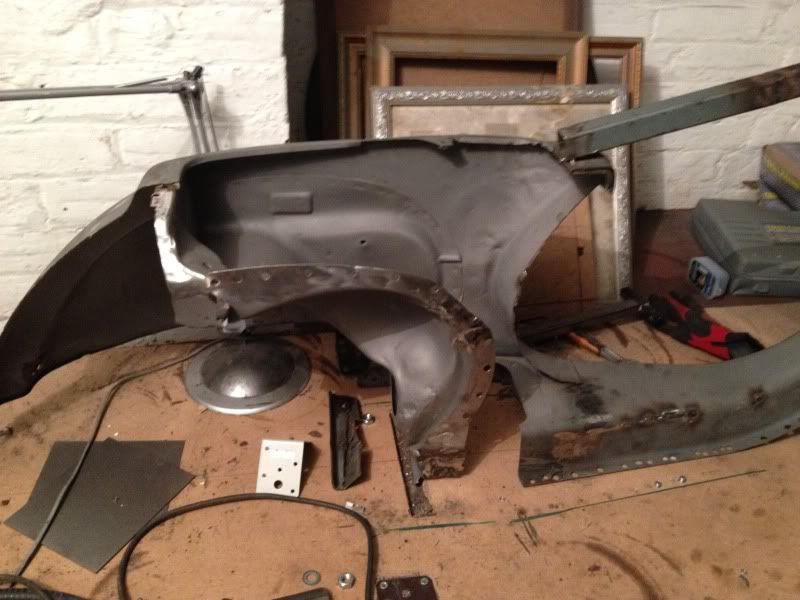 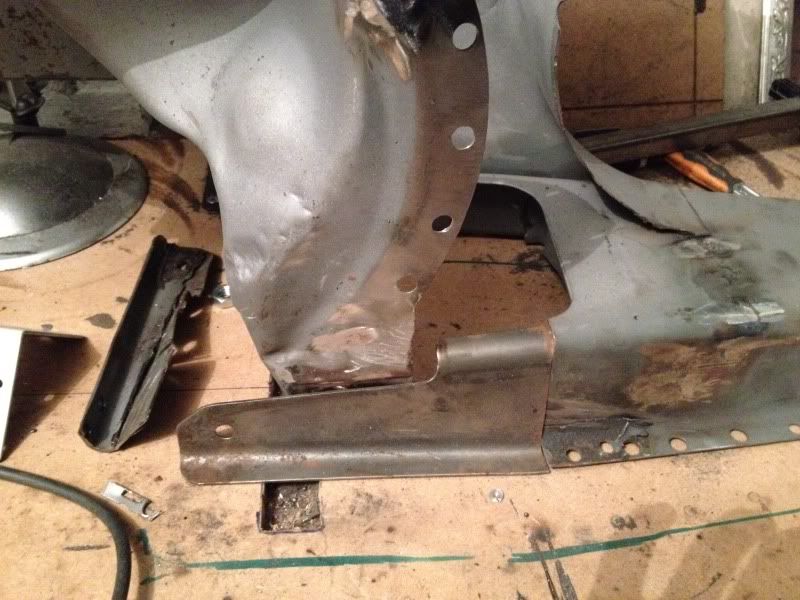 |
|
|
|
Post by Hugoagogo on Jun 10, 2013 19:39:55 GMT
|
|
|
|
Post by jacques on Jun 10, 2013 19:45:21 GMT
Good work there fella! Loosk like you're giving it 100%. This primmy didn't come from Wales by any chance? I bid on a white one a few years ago, almost exactly the same...though that scoot was "original paint".
|
|
|
|
Post by Hugoagogo on Jun 10, 2013 19:48:03 GMT
|
|
|
|
Post by Hugoagogo on Jun 10, 2013 19:53:49 GMT
Cheers Jacques. Not from Wales. Strangely enough I had spent months looking for one and this came up not more than half a mile away from me. Can't remember if they quoted the pain(t) as "original', but can remember peeling it back with my nail and finding the original Blue underneath.
|
|
|
|
Post by vinrouge on Jun 10, 2013 20:44:49 GMT
Very impressive for a first attempt, what happens to the copper strip after you finished welding does it just fall away. Last but one of the photos seems to show the inside of the frame at the rear and it seems to be lined up great
|
|
marco64
ET3
 '76 Primavera, '82 Primavera ET3
Posts: 127
|
Post by marco64 on Jun 11, 2013 17:27:36 GMT
I salute your courage skills and determination!!!
In other words... Bloody hell I would never have had the courage to sort that out... I do not have the skills.
Keep going, I look forward to seeing the finished article!!!
|
|
|
|
Post by jacques on Jun 11, 2013 18:42:56 GMT
Copper sheet is usually just used as a soaker to take some of the heat from the weld so it doesn't all go into the frame. It also helps to provide a ground point for the arc.
|
|
|
|
Post by ttscshaggy on Jun 11, 2013 19:10:01 GMT
Wow, you set yourself back a lot of work there fella.
Personally I think it was a bit Ott. It wouldn't of taken much to beat them parts back it to shape
|
|
|
|
Post by bikegrim on Jun 11, 2013 20:01:56 GMT
very f###ing ambitious. well done that man
|
|
|
|
Post by madmax on Jun 11, 2013 21:46:41 GMT
Nice work, you must be a welder then.  |
|
|
|
Post by scotia on Jun 11, 2013 23:15:05 GMT
Jesus!!! your mad hugo!! very brave indeed!guess you ,ll know its solid. still got the old tin lying around?? inbox me  |
|
|
|
Post by vespaframejig on Jun 12, 2013 7:26:16 GMT
i might still have some pics on the jig,email me and i will see if i can find them for you.
well done by the way.
vespaframejig
|
|
|
|
Post by Rhys135 on Jun 12, 2013 9:17:01 GMT
Looking good! Have you decided on a color?  |
|
|
|
Post by Hugoagogo on Dec 21, 2013 14:15:06 GMT
Time I think for a long overdue update. First of all just wanted to say thanks for all the kind words of support. Projects like this are fun, but also a headache at times... and coming on here is a good incentive to carry on. Sorry I've not been around lately, but had my time taken up by a few other things and as always, I changed the plan a few times too. Just thought I would get back to a couple of questions first too vinrouge - Yep the copper just dropped away when the clamps were removed. It was 0.6mm strip that is generally used for roofing. It was thin enough to have the needed flex to match the curves and just thick enough to soak up some of the heat. I used a portable digital TIG in the end. Dead handy for fine tuning the amps to minimise blow-through. The clamps left small enough holes on the frame that a fresh bit of copper could be propped against the frame and filled in. One of the positives of this method is that it forces you to weld in alternate sections and minimises heat distortion as a result. It worked well on the back end, but working with the angles on the front was a bit of a bugger. Overall I'm pretty pleased with it. Btw I'm not a welder by trade and strictly amateur, but did this as a team effort with a mate who is a proper guru. @rhys135 - Still not 100% on the colour but thinking Ford Monster Green on a white base. Paint is still a long way off at the moment.  |
|
|
|
Post by Hugoagogo on Dec 21, 2013 14:44:38 GMT
|
|